
Table of contents: Removal ↓ Installation ↓
- Home
- BMW 3 Series
- E46
- Body
- Interior
- Seat Belt Components — Removal and Installation
Seat Belt Components — Removal and Installation (BMW 3 Series E46)
Attention! Before you start, read paragraph 35.
Removal
Front seat belt (sedan and touring models)
1. Remove the front seat (see paragraph 24).
2. Remove the B-pillar trim (see paragraph 27).
3. Remove the screws and remove the belt guide from the rack.
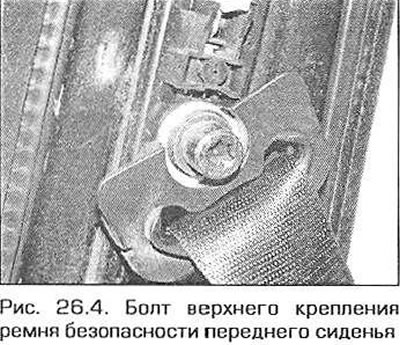
4. Unscrew the upper belt fastening bolt (Fig. 26.4).
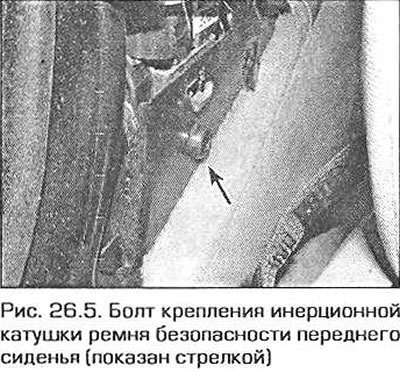
5. Unscrew the inertia reel mounting bolt and remove the belt from the body pillar (Fig. 26.5).
6. If necessary, unscrew the mounting bolts and remove the belt height adjustment mechanism from the body pillar.
Front Seat Belt (Coupe Model)
7. Remove the front seat (see paragraph 24).
8. Remove the B-pillar trim and rear side trim (see paragraph 27).
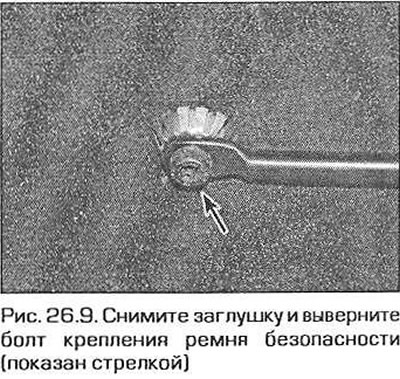
9. Remove the plastic plug from the lower belt fastening lever, unscrew the fastening bolt and remove the belt from the lever (Fig. 26.9).
10. Remove the screws and remove the belt guide from the rack.
11. Remove the upper belt fastening bolt.
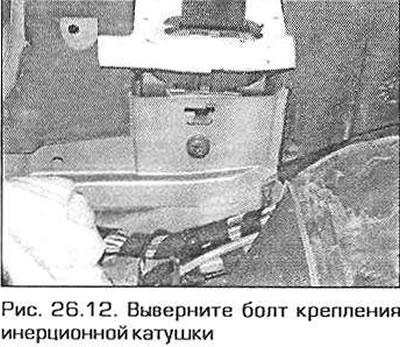
12. Unscrew the inertia reel mounting bolt and remove the belt from the body pillar (fig. 26.12).
13. If necessary, unscrew the mounting bolts and remove the belt height adjustment mechanism from the body pillar.
Seat belt buckle stand
14. Remove the seat (see paragraph 24).
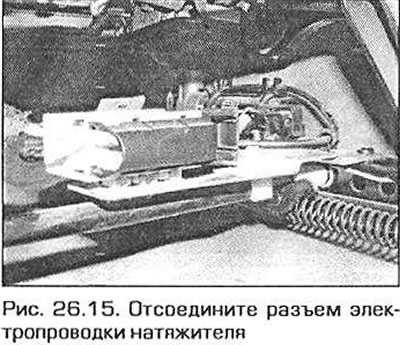
15. Release the tensioner wiring connector from the clamp and disconnect the connector (fig. 26.15).
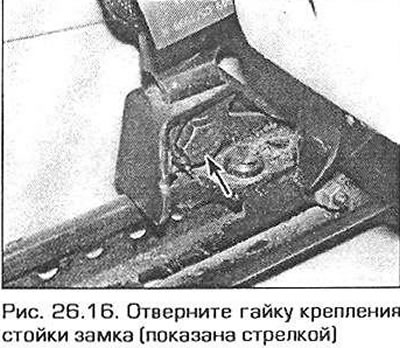
16. Loosen the rack mounting nut and remove it from the side wall of the seat (fig. 26.16).
Side seat belts for fixed rear seat
17. Remove the rear seat (see paragraph 24).
18. Unscrew the bolts securing the seat belts to the body and remove the central belt and the locks.
19. Remove the trim from the front of the rear shelf and disconnect it from the seat belts.
20. Carefully detach the trim panels from the rear body pillars and disconnect the interior lighting wiring from them.
21. Remove the clips from the front of the rear shelf, slide the shelf forward and remove it. After removing the shelf, disconnect the connectors of the wiring of the high brake light lamps (if it exists).
22. Unscrew the inertia reel mounting nut and remove the belt(s).
Side seat belts for folding rear seat
23. Remove the rear shelf trim (see paragraph 27).
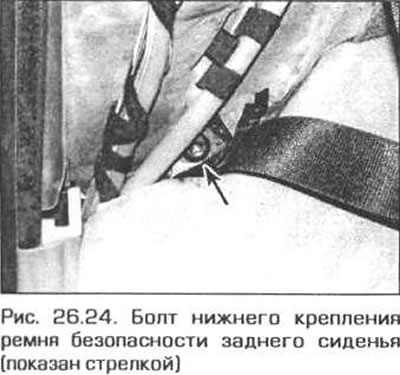
24. Remove the bolt of the lower seat belt mount to the body (fig. 26.24). Pass the belt through the rear shelf trim.
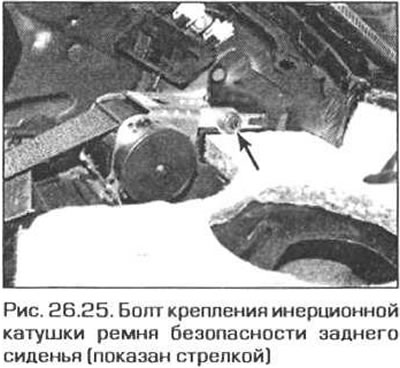
25. The inertia reel is secured with one bolt (fig. 26.25). Unscrew the bolt, then remove it along with the washer. On the coupe model, unscrew the screw and remove the plug to access the belt mounting bolt.
26. Remove the assembly from the bracket, then remove the belt from the vehicle interior.
Rear Seat Side Belt Buckle Post
27. Disconnect and remove the rear seat cushion.
28. Remove the bolt and remove the rack from the vehicle.
Central rear seat belt and belt buckle
29. Disconnect and remove the rear seat cushion from the vehicle.
30. Unscrew the bolt securing the central belt with the buckle and remove the belt from the vehicle.
Installation
Front seat belt
31. Installation is carried out in the reverse order of removal. Make sure that all seat belt mounting bolts are securely tightened and that the trim panels are secured with all fasteners.
Front seat belt buckle post
32. Make sure that the tensioner is correctly installed on the seat and tighten the fastening nut to the specified torque. Install the seat (see paragraph 24) and connect the battery.
Fixed rear seat side belt
33. Installation is carried out in the reverse order of removal. Make sure that all seat belt mounting bolts are securely tightened and that the trim panels are secured with all fasteners.
Side seat belt for folding rear seat
34. Installation is performed in the reverse order of removal. Make sure that all belt and inertia reel mounting bolts are tightened to the required torque.
Rear Seat Belt Buckle Post
35. Installation is performed in the reverse order of removal. Tighten the mounting bolt to the required torque.
Rear seat center belt and belt buckle
36. Installation is performed in the reverse order of removal. Tighten the mounting bolts to the required torque.
(The original article is available on the website: «BMWMAN.RU»)
This article is available at russian, bulgarian, belarusian, ukrainian, serbian, croatian, romanian, polish, slovak, hungarian
Article verified: Ilyinsky Matvey
Share information:
Previous articles
БМВ E46: Interior
Next articles
Similar articles on other types of BMW cars:
Removal and installation the timing belt BMW 5 Series E34 (1988-1996)
Removal, inspection and installation of the timing belt and its… BMW 5 Series E28 (1981-1988)
Exhaust system components — removal and installation BMW 7 Series E32 (1986-1994)
Removal and installation the timing belt cover BMW 7 Series E38 (1994-2001)
Removal and installation the electronic unit of the front passenger… BMW X3 E83 (2003-2010)
Removal and installation the alternator drive belt BMW X5 E53 (1999-2006)
Removal and installation the timing belt BMW 5 Series E34 (1988-1996)
Removal, inspection and installation of the timing belt and its… BMW 5 Series E28 (1981-1988)
Exhaust system components — removal and installation BMW 7 Series E32 (1986-1994)
Removal and installation the timing belt cover BMW 7 Series E38 (1994-2001)
Removal and installation the electronic unit of the front passenger… BMW X3 E83 (2003-2010)
Removal and installation the alternator drive belt BMW X5 E53 (1999-2006)
Link in different formats to this page
Visitor comments
No comments yet
- General information
- Manual
- Maintenance
- Power unit
- Engine repair
- Cooling system
- Power system (gasoline)
- Injection system (gasoline)
- Fuel system (diesel)
- Exhaust system
- Ignition system
- Charge and launch systems
- Transmission
- Car gearbox
- Clutch and drive shafts
- Chassis
- Brake system
- Suspension front and rear
- Steering
- Body
- Body care and repair
- Exterior
- Interior
- Electrical equipment
- Troubleshooting
- Lighting and signaling
- Equipment and devices
- Heater and air conditioner
- Electrical circuits
- General information
- Manual
- Repair on the road
- Weekly checks
- Maintenance
- Troubleshooting
- Power unit
- 4 cylinder engines
- 6 cylinder engines
- Engine overhaul
- Cooling and heating
- Fuel and exhaust system
- Starting and charging system
- Ignition system
- Transmission
- Clutch
- Mechanical gearbox
- Automatic gearbox
- Cardan and drive shafts
- Chassis
- Brake system
- Wheel suspension
- Steering
- Body
- Exterior
- Interior
- Electrical equipment
- Equipment and devices
- Electrical circuits
- General information
- Maintenance
- Power unit
- Engine repair
- Cooling system
- Ignition system
- Supply system
- Fuel injection system
- Exhaust system
- Transmission
- Clutch
- Car gearbox
- Front and rear axle
- Chassis
- Steering
- Brake system
- Body
- Exterior
- Interior
- Electrical equipment
- Heating system
- Equipment and devices
- Power devices
- Electrical circuits
- Power unit
- M10/M20 engine
- M40 engine
- Ignition system
- Lubrication system
- Cooling system
- Supply system
- Fuel injection
- Exhaust system
- Transmission
- Clutch
- Manual gearbox
- Front axle
- Rear axle
- Chassis
- Steering
- Brake system
- Body
- Exterior
- Interior
- Electrical equipment
- Heating system
- Equipment and devices
- Electrical circuits
- General information
- Specifications
- Operation and maintenance
- 4-cylinder engine
- Engine repair
- Cooling and lubrication system
- Supply system
- Ignition system
- 6-cylinder engine
- Engine repair
- Cooling and lubrication system
- Supply system
- Fuel injection system
- Ignition system
- Transmission
- Clutch
- 4-speed manual gearbox
- 5-speed manual gearbox
- Automatic gearbox
- Cardan and rear axle
- Chassis
- Steering
- Front suspension
- Rear suspension
- Brake system
- Electrical equipment
- Equipment and devices
- Electrical circuits