
Removal and installation the rear window
Caution: Do not damage the rear window heating/antenna wires.
Note:
- Removal is performed using Roll Out 2000.
- Only when replacing is a special cutting machine with a vibrating knife used.
1. Remove the rear window frame trims.
2. Remove the rear spoiler.
3. Remove the rear window wiper arm.
4. Remove the rear window wiper motor.
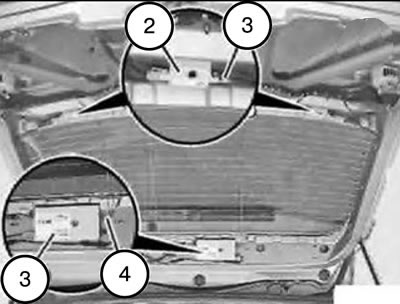
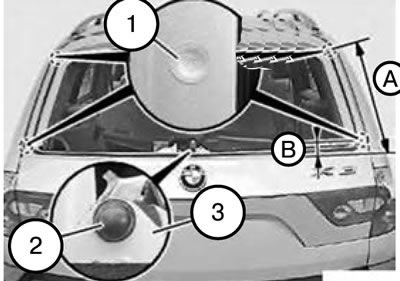
5. Disconnect the connectors (1) from the left/right obstruction loop (2) and secure the wires to the rear window using adhesive tape.
6. Disconnect the connector (4) from the antenna amplifier (3) and secure the wire to the rear window using adhesive tape.
Attention: Cover the body around the wire insertion point with fabric adhesive tape (danger of damage).
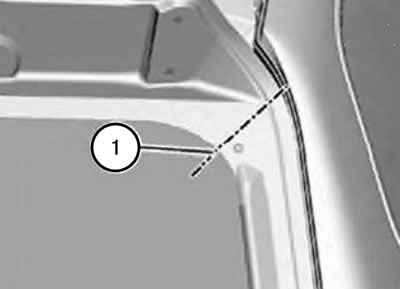
7. Insert the wire tool from the Roll Out 2000 kit along line (1), piercing the adhesive strip.
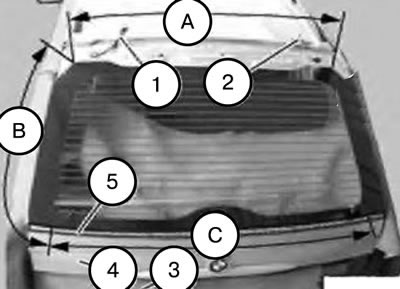
- (A). Knife 24 mm long - for the top.
- (B). Knife 45 mm long - for the sides.
- (C). Knife 24 mm long - for the bottom.
8. Push the protective tarpaulin (3) between the rear window frame and the body and secure it with adhesive tape.
9. Stick the textile adhesive tape (5) at the bottom between the rear window and the rear window frame.
Note: Two sizes of knives are used to cut the rear window (danger of damage).
Note: The top (A) is cut first.
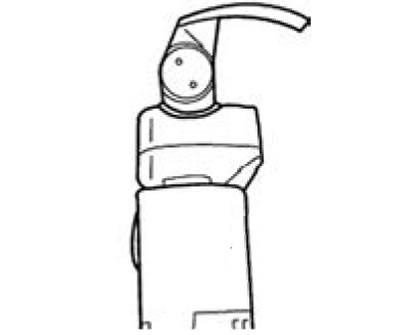
10. Insert the U-shaped knife (received through BMW Parts Delivery Service) into the device.
11. Sharpen the knife on a rotating whetstone (even if the knife is new).
12. Carefully insert the knife between the body and the rear window.
13. Guide the cutting blade of the knife parallel to the rear window.
14. Cut the strip of adhesive as close to the edge of the rear window as possible.
Caution: Use caution when cutting in the electrical contact area (danger of damage).
Note: Four semi-circular spacer buffers (H = 2.2 mm) and one semi-circular spacer buffer of form A (H = 5 mm) are installed.
15. Completely remove the remains of the old spacer buffers and precisely mark the location for installing the new ones.
16. Glue the semicircular spacer buffers (H = 2.2 mm) (1) onto the extrusion at a distance (A and B).
- A = approximately 30 mm.
- B= approximately 410 mm.
17. Glue the semicircular spacer buffer (shape A) (2) onto the tongue (3).
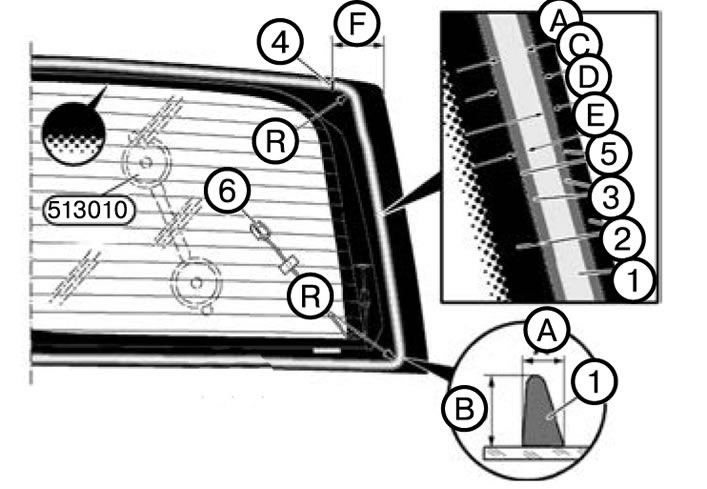
Rear window gluing diagram: 1. A strip of glue. 2. Ceramic coating. 3. Primer layer. 4. Start point of the glue strip. 5. Marks for applying primer. 6. Connectors for connecting the rear window heating system. A. 7±1 mm (width of glue strip). W. 11 mm (thickness of the adhesive strip). C. The width of the primer strip is specified in paragraph 5. D. 2±0.5 mm (distance from 1 to 5). E. 1 mm (distance from 1 to 5). F. Approximately 80 mm (distance from 4 to the edge of the window). R. Approximately 11 mm (radius of the glue strip)
18. Install two 513010 tools on the repair trolley. Wet the suction cups and secure the side window from the outside.
19. When reusing the old rear window, remove the remaining adhesive to a layer thickness of 0.5 mm.
20. Apply primer between the marks (5).
Note: Part (B) of the adhesive strip (1) should be almost perpendicular to the edge of the window.
21. Spread the glue on the joint (4) using tool 009322.

22. Install the rear window using tool 513010:
- 1) Insert at the top.
- 2) Align symmetrically on the sides.
- 3) Insert at the bottom at a distance (B) and press.
- 4) Fix the rear window in this position with yellow polymer adhesive tape.
Distance (A) from the lower edge of the rear window to the frame: 5 mm.
(Read the original source on the website «BMWman»)