
Removal and installation the windshield
Caution: Cover both front fenders with protective tarpaulin.
Note:
- Removal is performed using Roll Out 2000.
- Only when replacing is a special cutting machine with a vibrating knife used.
1. Remove the rubber trim from the windshield.
2. Remove the interior rearview mirror.
3. Remove the rain/light sensor.
4. Remove the fairing strip.
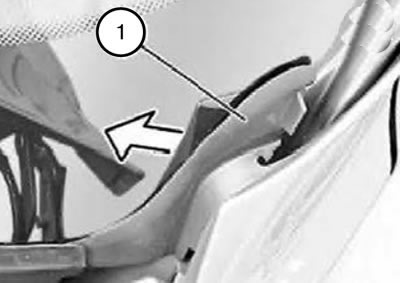
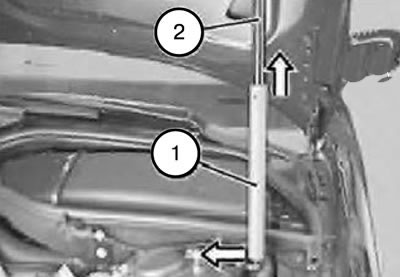
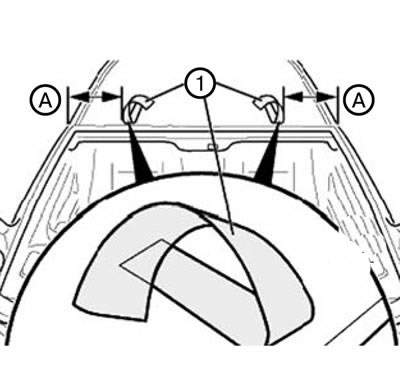
5. Remove the cover (1) in the direction indicated by the arrow.
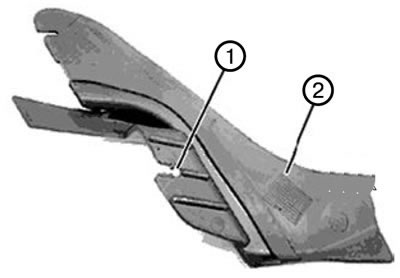
Note: The fastening (1) on the cover (2) must not be damaged.
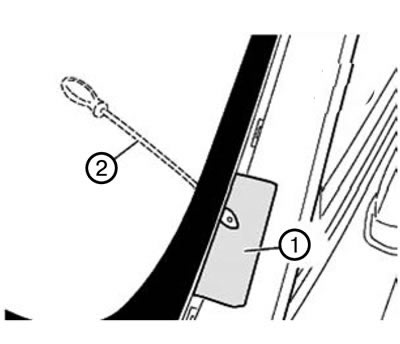
Attention: Cover the body around the wire insertion point with textile adhesive tape (1).
6. Insert the wire tool (2) from the Roll Out 2000 kit, piercing the adhesive strip.
Note: Only for replacement.
7. Insert the U-shaped knife (received through BMW Parts Delivery Service) in the device:
- 24mm long blade for top and sides.
- 36mm blade for bottom and bottom/sides.
8. Sharpen the knife on a rotating whetstone (even if the knife is new).
9. Carefully insert the knife between the body and the windshield.
10. Guide the cutting blade of the knife parallel to the windshield.
11. Cut the adhesive strip as close to the edge of the windshield as possible.
Note:
- When cutting at the bottom, the hood must be in the service position.
- The wires and hoses remain connected.
12. Move the hood to the service position.
13. Cut the strip of glue at the bottom of the windshield.
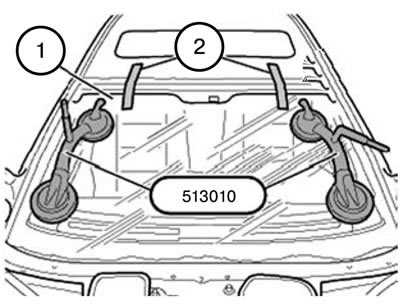
14. Remove the windshield using tools 513010.
15. Remove the adhesive tape from around the entire perimeter.
A. Approximately 342 mm. B. Approximately 35 mm. 1. Windshield. 2. A strip of foam rubber. 4. A strip of glue.
Attention:
- To avoid damage to the windshield and noise.
- Completely remove the remains of the old spacer buffers (3) and precisely mark the installation location of the new ones.
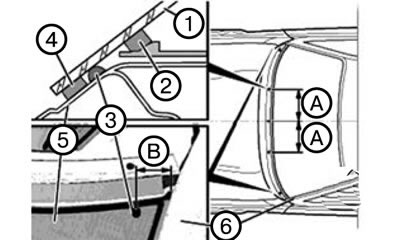
16. Glue the semicircular spacer buffer (3) at the end of the rounding at the fairing (5), as shown in the figure:
- fairing center (5)
- at a distance (A) from the center of the fairing (5)
- at a distance (B) from the side frame (6)
A. About 20 mm. 1. Instrument panel trim. 2. Windshield. 3. Round spacer buffer. 4. A strip of glue. 5. Fairing (shield). 7. Soundproofing of the upper part of the front shield.
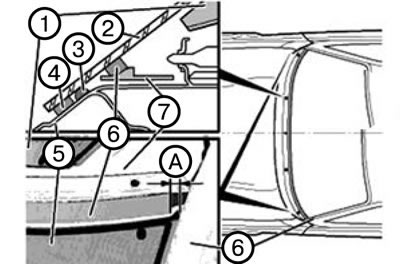
Caution: Immediately before installing the windshield (2), press (when reinstalling using a hand roller) or stick it on (when replacing) foam rubber strip (6). Otherwise, the expanding foam rubber strip may squeeze out the adhesive strip (4) (leaks, noise during movement).
17. Glue a new strip of foam rubber (6) onto the sound insulation (7).
18. The foam rubber strip (6) should only be glued up to the distance (A) from the side frame (8).
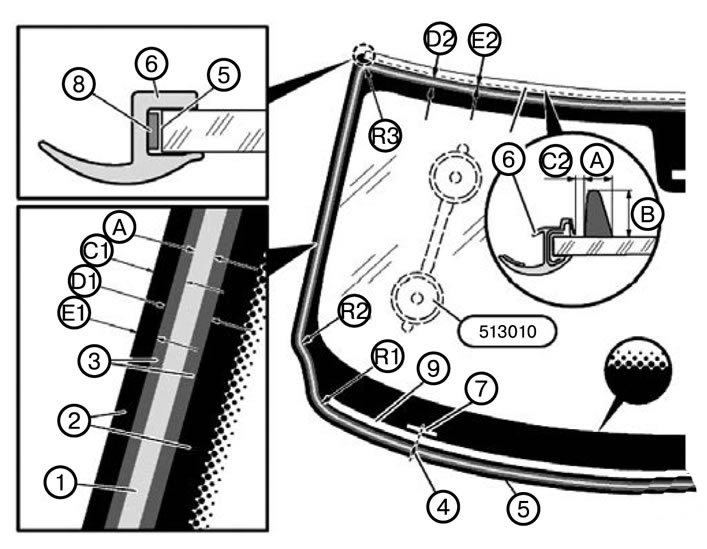
Windshield gluing diagram: 1. A strip of glue. 2. Ceramic coating. 3. Primer layer. 4. Start point of the glue strip. 5. Glass edge. 6. Rubber edging at the top. 7. Viewing window for identification number on US vehicles. 8. Adhesive tape. 9. Strip of foam rubber. A. 7±1 mm (width of glue strip). W. 11 mm (thickness of the adhesive strip). C1. 8 ±0.5 mm (distance from 1 to 5). C2. 2 ±0.5 mm (distance from 1 to 6). D1. 19 ±2 mm (width from 3). D2. 16 mm (width from 3). E1. 4 mm (distance from 3 to 5). E2.0 mm (distance from 3 to 6). R1. approx. 40 mm (radius 1 at the bottom). R2. Approx. 25 mm (radius 1 in the middle/bottom). R3. Approx. 15 mm (radius 1 at the top).
19. Install two 513010 tools on the repair trolley. Wet the suction cups and secure the side window from the outside.
Note: When reusing an old windshield, remove any remaining adhesive to a layer thickness of 0.5 mm and press the foam rubber strip (9) with a hand roller.
20. Install the rubber trim (6), paying attention to the center mark on the rubber trim and the windshield and mirror base. Remove the liner from the adhesive tape (8) on the left and right sides and press it to the edge (5) of the glass.
Note: Part (B) of the adhesive strip (1) should be almost perpendicular to the edge of the glass (5) or the rubber edging (6).
21. Spread the glue on the joint (4) using tool 009322.
Note: The areas where the polymer adhesive tape (1) is applied must be free of grease and dust.
22. Apply two strips (1) of yellow polymer adhesive tape to the roof at a distance (A) from the outer corners.
Length: 400 mm.
A = 250 mm.
23. Carefully insert the windshield (1) using tool 513010
- 1) Insert from the top first.
- 2) Align symmetrically on the sides.
- 3) Then insert from below and press.
- 4) Press the windshield upward until the seal is evenly seated against the roof panel.
- 5) Fix the windshield in this position at the top with two strips (2) of yellow polymer adhesive tape.
Note: The windshield (1) must be recessed relative to the roof's outer trim (2). This is the only way to prevent airflow noise.
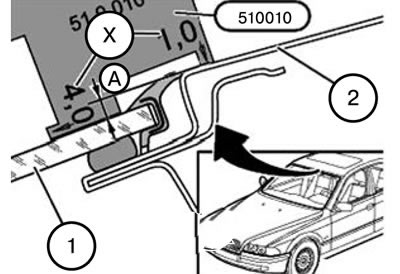
24. Install the 510010 tool along the central axis of the vehicle, depending on the dimension (A), and check the dimension to which the windshield is recessed (1).
Windshield recess size (A):
- A = 2.3+ 1 mm.
- X = Measurement points 1 - 4 mm.