
Replacing the protective molding
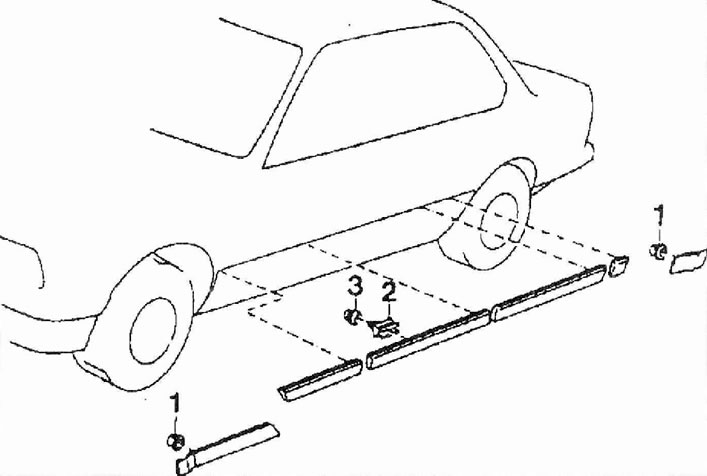
The protective moldings are attached to the body using plastic spacer clamps 2.
Remove the protective molding with your hands or by prying it with a wide plastic spatula.
Note: Depending on the installation location, one or both ends of the molding are secured with threads from the inside, see nuts 1 in the figure. Unscrew the nuts.
As a rule, when removing the protective molding, the plastic tips 3 together with the brackets are removed along with it. Therefore, you should first remove the bushings from the pins and insert them into the corresponding holes in the body.
Straighten any bent moldings before installation.
After this, align the molding so that the brackets match the holes and snap into the clamps. If necessary, drive the pins in with blows of the palms.
If present, install screws along the edges of the molding.