
- Home
- BMW 5 Series
- E34
- Body
- Exterior
- Fitting the engine compartment hood
Fitting the engine compartment hood (BMW 5 Series E34)
Fitted at sides and front
Screw in the left and right buffers completely.
Loosen the bolts of the locking bracket "arrow".
Remove the left and right parts of the front decorative grille.
Loosen the bolts of the left and right hood hinges.

Align the engine compartment hood with the front fenders on the sides and in front.
Adjusting the height of the front engine compartment hood
To do this, slightly screw the locking bracket to the hood and close the hood, while it itself is installed in the desired position. Open the hood again and tighten the bolts securing the locking bracket.
By screwing the locking bracket in and out, adjust the height of the engine compartment hood so that it is located approximately 1 mm below the side walls (front wings).
After this, unscrew the stop buffers so much that the hood closes with a slight tension and is located at the front at the same level as the side walls.
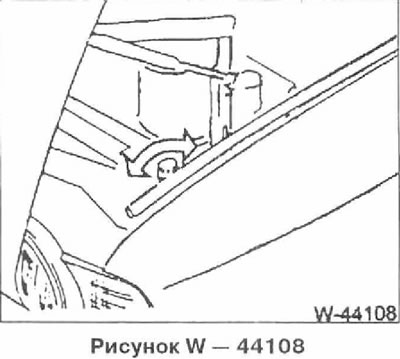
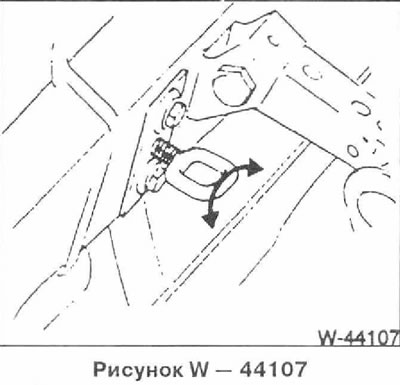
Adjusting the rear guide roller
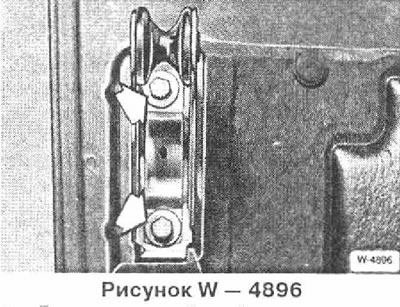
To do this, loosen the guide roller bolts.
Move the bracket with the roller so that the roller fits perfectly into the latch. Maintain clearance between the side wall and the hood of the engine compartment.
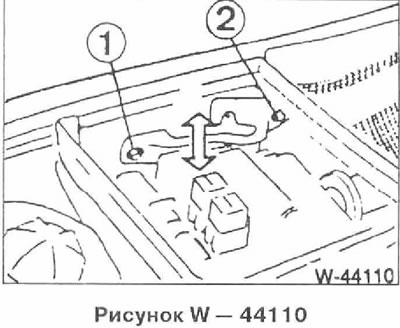
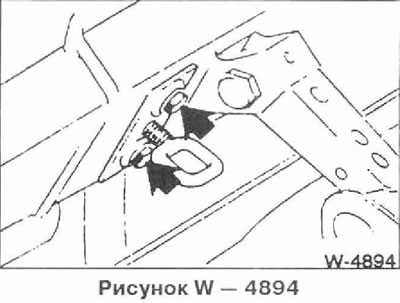
Loosen bolts 1 and 2. Adjust the latch so that when closed, the engine compartment hood is flush with the side wall.
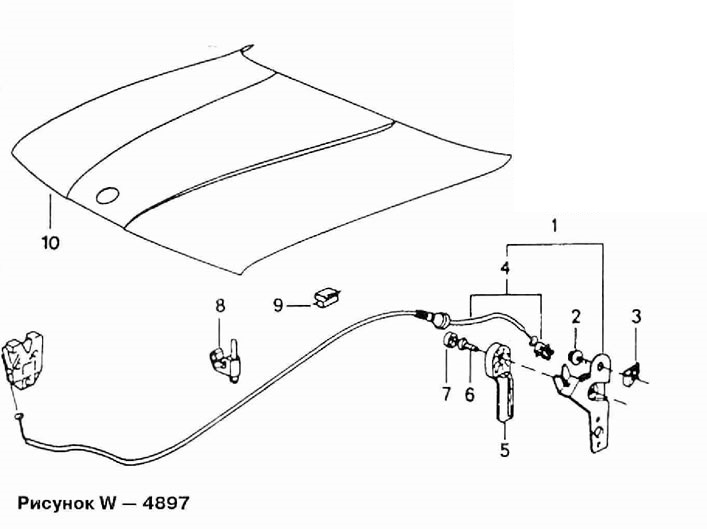
1 Hood release lever assembly
2 Self-tapping screw
3 Nut
4 Braided cable
5 Lever
6 Bolt
7 Protective cap
8 Bracket
9 Clamp
10 Engine compartment hood
[The original text is available on the website: BMWman.ru]
This article is available at russian, bulgarian, belarusian, ukrainian, serbian, croatian, romanian, polish, slovak, hungarian
Article verified: Polikarpov Saveliy
Share information:
Previous articles
БМВ E34: Exterior
Next articles
Similar articles on other types of BMW cars:
Fitting the engine compartment hood BMW 3 Series E30 (1982-1994)
Fitting the engine compartment hood BMW 3 Series E36 (1990-2000)
Engine hood — removal and installation BMW 7 Series E32 (1986-1994)
Checking the condition and replacing hoses and tubes in the engine… BMW 7 Series E38 (1994-2001)
The most important thing in the engine compartment BMW X3 E83 (2003-2010)
Anti-corrosion protection of the underbody and engine compartment BMW X5 E53 (1999-2006)
Link in different formats to this page
Visitor comments
No comments yet
- General information
- Governing bodies
- Manual
- Maintenance
- Power unit
- Engine repair
- Lubrication system
- Cooling system
- Ignition system
- Supply system
- Injection system (gasoline)
- Injection system (diesel)
- Exhaust system
- Transmission
- Clutch
- Car gearbox
- Front axle
- Rear axle
- Chassis
- Steering
- Brake system
- Wheels and tires
- Body
- Interior
- Exterior
- Heating system
- Electrical equipment
- Equipment and devices
- Power devices
- Windscreen wipers
- Electrical circuits
- General information
- Manual
- Maintenance
- Power unit
- Engine repair
- Ignition system
- Engine lubrication system
- Cooling system
- Fuel system (gasoline)
- Fuel system (diesel)
- Exhaust system
- Transmission
- Clutch
- Car gearbox
- Chassis
- Front and rear suspension
- Steering
- Brake system
- Body
- Exterior
- Interior
- Electrical equipment
- Heating system
- Equipment and devices
- Power devices
- Electrical circuits
- General information
- Manual
- Maintenance
- Power unit
- Engine in a car
- Engine overhaul
- Cooling system
- Supply system
- Ignition system
- Control system
- Transmission
- Clutch
- Manual gearbox
- Automatic gearbox
- Transmission line
- Chassis
- Steering
- Front suspension
- Rear suspension
- Brake system
- Body
- Body elements
- Car care and painting
- Electrical equipment
- Heater and air conditioner
- Equipment and devices
- Starter and generator
- Electrical circuits
- General information
- Operation and maintenance
- Specifications
- Power unit
- Engine repair
- Cooling and lubrication system
- Supply system
- Ecotronic power supply system
- Fuel injection system
- Ignition system
- Transmission
- Clutch
- Gearbox BMW 242/4
- Gearbox Getrag 262/8
- Gearbox Getrag 265/6
- Automatic gearbox
- Cardan gear
- Rear axle
- Chassis
- Steering
- Front suspension
- Rear suspension
- Brake system
- Electrical equipment
- Equipment and devices
- Electrical circuits