



Table of contents: Removal ↓ Installation ↓
- Home
- BMW 5 Series
- E34
- Body
- Exterior
- Removal and installation door trim
Removal and installation door trim (BMW 5 Series E34)
The description is given for the front doors. On the rear doors, the working operations are performed similarly.
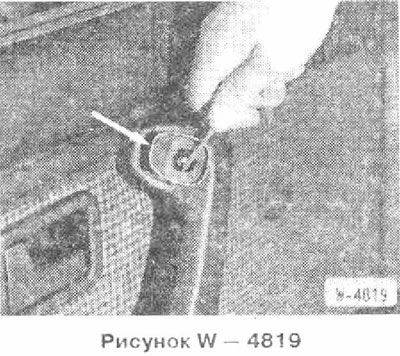
On vehicles with electric exterior mirrors, remove the control button. Insert a small screwdriver into the slot in the switch and pull the switch out.
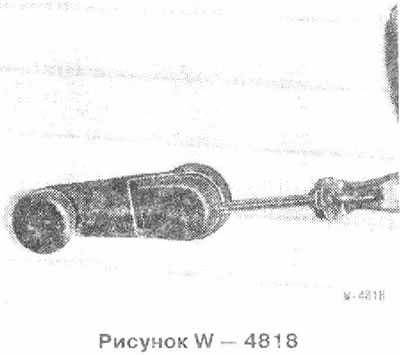
On vehicles with a window lift handle, remove the cover from the handle and unscrew the bolt located underneath. Remove the handle.
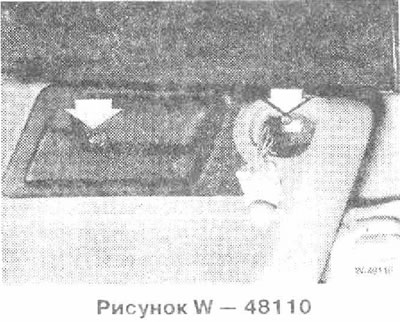
Unscrew the 2 "arrow" screws, having first removed the plastic cover from the left screw with a small screwdriver.
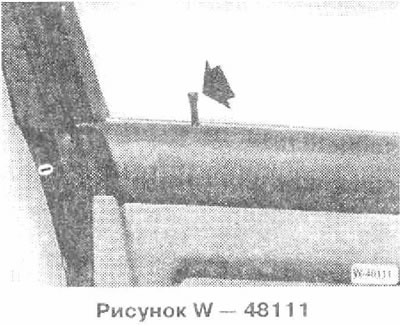
Unscrew the door lock button.
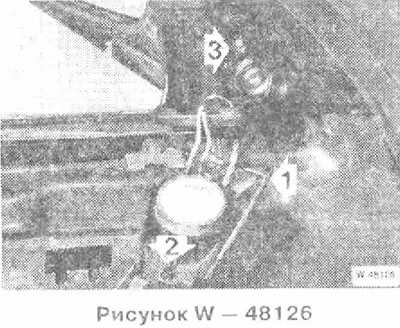
Unscrew the inner trim or speaker from the rear-view mirror. To do this, unscrew screw 1, detach speaker grille 2 from above, then unscrew bolt 3.
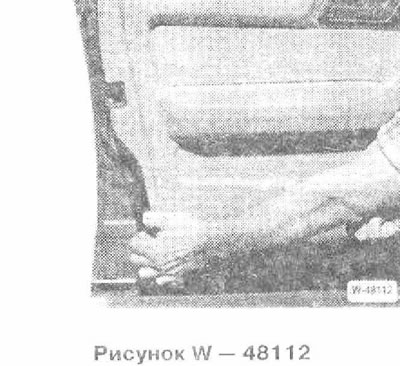
Disconnect the inner door trim at the clamp locations. The clamp locations are shown in the Installation section.
Pull the inner door trim upwards. At the same time, the glass shaft seal located on the door trim is removed from the clamps.
Disconnect the lock control cable from the inside door handle.
If necessary, carefully remove the foam trim from the door cutout.
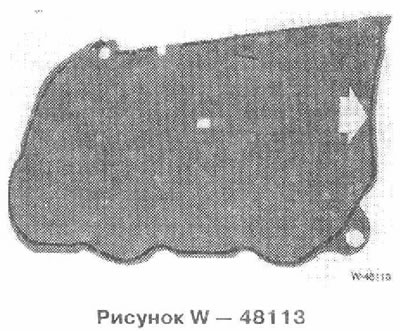
Carefully glue the foam lining onto the door cutout.
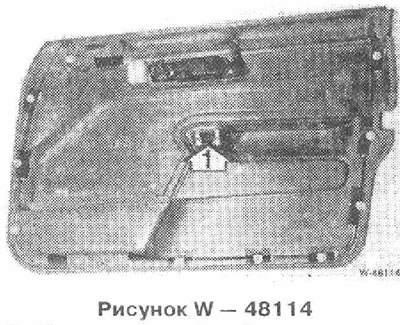
Remove clamps 1 from the door trim and place them in the appropriate places in the door.
Check if all the clips of the inner door trim are present, replace any defective clips.
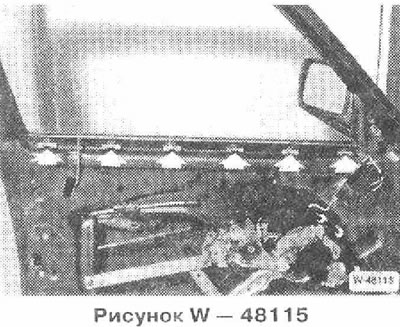
Connect the remote control cable to the rear side of the door trim.
Insert the trim into the door from above, first pressing it against the door shaft from the front, then from the back, and aligning it slightly with the door.
Press the trim against the door at the clamping points.
Tighten the door lock button.
Screw the screw into the top of the armrest and door handle and secure the trim.
On cars with electric drive of exterior mirrors put the connector on the switch. Insert the switch into the armrest, put the mirror control button on it. The button can be set only in one position.
On vehicles with manual window lifts, position the handle with the washer so that when the window is closed, it points forward and upward toward the windshield.
Secure the handle with a screw and put the cover on the handle.
Install the mirror cover.
Removal
On vehicles with electric exterior mirrors, remove the control button. Insert a small screwdriver into the slot in the switch and pull the switch out.
On vehicles with a window lift handle, remove the cover from the handle and unscrew the bolt located underneath. Remove the handle.
Unscrew the 2 "arrow" screws, having first removed the plastic cover from the left screw with a small screwdriver.
Unscrew the door lock button.
Unscrew the inner trim or speaker from the rear-view mirror. To do this, unscrew screw 1, detach speaker grille 2 from above, then unscrew bolt 3.
Disconnect the inner door trim at the clamp locations. The clamp locations are shown in the Installation section.
Pull the inner door trim upwards. At the same time, the glass shaft seal located on the door trim is removed from the clamps.
Disconnect the lock control cable from the inside door handle.
If necessary, carefully remove the foam trim from the door cutout.
Note: The adhesive seal will adhere better to the foam liner if it is removed at low temperatures.
Installation
Carefully glue the foam lining onto the door cutout.
Caution: Do not damage the trim, otherwise there will be drafts in the car. The glue must be applied along the contour, otherwise buy BMW butyl cord and correct the adhesive seal.
Remove clamps 1 from the door trim and place them in the appropriate places in the door.
Check if all the clips of the inner door trim are present, replace any defective clips.
Connect the remote control cable to the rear side of the door trim.
Insert the trim into the door from above, first pressing it against the door shaft from the front, then from the back, and aligning it slightly with the door.
Press the trim against the door at the clamping points.
Tighten the door lock button.
Screw the screw into the top of the armrest and door handle and secure the trim.
On cars with electric drive of exterior mirrors put the connector on the switch. Insert the switch into the armrest, put the mirror control button on it. The button can be set only in one position.
On vehicles with manual window lifts, position the handle with the washer so that when the window is closed, it points forward and upward toward the windshield.
Secure the handle with a screw and put the cover on the handle.
Install the mirror cover.
This article is available at russian, bulgarian, belarusian, ukrainian, serbian, croatian, romanian, polish, slovak, hungarian
Article verified: Polikarpov Saveliy
Share information:
Previous articles
БМВ E34: Exterior
Next articles
Similar articles on other types of BMW cars:
Removal and installation door trim BMW 3 Series E30 (1982-1994)
Removal and installation door trim BMW 3 Series E36 (1990-2000)
Removal and installation trim and soundproofing of the front door BMW 7 Series E38 (1994-2001)
Door — removal, installation and adjustment BMW 7 Series E32 (1986-1994)
Removal and installation the rear door BMW X3 E83 (2003-2010)
Removal and installation the front door trim BMW X5 E53 (1999-2006)
Removal and installation door trim BMW 3 Series E30 (1982-1994)
Removal and installation door trim BMW 3 Series E36 (1990-2000)
Removal and installation trim and soundproofing of the front door BMW 7 Series E38 (1994-2001)
Door — removal, installation and adjustment BMW 7 Series E32 (1986-1994)
Removal and installation the rear door BMW X3 E83 (2003-2010)
Removal and installation the front door trim BMW X5 E53 (1999-2006)
Link in different formats to this page
Visitor comments
No comments yet
- General information
- Governing bodies
- Manual
- Maintenance
- Power unit
- Engine repair
- Lubrication system
- Cooling system
- Ignition system
- Supply system
- Injection system (gasoline)
- Injection system (diesel)
- Exhaust system
- Transmission
- Clutch
- Car gearbox
- Front axle
- Rear axle
- Chassis
- Steering
- Brake system
- Wheels and tires
- Body
- Interior
- Exterior
- Heating system
- Electrical equipment
- Equipment and devices
- Power devices
- Windscreen wipers
- Electrical circuits
- General information
- Manual
- Maintenance
- Power unit
- Engine repair
- Ignition system
- Engine lubrication system
- Cooling system
- Fuel system (gasoline)
- Fuel system (diesel)
- Exhaust system
- Transmission
- Clutch
- Car gearbox
- Chassis
- Front and rear suspension
- Steering
- Brake system
- Body
- Exterior
- Interior
- Electrical equipment
- Heating system
- Equipment and devices
- Power devices
- Electrical circuits
- General information
- Manual
- Maintenance
- Power unit
- Engine in a car
- Engine overhaul
- Cooling system
- Supply system
- Ignition system
- Control system
- Transmission
- Clutch
- Manual gearbox
- Automatic gearbox
- Transmission line
- Chassis
- Steering
- Front suspension
- Rear suspension
- Brake system
- Body
- Body elements
- Car care and painting
- Electrical equipment
- Heater and air conditioner
- Equipment and devices
- Starter and generator
- Electrical circuits
- General information
- Operation and maintenance
- Specifications
- Power unit
- Engine repair
- Cooling and lubrication system
- Supply system
- Ecotronic power supply system
- Fuel injection system
- Ignition system
- Transmission
- Clutch
- Gearbox BMW 242/4
- Gearbox Getrag 262/8
- Gearbox Getrag 265/6
- Automatic gearbox
- Cardan gear
- Rear axle
- Chassis
- Steering
- Front suspension
- Rear suspension
- Brake system
- Electrical equipment
- Equipment and devices
- Electrical circuits