Attention! If there is an airbag system, strictly observe the safety regulations.
Avoid the use of sharp-edged tools when removing the casing.
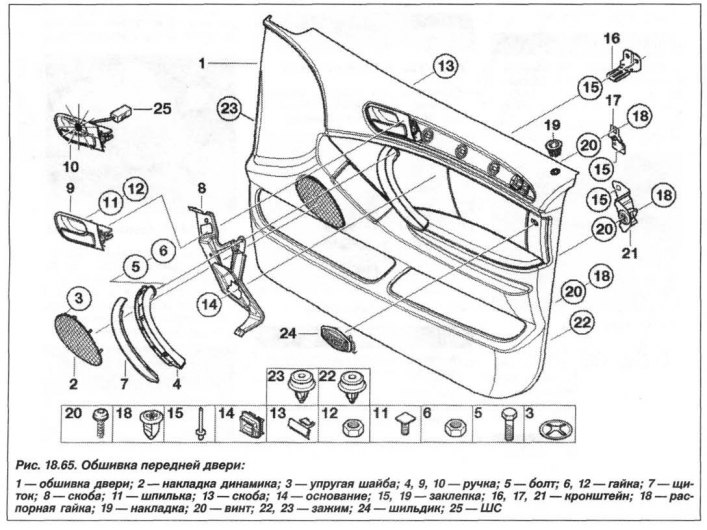
The design of the front door trim with the airbag system is shown in Figure 18.65.
Removal of a covering of a forward door is necessary for carrying out in a following order. Prepare fixture «00.9.317» from the kit «00.9.310», remove cover (decorative strip) on the door trim, power window switch for side doors and footwell light at the bottom of the door.
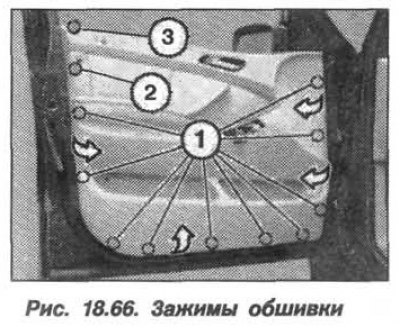
Remove screws (1, fig. 18.66), remove plug (2) and remove the screw underneath. Using fixture «00.9.317», release the fastening clips of the skin and carefully release the upper edge of the skin from the clips. Unhook the door trim from the unlock button (3).
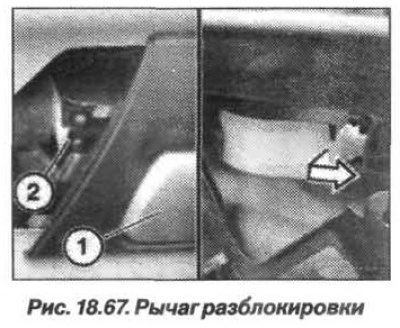
If there is an illumination of the internal handle of the door lock, disconnect the loop (25, see fig. 8.65) from the door lock handle. Unclip the door release lever drive cable, for which:
- tighten the release lever (1, fig. 18.67);
- remove the retainer (2);
- Disconnect the cable by moving it inwards and backwards.
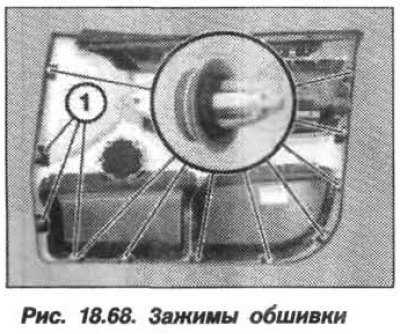
Remove front door trim. Installing the front door trim should be carried out in reverse order, taking into account that the clips (1, fig. 18.68) longer than the rest of the clips and they are grey, the rest are white. Install all clips with O-rings, replace damaged clips.
When installing, press the release lever (1, see fig. 18.67) all the way to the door trim. Bend the bracket on the inner door panel to catch the center clip.
After installing the door trim, carry out the following operations in sequence:
- lower glass:
- lock the car with a key;
- check the locking button rod for ease of movement, center it if necessary.
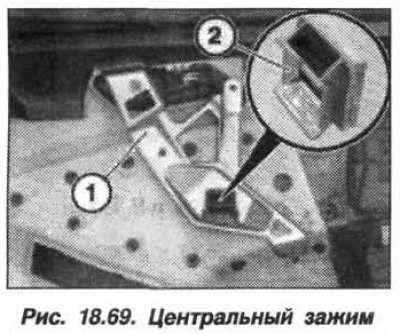
When replacing the front door trim, it is necessary to remove the inner door handle and install the center clip (2, fig. 18.69) on the frame (1).