
Table of contents: Removal ↓ Installation ↓
- Home
- BMW 3 Series
- E30
- Body
- Exterior
- Removal and installation door trim
Removal and installation door trim (BMW 3 Series E30)
Removal
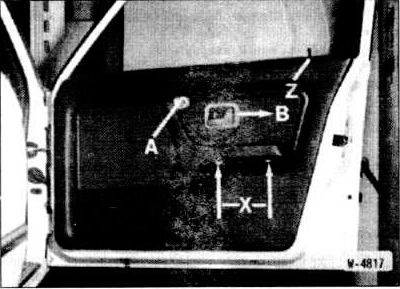
Unscrew the door lock button "Z".
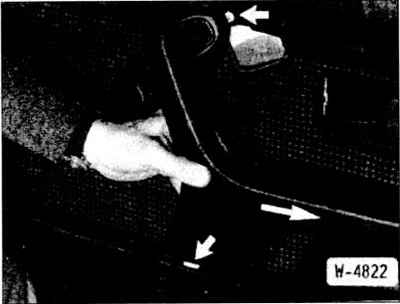
Move the "B" cover back and pull it out.
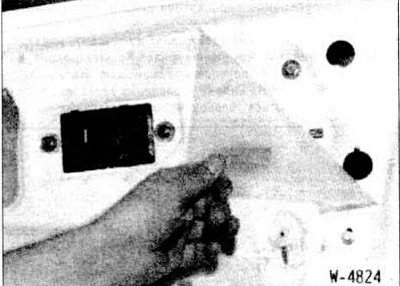
Use a screwdriver to pry up the armrest cover "A" and unscrew the screw located underneath it.
Loosen the "X" screws of the armrest. Pull the armrest forward and release.
On vehicles with an electric outside mirror: pull out the mirror control button, pry up the switch with a small screwdriver and pull it out, disconnect the switch connector.

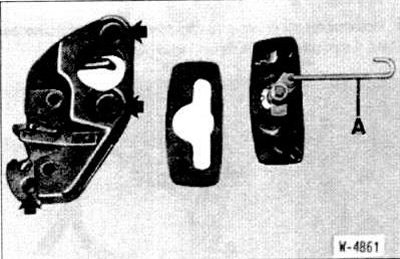
On vehicles with a window lift: remove the cover from the handle.
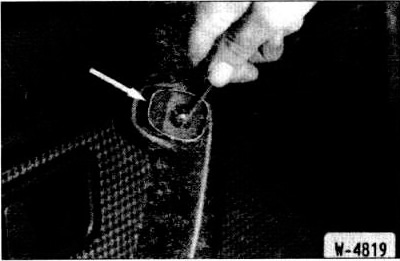
Press the stopper (arrow) with a screwdriver or unscrew the screw.
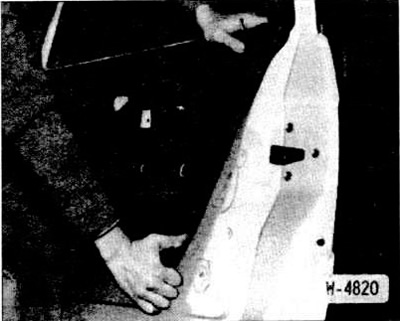
Pull the trim away from the door in the area of the clamps and remove it upwards. As a rule, the window opening seal is also removed together.
If there is film, carefully pull it out of the door cutout.
Installation
Carefully stick the film onto the door cutout.
Note: The film should not be damaged, otherwise there will be drafts in the cabin. Small tears can be sealed with adhesive tape.
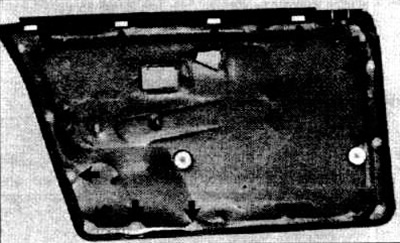
Check that all clips are present on the door trim. Replace damaged clips.
Secure the door shaft seal to the trim with clamps.
Insert the trim into the door from above, first pressing it against the door shaft from the front and then from the back, and aligning it slightly with the door.
Press the trim against the door at the clamping points.
Tighten the "Z" button of the door lock.
Place the "B" pad on the back and push it into the slot.
Insert the armrests from below into the shelf in the door and move them forward, while the armrest should simultaneously enter the slot from above.
Screw a screw into the armrest from above and install the cover.
On vehicles with an electric outside mirror, connect the connector to the switch. Insert the switch into the armrest. Put on the mirror control button. The button can only be installed in one position.
On vehicles with a manual window lift mechanism, place the handle with the washer so that when the window is closed, the handle points forward.
Secure the handle with a stopper or screw. Put the cover on the handle.
[Read the original source on the website BMWMAN.ru]
This article is available at russian, bulgarian, belarusian, ukrainian, serbian, croatian, romanian, polish, slovak, hungarian
Article verified: Polikarpov Saveliy
Share information:
Previous articles
БМВ E30: Exterior
Next articles
Similar articles on other types of BMW cars:
Removal and installation door trim BMW 5 Series E34 (1988-1996)
Removal and installation the rear door trim (Touring) BMW 5 Series E39 (1995-2003)
Removal and installation trim and soundproofing of the front door BMW 7 Series E38 (1994-2001)
Door — removal, installation and adjustment BMW 7 Series E32 (1986-1994)
Removal and installation the rear door BMW X3 E83 (2003-2010)
Removal and installation the front door trim BMW X5 E53 (1999-2006)
Link in different formats to this page
Visitor comments
No comments yet
- General information
- Manual
- Maintenance
- Power unit
- Engine repair
- Cooling system
- Power system (gasoline)
- Injection system (gasoline)
- Fuel system (diesel)
- Exhaust system
- Ignition system
- Charge and launch systems
- Transmission
- Car gearbox
- Clutch and drive shafts
- Chassis
- Brake system
- Suspension front and rear
- Steering
- Body
- Body care and repair
- Exterior
- Interior
- Electrical equipment
- Troubleshooting
- Lighting and signaling
- Equipment and devices
- Heater and air conditioner
- Electrical circuits
- General information
- Manual
- Repair on the road
- Weekly checks
- Maintenance
- Troubleshooting
- Power unit
- 4 cylinder engines
- 6 cylinder engines
- Engine overhaul
- Cooling and heating
- Fuel and exhaust system
- Starting and charging system
- Ignition system
- Transmission
- Clutch
- Mechanical gearbox
- Automatic gearbox
- Cardan and drive shafts
- Chassis
- Brake system
- Wheel suspension
- Steering
- Body
- Exterior
- Interior
- Electrical equipment
- Equipment and devices
- Electrical circuits
- General information
- Maintenance
- Power unit
- Engine repair
- Cooling system
- Ignition system
- Supply system
- Fuel injection system
- Exhaust system
- Transmission
- Clutch
- Car gearbox
- Front and rear axle
- Chassis
- Steering
- Brake system
- Body
- Exterior
- Interior
- Electrical equipment
- Heating system
- Equipment and devices
- Power devices
- Electrical circuits
- Power unit
- M10/M20 engine
- M40 engine
- Ignition system
- Lubrication system
- Cooling system
- Supply system
- Fuel injection
- Exhaust system
- Transmission
- Clutch
- Manual gearbox
- Front axle
- Rear axle
- Chassis
- Steering
- Brake system
- Body
- Exterior
- Interior
- Electrical equipment
- Heating system
- Equipment and devices
- Electrical circuits
- General information
- Specifications
- Operation and maintenance
- 4-cylinder engine
- Engine repair
- Cooling and lubrication system
- Supply system
- Ignition system
- 6-cylinder engine
- Engine repair
- Cooling and lubrication system
- Supply system
- Fuel injection system
- Ignition system
- Transmission
- Clutch
- 4-speed manual gearbox
- 5-speed manual gearbox
- Automatic gearbox
- Cardan and rear axle
- Chassis
- Steering
- Front suspension
- Rear suspension
- Brake system
- Electrical equipment
- Equipment and devices
- Electrical circuits