
Removal and installation the instrument panel trim
1. Set the front seats to the rearmost position and lower them.
2. Set the steering column to the "down" and "extended" position.
3. Remove the trim from both front pillars.
4. Remove the switch mounts from the steering column.
5. Remove the instrument cluster.
6. Remove the lighting control panel.
7. Remove the side trim in the footwell near the left front pillar.
8. Remove the small items compartment in the instrument panel.
9. Remove the central information display.
10. Remove the radio.
11. Remove the preselector lever cover.
12. Remove the compartment for small items.
13. Remove the right glove box with the housing.
14. Remove the right front drink holder.
15. Remove the side trim of the footwell at the right front pillar.
16. Remove the right lower instrument panel trim.
17. Remove the airbag module on the front passenger side.
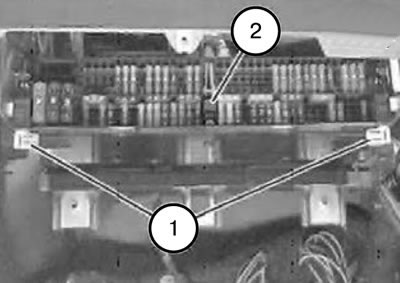
18. Open the latches (1) and lower the fuse holder (2) down.
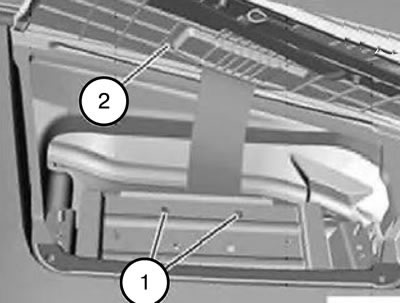
19. Fold the front passenger airbag cover (2) upwards.
Note: When removing the screws (1), the mounting plate may fall into the front passenger footwell.
20. Loosen the screws (1), tightening torque 9 Nm.
21. Remove the front passenger airbag cover (2) complete with the corresponding mounting plate.
Note: When installing, ensure that the mounting plate (1) is correctly positioned in the retaining strap (2) of the front passenger airbag cover.
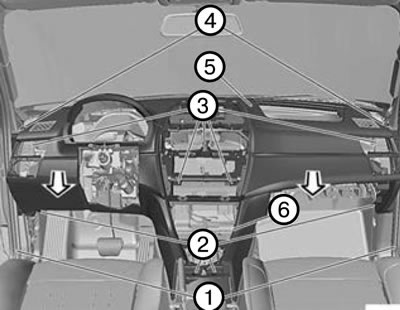
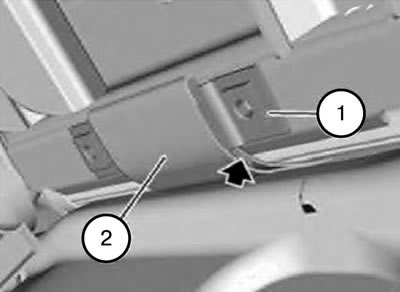
22. Remove the protective trim (1) in the area of the instrument panel trim (5).
23. Remove the screws (2).
24. Unscrew the nuts (3).
25. Disconnect the connector (6) of the solar sensor.
26. Move the instrument panel trim (5) in the direction indicated by the arrow and remove.
Note: Before installing the instrument panel trim (5), make sure the foam sound insulation (4) is positioned correctly.
Note:
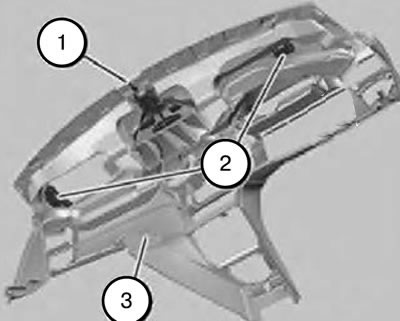
- When installing, it is necessary to pay attention to the correct position of the guides (1) and (2) of the instrument panel trim (3) in the corresponding sockets.
- Pay attention to the correct position of the air duct seals.
27. Installation should be carried out in the reverse order of removal, taking into account the above notes.