
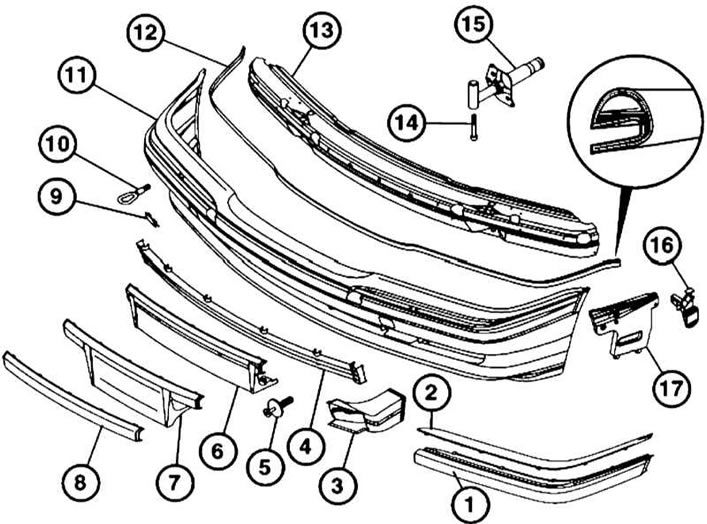
Front Bumper Assembly Components
1 - Side bumper trim
2 - Chrome side decorative strip
3 — Brake system blower channel
4 — Lower section of the decorative radiator grille
5 - Rivet with expansion sleeve
6, 7 — License plate mounting shield
8 — Central bumper trim (models for the USA)
9 — Towing eye cover
10 — Towing eye
11 — Bumper cover
12 - Protective edging
13 — Support beam
14 — Cylinder head bolt
15 — Shock damper
16 — Bracket
17 - Insert
1. Open the hood.
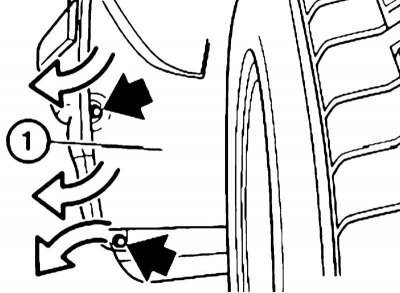
2. Unscrew the bolts on the left and right sides and remove the side aprons (1) of the wheel arches.
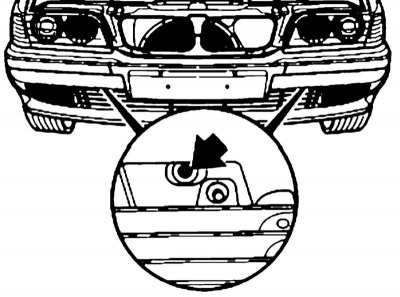
3. Remove the shock absorber mounting bolts.
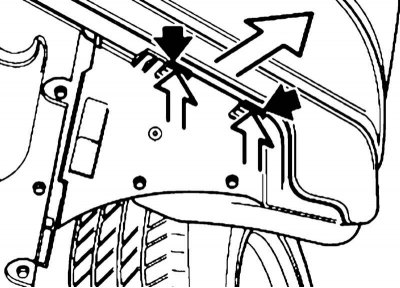
4. Press the locking tabs up and move the bumper forward a little.
5. On models with parking assistance, disconnect the parking assistance sensor connectors.
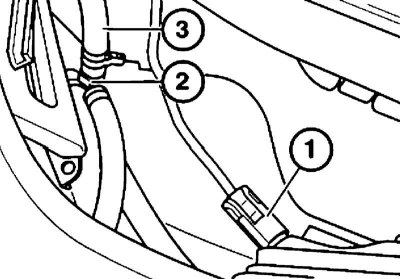
6. Disconnect the connectors (1) of the left and right fog lamp wiring. On models with headlamp washers, remove the retainer (2), disconnect the hose (3) and move it upwards or plug it.
7. Pull the bumper towards you and remove it.
8. When replacing the bumper, transfer the fog lights and their brackets, headlight washers, license plate mounting panel, brake air ducts, lower decorative radiator grille and other decorative elements from the old bumper to the new one.
The side trims can be replaced without removing the bumper – press them away from the clips using a plastic wedge.
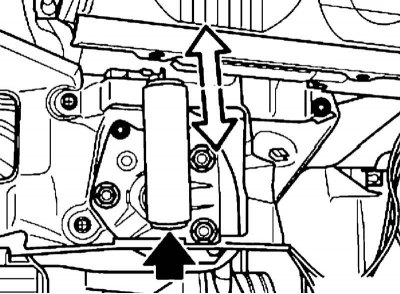
9. Installation is carried out in the reverse order. The height of the bumper is adjusted by screwing in the bolts with a head for a rod wrench.