
Table of contents: Rack A ↓ B-pillar, lower trim section ↓ B-pillar, upper trim section ↓ C-pillar ↓ Ceiling ↓
- Home
- BMW 7 Series
- E38
- Body
- Interior
- Removal and installation of body pillar and ceiling trim panels
Removal and installation of body pillar and ceiling trim panels (BMW 7 Series E38)
Rack A
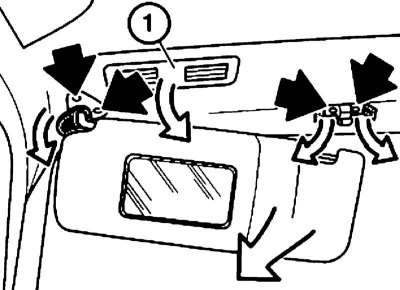
1. On models with A-pillar airbag:
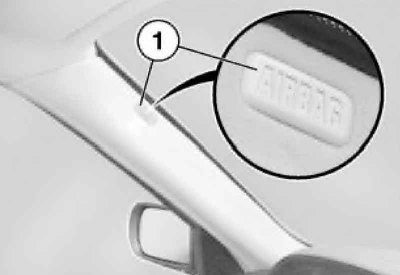
- Remove the protective trim on the pillar trim and take out the clip (1);
- Remove the bolt (1).
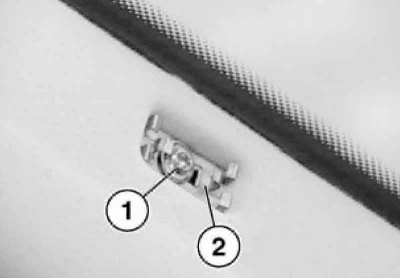
When installing, check that the clamp (2) is positioned correctly.
2. Remove the front pillar trim by moving it inward and upward.

3. Installation is carried out in the reverse order. Replace damaged fasteners and plugs.
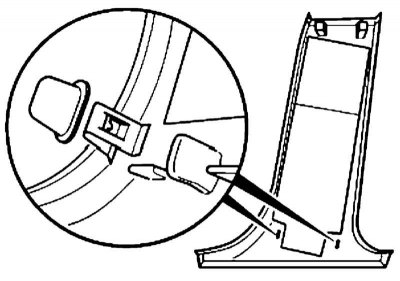
4. On models with an A-pillar airbag, the soft tab (1) of the plug (2) must face the airbag (3) side, otherwise the clip (4) may damage the airbag.
B-pillar, lower trim section
1. Remove the front and rear door sill trims (see section Removal and installation door sill trims).
2. Move the seat to the forwardmost position.
3. Partially remove the protective trim from the B-pillar trim. Press the clips of the lower B-pillar trim panel inwards (1) and remove the trim panel downwards (2).
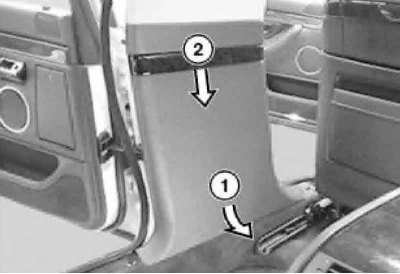
4. Installation is carried out in the reverse order. Replace damaged fasteners and plugs.
B-pillar, upper trim section
1. Remove the lower B-pillar trim panel.
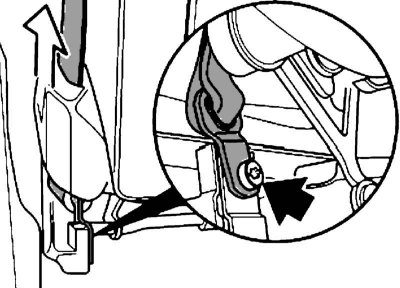
2. Remove the front seat belt mounting bolt.
3. Remove the upper B-pillar trim cover. Press the lower B-pillar trim clips inwards (1) and remove it downwards (2).
4. Installation is carried out in the reverse order. Replace damaged fasteners and plugs.
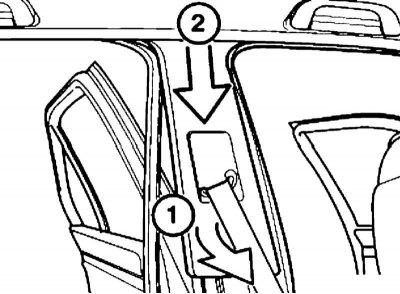
C-pillar
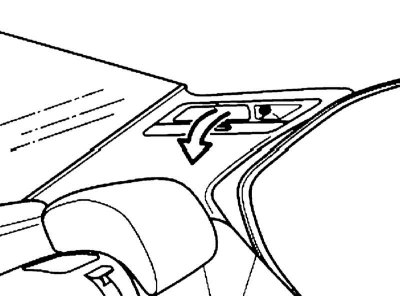
1. Disconnect the rear light cover, remove it by moving it upwards and disconnect the connector.
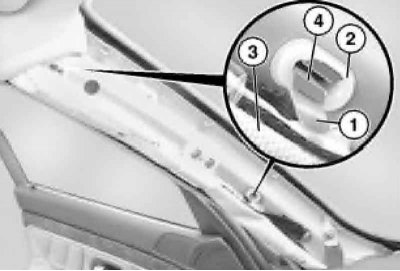
2. On models with C-pillar airbag (with icon 1) unscrew the screws (2) and remove the trim (3) by moving it inward and upward.
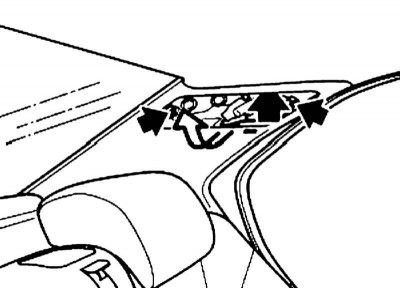
3. On models without a C-pillar airbag, remove the bolts and remove the trim in an inward and upward motion.
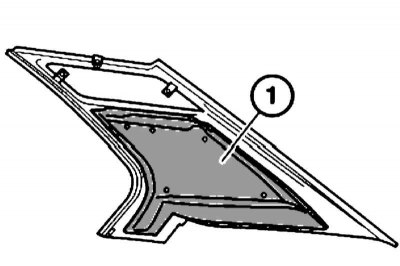
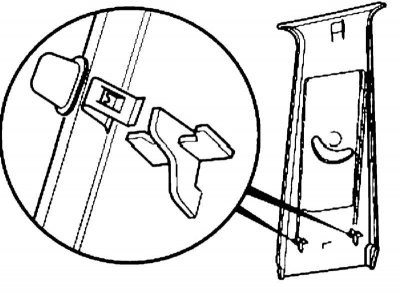
4. When replacing the trim panel, remove the sound insulation (1) from the old panel and glue it to the new panel.
Ceiling
1. Remove all upper grab rails and all pillar trim.
2. Remove the right front seat (see section Removal and installation front seats).
3. Remove the top hatch cover (see section Removal and installation the top hatch cover Chapter Body)
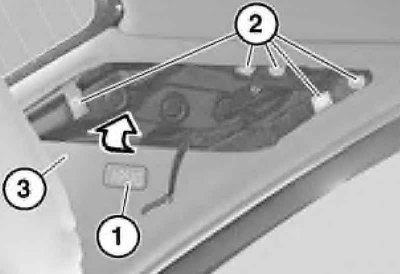
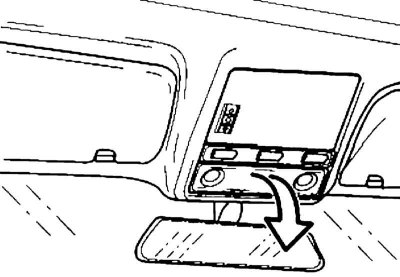
4. Remove the sun visor and vanity mirror light bulbs (1). Disconnect the connectors, remove the pads from the support and hinge and unscrew the screws. Pull the wire slightly and disconnect the light connector.
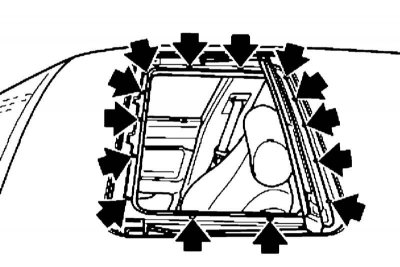
5. Unscrew the bolts and remove the protective frame. When replacing, replace the nuts in the ceiling trim if necessary.
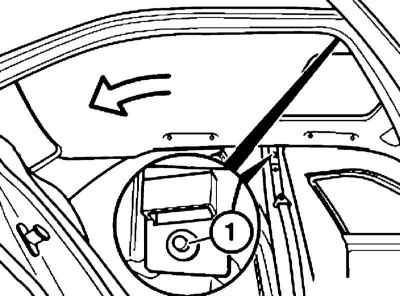
6. Remove the main interior light shade and disconnect the connector.

7. Hook and remove the plug, disconnect the connector.
8. Move the backrest of the left front seat to its rearmost position.
9. On models up to 05/1997, pry up and remove the retainers (1) on the left and right sides. Press the headlining trim out of the metal tabs with a backwards movement and remove it by sliding it towards the right rear door. On models from 05/1997, press the headlining trim out of the metal tabs with a backwards movement and remove it by sliding it towards the right rear door.
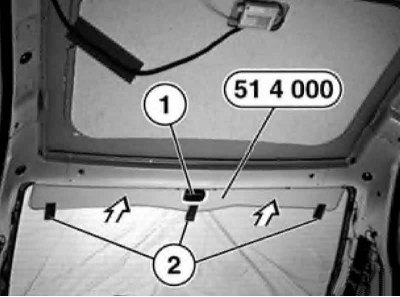
10. Installation is carried out in the reverse order. Insert tool No.51 4 000 into the base of the headlining and secure with fabric-backed adhesive tape (2). On models with a car telephone connection unit, if possible, pass over the car telephone connection unit (1).
11. Press the headlining trim (1) onto tool No.51 4 000 with an upward movement, push forward until it stops and secure. Remove tool No.51 4 000 and wipe the rear window.
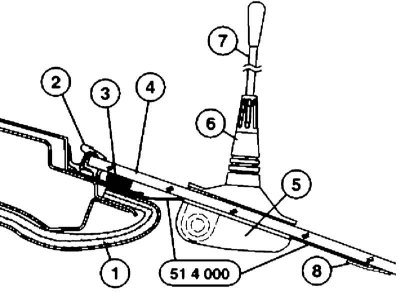
1 - Ceiling finishing
2 - Sealing profile
3 - Glue strip
4 - Rear window
5 - Switch box
6 - Antenna base
7 - Antenna
8 - Adhesive tape on a textile base
[The original text is available on the website www.bmwman.ru]
This article is available at russian, bulgarian, belarusian, ukrainian, serbian, croatian, romanian, polish, slovak, hungarian
Article verified: Polikarpov Saveliy
Share information:
Previous articles
БМВ E38: Interior
Next articles
Similar articles on other types of BMW cars:
Removal and installation the luggage compartment trim BMW 3 Series E30 (1982-1994)
Removal and installation the left footwell trim BMW 3 Series E36 (1990-2000)
Removal and installation door trim BMW 5 Series E34 (1988-1996)
Removal and installation the upper steering column trim BMW 5 Series E39 (1995-2003)
Pistons — removal and installation BMW X3 E83 (2003-2010)
Removal and installation the pedal mechanism trim BMW X5 E53 (1999-2006)
Link in different formats to this page
Visitor comments
No comments yet
- General information
- Introduction to guide
- Manual
- Maintenance
- Power unit
- Engine M60/1, M60/2 (petrol)
- M62 engine (petrol)
- M57 engine (diesel)
- M67 engine (diesel)
- Cooling system
- Fuel system (petrol)
- Fuel system (diesel)
- Exhaust system
- Ignition and control systems
- Charge and launch systems
- Transmission
- Clutch
- Mechanical gearbox
- Automatic gearbox
- Cardan and drive shafts
- Chassis
- Brake system
- Front suspension
- Rear suspension
- Steering
- Body
- Exterior
- Interior
- Electrical equipment
- Equipment and devices
- Lighting
- Heating and air conditioning
- Electrical circuits
- General information
- Care and maintenance
- Power unit
- Minor engine repair
- Engine overhaul
- Lubrication system
- Cooling system
- Ignition system
- Supply system
- Injection system (petrol)
- Injection system (diesel)
- Exhaust system
- Transmission
- Clutch
- Manual gearbox
- Automatic gearbox
- Cardan gear
- Rear axle and shafts
- Chassis
- Front suspension
- Rear suspension
- Steering
- Wheels and tires
- Brake system
- Body
- Body elements
- Electrical equipment
- Equipment and devices
- Electrical circuits