
Table of contents: Heated seats* ↓ Rear window sunshade* ↓ Radio and Hi-Fi audio system* ↓ Hi-Fi audio system harman kardon ↓ Radio reception ↓ Glove box ↓ Portable lamp* ↓ Compartments for small items ↓ Ashtray in front* ↓ Cigarette lighter* ↓ Ashtray at the back* ↓ Transportation of long items* ↓ Ski transport case* ↓ In combination with a device for…↓ Warning triangle* ↓ First aid kit* ↓
- Home
- BMW 3 Series
- E46
- General information
- Manual
- Salon equipment
Salon equipment (BMW 3 Series E46)
Heated seats*
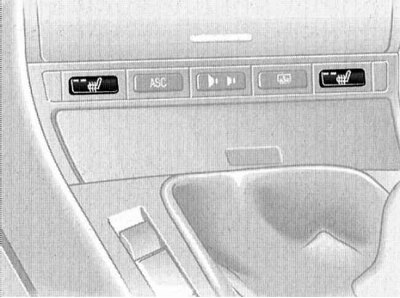
To heat the seat cushion and backrest, first turn the ignition key to position 2.
Pressing the key in sequence allows you to select one of three operating modes:
Indicator lights do not light: seat heating is off.
One control lamp is on: normal heating mode. Heating switches off automatically.
Two control lamps are on: fast heating. Switching to normal heating mode is done automatically.
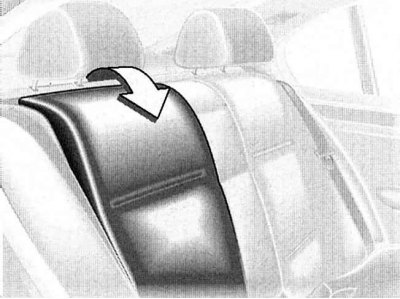
Rear window sunshade*
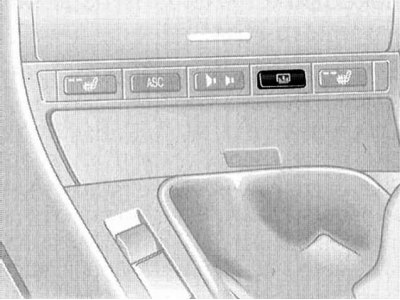
To turn on the curtain drive, press the key. The drive is activated after turning the ignition key to position 1.
The illustration shows the layout of the keys for a complete set. This layout may vary depending on the volume of the vehicle's equipment.
Radio and Hi-Fi audio system*
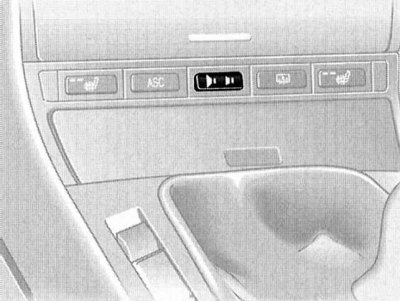
Hi-Fi audio system harman kardon
Each time you press a key, the system turns on or off, respectively.
When the system is switched on, an acoustic effect of spatial enlargement of the passenger compartment occurs while simultaneously improving the stereo sound effect in all seats.
When the reception quality is poor, the system often switches from stereo to mono and back. In this case, turn off the system.
Radio reception
The quality of reception and reproduction of sound by a car radio depends on the distance of the radio station, as well as the position of the car during reception and the orientation of the antenna.
Despite the perfect protection against interference created by the vehicle's own systems, extraneous noises occur during reception while driving, caused by external influences, the sources of which are high-voltage power lines, buildings or natural obstacles in the path of radio waves. Natural influences (high solar radiation intensity, fog, rain or snowfall) may also interfere with radio reception.
Car or portable telephones not recommended by BMW may also cause interference. This interference manifests itself as a low-pitched hum from the loudspeakers.
Installation and handling of the radio receiver are described in the instructions supplied with it.
The medium, long and short wave ranges provide greater reception range because radio signals propagate not only as surface waves that bend around the Earth, but also as spatial waves reflected by the ionosphere.
The VHF (FM) range provides significantly better sound reproduction quality than any other waves. However, the range of radio stations operating in this range is limited due to the rectilinear propagation of ultra-short waves.
Certain limitations in reception are partially compensated by "clever" systems.
RDS system (Radio Data System) provides automatic selection of the frequency with the highest reception quality if the radio station broadcasts on several frequencies.
The antenna diversity method means that several antennas for receiving ultra-short waves are built into the rear window. Thus, the car has three independent antennas. The built-in processor automatically selects the antenna that provides the best ultra-short wave reception. Switching from antenna to antenna is done in a matter of milliseconds and is completely unnoticeable for the listener.
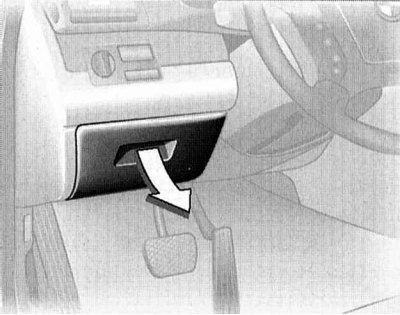
Glove box
Opening
Pull the handle. This will turn on the drawer light.
Closing
Close the lid with an upward movement.
Locking
To lock the box, you need to use the key from the single lock. After that, you can also unlock it only with the key from the single lock.
If you leave your car, for example, in a hotel parking lot, and give the employee only the door and ignition keys (refer to Section Keys, single lock and anti-theft system), then access to the glove compartment will be impossible.
To avoid injury in an accident, it is recommended not to leave the glove box open unnecessarily.
Portable lamp*
The lamp is located on the left in the storage compartment. Thanks to the presence of a device that protects its battery from overcharging, it can be stored permanently plugged into the socket.
The lamp can only be inserted into the socket with a plug when it is switched off, otherwise there is a risk of overload and damage to the lamp.
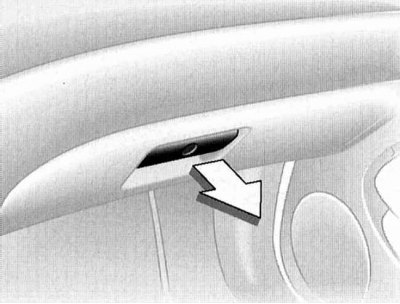
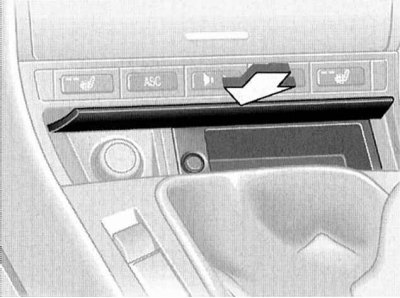
Compartments for small items
To the left of the steering column is a small box. To open it, fold the lid down.
To avoid injury in the event of an accident, do not leave the box open.
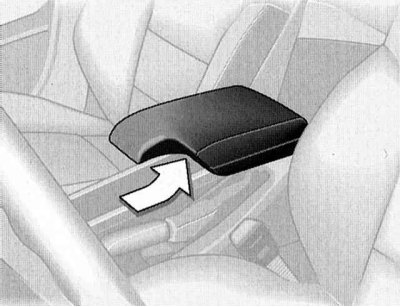
The storage compartment in the front armrest* opens at the touch of a button (shown by arrow). Its lid opens upwards.
Pockets or niches for small items can be found on the front doors, as well as on the center console above the ashtray*. There are nets on the back of the front seatbacks*.
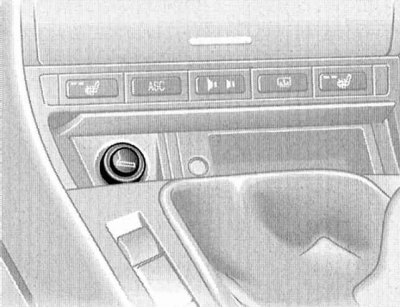
Ashtray in front*
Opening
The ashtray opens by simply pressing in the direction shown by the arrow.
Put out your cigarette in the ashtray's receptacle without using too much force, after shaking off the ash.
Cleaning
Press on the edge of the lid (as shown by the arrow). The ashtray will move upwards and can then be removed from its socket.
On vehicles with non-smoking equipment, the plug located in place of the ashtray is removed in a similar manner.
Cigarette lighter*
Press the cigarette lighter into the socket. Once it is pushed back, it can be removed.
Hold the hot cigarette lighter only by the handle, otherwise there is a risk of burns.
The cigarette lighter remains operational even after the key has been removed from the ignition. Therefore, never leave children unattended in the car.
Cigarette lighter socket
This socket can be used as a power outlet for connecting a portable lamp, vacuum cleaner and other current consumers with a power of approximately 200 W and a working voltage of 12 V. To avoid damage to the cigarette lighter socket, do not attempt to insert an unsuitable plug into it.
On vehicles with non-smoking equipment, the cigarette lighter socket is located in the same place.
Ashtray at the back*
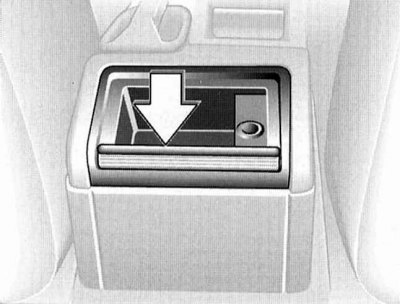
Opening
Move the curtain.
Cleaning
Press, as if continuing to open the ashtray, on the edge of the open curtain (as shown by the arrow). The ashtray will move upwards and can then be removed.
On vehicles with non-smoking equipment, the plug located in place of the ashtray is removed in a similar manner.
Transportation of long items*
The backrest of the rear seat is divided in the proportion 1/3: 2/3. To store long items, you can fold down each of these parts of the backrest.
To unlock the backrest, pull the corresponding lever (shown by arrow).
The unlocked backrest moves forward slightly. Put your hand through the gap, grab the backrest and tilt it down.
When installing, make sure that the backrest is securely fixed in place. Otherwise, when braking or making sudden maneuvers, the load may fall from the trunk into the passenger compartment and cause injury to passengers.
There are special loops at the corners of the trunk for attaching cargo-retaining nets* or tension straps used to secure items in the trunk.
Please also refer to the "Download" subsection below.
Ski transport case*
The case can be used to transport up to four pairs of skis or up to two snowboards without worrying about their safety or the cleanliness of the interior.
Taking into account the length of the cover and the additional space in the trunk, skis up to 2.10 m long can be loaded into the car. When loading skis 2.10 m long, the capacity of the cover is reduced, so that it can accommodate no more than two pairs of skis of the specified maximum length.
Loading
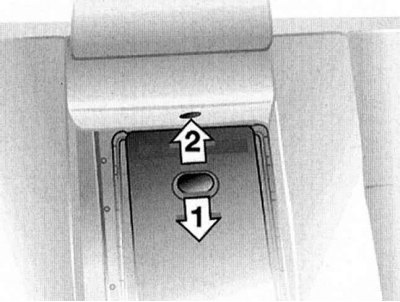
1. Fold down the center divider armrest, remove the trim panel secured with Velcro, and place it on the armrest.
2. Press the button shown by arrow 1. The tailgate will unlock.
3. Having brought together the fasteners shown by arrows 2, open the cover.
4. Straighten the cover and place it between the front seats. The zipper is designed to simplify access to the items loaded into the cover, as well as to dry it faster.
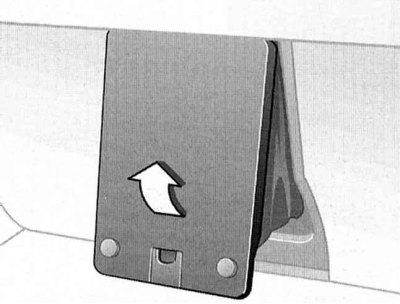
5. Secure the folding loading hatch cover from the trunk side to the magnetic holders located on the bottom side of the shelf behind the rear seat.
Make sure that skis are loaded into the bag only when clean and avoid damaging the bag with sharp edges.
Skis or other long items loaded into the bag must be secured with a strap attached to the bag, which is tightened with a buckle.
To remove the cover, proceed in reverse order.
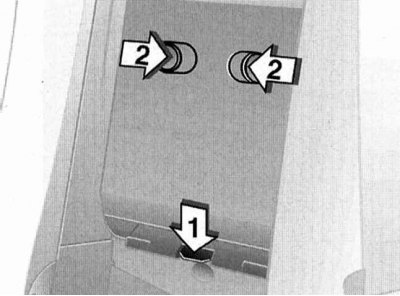
In combination with a device for transporting long objects
1. Fold down the central armrest divider, remove the trim panel secured with Velcro and place it on the armrest.
2. Press button 1 and open the lid.
3. Press button 2. The trunk lid will unlock.
Cargo placement
If you are transporting cargo, please follow the instructions below:
Place heavy loads as deep as possible, that is, immediately behind the backs of the front seats or the dividing wall of the trunk, and put them at the very bottom.
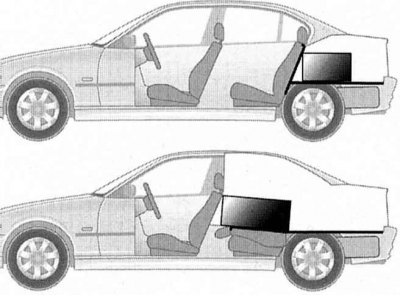
Cover sharp edges.
The load must not be placed above the top line of the seat backs.
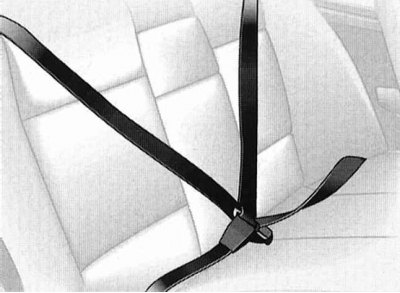
When transporting heavy objects and there are no passengers in the rear seat, fasten the side seat belts in the opposite buckles.
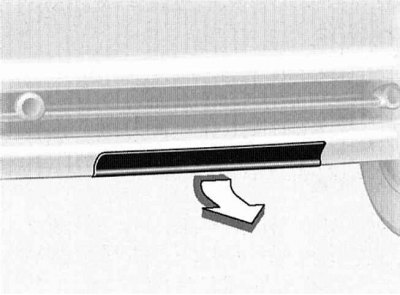
Securing cargo
Small and light items should be placed on the rubberized, non-slip side of the boot mat or secured with a load-retaining net* or tension straps (refer to Section Luggage compartments).
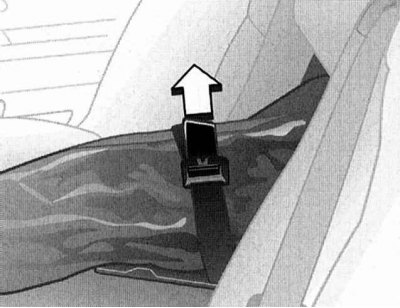
For bulky and heavy objects, you can purchase special rigging equipment* at the BMW service station. Loops located at the corners of the trunk are used to secure them (in the illustration such a loop is indicated by an arrow).
Follow the instructions for using rigging equipment.
Always place the load correctly and ensure that it is securely fastened, otherwise it may cause injury to passengers during braking or sudden maneuvers.
Do not exceed maximum gross weight and permissible axle loads (refer to Specifications). Otherwise, traffic safety cannot be guaranteed, which is in conflict with traffic regulations.
Heavy and rigid loads may only be placed in the passenger compartment as described above. Otherwise, they may shift and injure passengers during braking or sudden maneuvers.
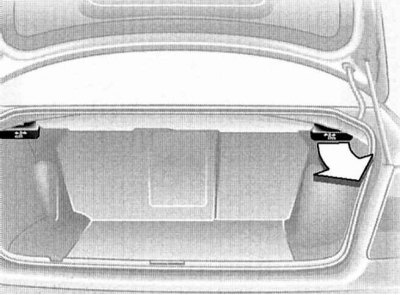
Warning triangle*
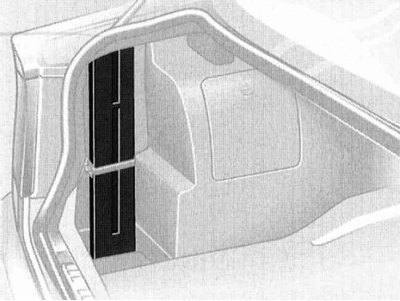
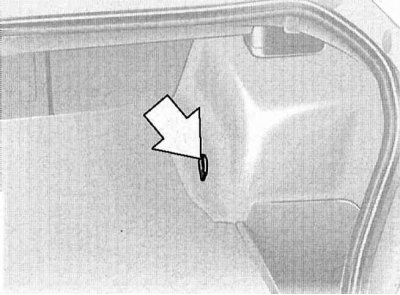
The sign is located in a niche, on the left in the trunk.
Follow the established rules regarding the presence of an emergency stop sign on the vehicle in use.
First aid kit*
The first aid kit is located under the front passenger seat.
To open the first aid kit, pull the handle and flip the lid down.
To close the first aid kit, slam the lid down by lifting it up.
The shelf life of some medications in the first aid kit is limited. Therefore, regularly check the contents of the first aid kit and promptly replace expired medications with new ones. These medications can be purchased at any pharmacy. Follow the established rules regarding the presence of a first aid kit in the vehicle in use.
This article is available at russian, bulgarian, belarusian, ukrainian, serbian, croatian, romanian, polish, slovak, hungarian
Article verified: Sevastyanov Nikolay
Share information:
Previous articles
БМВ E46: Manual
Next articles
Similar articles on other types of BMW cars:
Electrical equipment diagram for cars «525» and «528» BMW 5 Series E12 (1972-1981)
Body / interior equipment BMW 5 Series E39 (1995-2003)
Electrical equipment. General information BMW 7 Series E32 (1986-1994)
Service technology, tools and workplace equipment BMW 7 Series E38 (1994-2001)
Salon care BMW X3 E83 (2003-2010)
Salon attributes BMW X5 E53 (1999-2006)
Link in different formats to this page
Visitor comments
No comments yet
- General information
- Manual
- Maintenance
- Power unit
- Engine repair
- Cooling system
- Power system (gasoline)
- Injection system (gasoline)
- Fuel system (diesel)
- Exhaust system
- Ignition system
- Charge and launch systems
- Transmission
- Car gearbox
- Clutch and drive shafts
- Chassis
- Brake system
- Suspension front and rear
- Steering
- Body
- Body care and repair
- Exterior
- Interior
- Electrical equipment
- Troubleshooting
- Lighting and signaling
- Equipment and devices
- Heater and air conditioner
- Electrical circuits
- General information
- Manual
- Repair on the road
- Weekly checks
- Maintenance
- Troubleshooting
- Power unit
- 4 cylinder engines
- 6 cylinder engines
- Engine overhaul
- Cooling and heating
- Fuel and exhaust system
- Starting and charging system
- Ignition system
- Transmission
- Clutch
- Mechanical gearbox
- Automatic gearbox
- Cardan and drive shafts
- Chassis
- Brake system
- Wheel suspension
- Steering
- Body
- Exterior
- Interior
- Electrical equipment
- Equipment and devices
- Electrical circuits
- General information
- Maintenance
- Power unit
- Engine repair
- Cooling system
- Ignition system
- Supply system
- Fuel injection system
- Exhaust system
- Transmission
- Clutch
- Car gearbox
- Front and rear axle
- Chassis
- Steering
- Brake system
- Body
- Exterior
- Interior
- Electrical equipment
- Heating system
- Equipment and devices
- Power devices
- Electrical circuits
- Power unit
- M10/M20 engine
- M40 engine
- Ignition system
- Lubrication system
- Cooling system
- Supply system
- Fuel injection
- Exhaust system
- Transmission
- Clutch
- Manual gearbox
- Front axle
- Rear axle
- Chassis
- Steering
- Brake system
- Body
- Exterior
- Interior
- Electrical equipment
- Heating system
- Equipment and devices
- Electrical circuits
- General information
- Specifications
- Operation and maintenance
- 4-cylinder engine
- Engine repair
- Cooling and lubrication system
- Supply system
- Ignition system
- 6-cylinder engine
- Engine repair
- Cooling and lubrication system
- Supply system
- Fuel injection system
- Ignition system
- Transmission
- Clutch
- 4-speed manual gearbox
- 5-speed manual gearbox
- Automatic gearbox
- Cardan and rear axle
- Chassis
- Steering
- Front suspension
- Rear suspension
- Brake system
- Electrical equipment
- Equipment and devices
- Electrical circuits