
Table of contents: Heater and ventilation of the…↓ Automatic air conditioning* ↓ Draft-free ventilation ↓ Microfilter ↓ Quick ventilation ↓ Quick warm-up of the interior ↓ Defrosting and drying glass ↓ Heating ↓ Good microclimate for good health ↓ Automatic air distribution ↓ Individual air distribution ↓ Temperature ↓ Air supply ↓ Defrosting and drying glass ↓ Conditioning ↓ Circulation mode ↓ Automatic Outdoor Air Pollution…↓ Rear window heating ↓ Draft-free ventilation ↓ Microfilter, activated carbon filter* ↓
- Home
- BMW 3 Series
- E46
- General information
- Manual
- Heater, ventilation and air conditioning of the passenger compartment
Heater, ventilation and air conditioning of the passenger compartment (BMW 3 Series E46)
Heater and ventilation of the passenger compartment
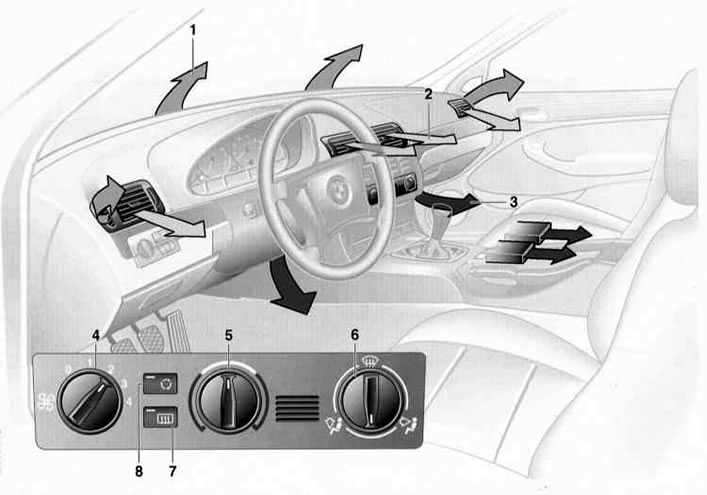
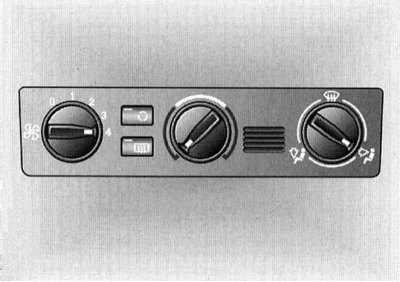
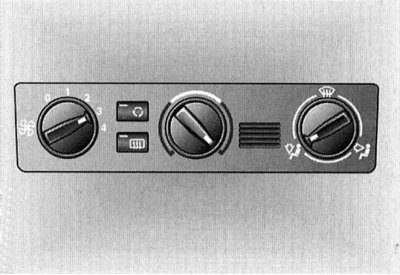
1 - Air supply to the windshield and side windows
2 - Supply air to the upper body
The wheels allow you to smoothly open and close the air supply, and the levers change the direction of the air flow entering the cabin
3 - Air supply to the feet in the front part of the cabin
Similar nozzles are also located in the rear of the cabin
4 — Air supply regulator
Heating and ventilation operate when the ignition key is in position 1 or 2
5 — Temperature regulator
6 — Air distribution regulator to the windows
- to the upper body
- to the feet
Any intermediate positions are possible
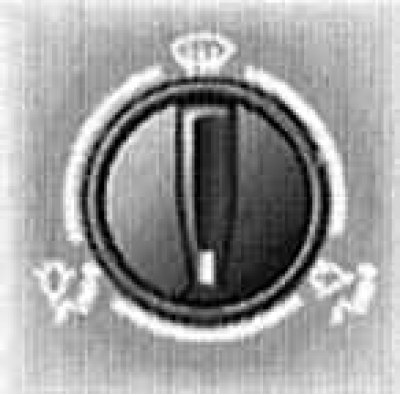
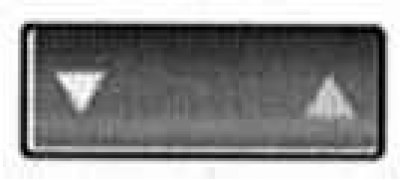
7 — Rear window heating switch
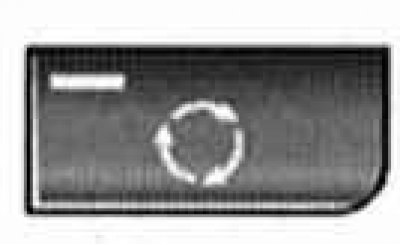
8 — Circulation mode activation key
Automatic air conditioning*

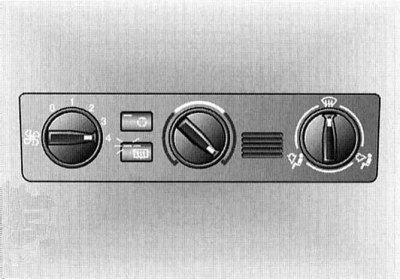
1 - Air supply to the windshield and side windows
2 - Supply air to the upper body
The side wheels allow smooth opening and closing of the air supply, and the levers provide a change in the direction of the incoming air flow. The middle wheel regulates the ratio of cold and warm air
3 - Air supply to the feet in the front part of the cabin
Similar nozzles are also located in the rear of the cabin
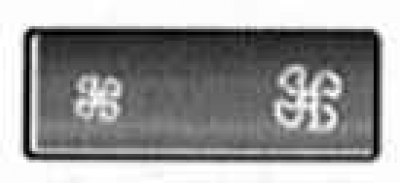
4 — Circulation mode / Automatic control of outdoor air pollution (AUC)*
5 — Air supply regulator
6 — Temperature regulator
7 - Automatic air distribution
8 - Individual air distribution
9 — Air intake grille for temperature sensor - do not obstruct
10 — Supply air temperature indicator
11 - Defrosting and drying glass
12 — Air conditioning
13 — Rear window heating (Section Rear window defroster)
Air supply
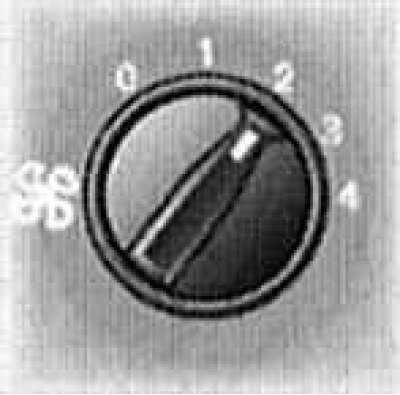
The air supply can be adjusted in steps (from 1 to 4). The stronger the air supply, the more efficient the heating and ventilation. In position O the fan and heating are off. In position O the air supply can be completely stopped by pressing the circulation mode button.
Temperature
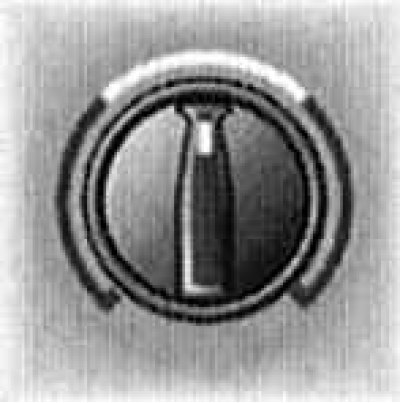
To increase the air temperature in the cabin, turn the regulator to the right (red marking). For faster heating, turn the regulator to the extreme right position. Then select a comfortable temperature for you.
Air distribution
You can direct the air coming into the cabin to the windows
Rear window heating
When the rear window heating is on, the indicator lamp lights up. The rear window heating switches off automatically, refer to Section Rear window defroster.
Circulation mode
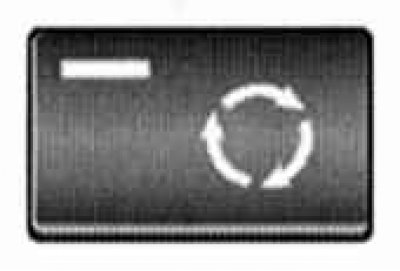
If there are unpleasant odors in the outside air, you can temporarily stop it from entering the cabin. In this case, only the air in the cabin will be used.
If the windows fog up when the recirculation mode is on, turn off the recirculation mode and increase the air supply if necessary.
Draft-free ventilation
You can adjust the air flow to your upper body according to your wishes.
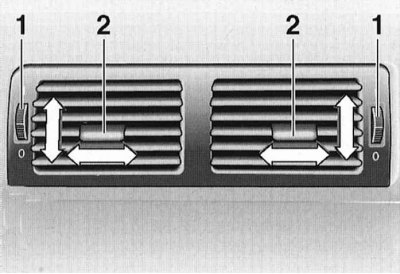
The grooved wheels 1 allow you to smoothly open and close the nozzles. The levers 2 allow you to change the direction of the air entering the passenger compartment.
Adjust the nozzles so that the air flow does not hit you directly, but passes by.
Microfilter
The microfilter installed in your BMW traps dust particles and pollen present in the air taken in from outside. It is replaced during maintenance. The need for early replacement of the filter can be determined by a significant reduction in the maximum air flow.
For more information on replacing the filter, see Section Replacing the cabin air filter element.
Quick ventilation
1. Set the air supply fan regulator to position 4.
2. Set the temperature regulator to the far left (blue marking) position. Then select a comfortable temperature for you in the cabin.
3. Set the air distribution regulator to position
4. Open the nozzles to supply air to the upper body.
Quick warm-up of the interior
1. Set the air supply fan regulator to position 3.
2. Set the temperature regulator to the far right (red marking) position. Then select a comfortable temperature for you in the cabin.
3. Set the air distribution regulator to position
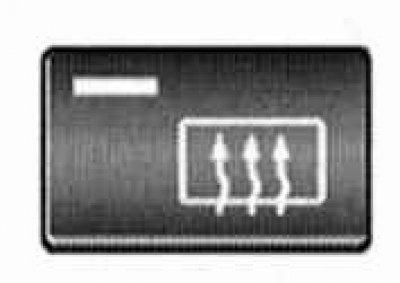
Defrosting and drying glass
1. Set the air supply fan regulator to position 4.
2. Set the temperature regulator to the far right (red marking) position.
3. Set the air distribution regulator to position
4. To defrost the rear window, turn on its heating.
Heating
If the windows are not frozen or fogged up, the following installation is recommended:
1. Set the air supply fan regulator to position 2.
2. Use the temperature controller to select a comfortable temperature in the cabin.
3. Set the air distribution regulator to position
Good microclimate for good health
Use the automatic system - press button 7. Select a temperature that is comfortable for you, for example 22°C. You can use the air conditioner (12) as soon as the outside temperature exceeds 5°C. The air conditioner dries the air, prevents the windows from fogging up if, for example, people get into the car in wet clothes. Adjust the nozzles (2) so that the air does not hit you directly, but flows around you on the sides. Turn the knurled wheel between the nozzles (2) to the middle position, since some amount of cold air helps you not to get tired while driving.
More detailed information on setting up the automatic air conditioner is given below.
# You can set up your car so that when you unlock it using your personal key remote control, the automatic air conditioning will turn on according to the settings you have set in advance.
Automatic air distribution
The automatic program (AUTO) will relieve you of the burden of adjusting the distribution and supply of air and, in addition, will bring the temperature parameters you entered into line with external conditions (summer, winter). The system will provide pleasant climate comfort in the car at any time of the year. Select a comfortable temperature in the cabin, for example 22°C. The parameters you entered, as well as the AUTO inscription for air supply, are displayed on indicator 10. Open the deflectors of the air supply nozzles to the upper part of the body. In the warm season, turn on the air conditioner. Maximum cooling is provided by setting the knurled wheel 3 to the "Cold" position.
Individual air distribution

You can set the air distribution mode yourself and thus turn off the automatic system. Air is supplied to the glass
Temperature
The numbers on the indicator are the temperature in the cabin. It is advisable to set the temperature to 22°C, including with the air conditioner on. Once the car starts moving, the selected temperature - both in summer and winter - is set very quickly and maintained at a constant level.
Turn the knurled wheel 3 (subsection "Draft-free ventilation") to the middle position, as a certain amount of cold air helps you not to get tired while driving. Use this opportunity to make slight adjustments to the microclimate in the cabin.
By setting the temperature to 32°C, you thereby turn on the maximum unregulated heating power. Selecting 16°C with the air conditioner on turns on the full cooling power.
Air supply
By pressing the left or right side of the key, you can adjust the air supply. The automatic air supply mode is turned off, but the automatic air distribution mode is maintained.
If you press the left side of the key at the minimum fan level, all the indicators will go out: the fan, heater and air conditioner will turn off, the air supply will be blocked. By pressing any key of the automatic air conditioner you can turn the system on again.
Defrosting and drying glass
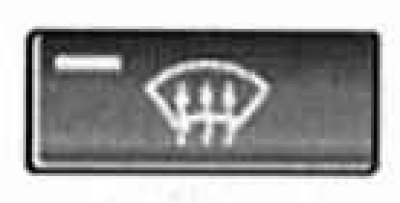
This program will provide quick defrosting and drying of the windshield and side windows.
Conditioning
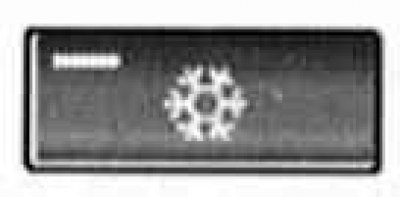
When the air conditioner is switched on, the incoming outside air is cooled, dried and, if necessary, - depending on the selected temperature - heated again.
Depending on weather conditions, the windshield may fog up for a while after starting the engine.
When the outside temperature is below +5°C, turn off the air conditioner. This will help you avoid fogging up the windows.
If the windows fog up after turning off, turn the air conditioner back on.
Water condensation settles in the air conditioner and drains under the car. Therefore, traces of water on the road are not a sign of a malfunction.
Circulation mode
If there are unpleasant odors in the outside air, you can temporarily stop it from entering the cabin. In this case, the system will use only the air in the cabin.
If the windows fog up when the recirculation mode is on, turn off the recirculation mode and increase the air supply if necessary.
Automatic Outdoor Air Pollution Control (AUC)
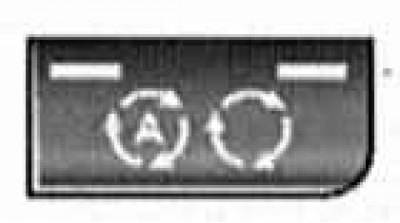
If there are unpleasant odors in the outside air, you can stop it from entering the cabin. In this case, the system will use only the air in the cabin. Pressing the button successively allows you to select one of three operating modes:
Indicator lights do not light: outside air is entering.
The left indicator lamp is on: AUC mode. The system has detected an increased concentration of harmful substances in the outside air and has blocked its flow into the passenger compartment. Only the air in the passenger compartment is used.
Subsequently, depending on the quality composition of the air, switching is carried out from the circulation mode to the supply of outside air and back.
Right indicator lamp lights: Outside air supply is completely stopped. Only air from inside the vehicle is used.
If the windows fog up when the recirculation mode is on, turn off the recirculation mode and increase the air supply if necessary.
Rear window heating

When the rear window heating is on, the indicator lamp lights up. The rear window heating switches off automatically, refer to Section Rear window defroster.
Draft-free ventilation
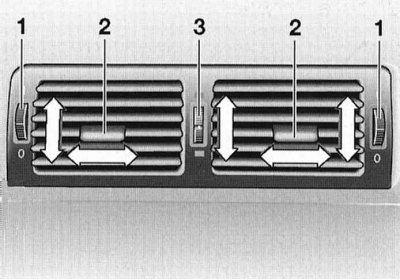
You can adjust the air flow to your upper body according to your wishes.
The grooved wheels 1 allow you to smoothly open and close the nozzles. The levers 2 allow you to change the direction of the air entering the passenger compartment.
Adjust the nozzles so that the air does not hit you directly, but flows around you on the sides.
The knurled wheel 3 allows you to add more or less cold air to the air supplied to the upper part of the body.
Microfilter, activated carbon filter*
Your BMW is equipped with a microfilter that traps dust particles and pollen present in the air taken in from outside. The activated carbon filter removes gaseous harmful substances from the incoming air. The combined filter* is replaced during maintenance. The need for early replacement can be determined by a significant reduction in the maximum air flow.
For more information on replacing the filter, see Section Replacing the cabin air filter element.
Information obtained from this online resource BMWman.ru
This article is available at russian, bulgarian, belarusian, ukrainian, serbian, croatian, romanian, polish, slovak, hungarian
Article verified: Sevastyanov Nikolay
Share information:
Previous articles
БМВ E46: Manual
Next articles
Similar articles on other types of BMW cars:
Rear passenger compartment light left BMW 5 Series E39 (1995-2003)
Heating, ventilation and air conditioning BMW 5 Series E34 (1988-1996)
Automatic ventilation, heating and air conditioning (HVAC) system BMW 7 Series E38 (1994-2001)
Heating/Air Conditioning Control Unit — Removal and Installation BMW 7 Series E32 (1986-1994)
Glove compartment BMW X3 E83 (2003-2010)
Wiring diagram for front passenger compartment lighting BMW X5 E53 (1999-2006)
Link in different formats to this page
Visitor comments
No comments yet
- General information
- Manual
- Maintenance
- Power unit
- Engine repair
- Cooling system
- Power system (gasoline)
- Injection system (gasoline)
- Fuel system (diesel)
- Exhaust system
- Ignition system
- Charge and launch systems
- Transmission
- Car gearbox
- Clutch and drive shafts
- Chassis
- Brake system
- Suspension front and rear
- Steering
- Body
- Body care and repair
- Exterior
- Interior
- Electrical equipment
- Troubleshooting
- Lighting and signaling
- Equipment and devices
- Heater and air conditioner
- Electrical circuits
- General information
- Manual
- Repair on the road
- Weekly checks
- Maintenance
- Troubleshooting
- Power unit
- 4 cylinder engines
- 6 cylinder engines
- Engine overhaul
- Cooling and heating
- Fuel and exhaust system
- Starting and charging system
- Ignition system
- Transmission
- Clutch
- Mechanical gearbox
- Automatic gearbox
- Cardan and drive shafts
- Chassis
- Brake system
- Wheel suspension
- Steering
- Body
- Exterior
- Interior
- Electrical equipment
- Equipment and devices
- Electrical circuits
- General information
- Maintenance
- Power unit
- Engine repair
- Cooling system
- Ignition system
- Supply system
- Fuel injection system
- Exhaust system
- Transmission
- Clutch
- Car gearbox
- Front and rear axle
- Chassis
- Steering
- Brake system
- Body
- Exterior
- Interior
- Electrical equipment
- Heating system
- Equipment and devices
- Power devices
- Electrical circuits
- Power unit
- M10/M20 engine
- M40 engine
- Ignition system
- Lubrication system
- Cooling system
- Supply system
- Fuel injection
- Exhaust system
- Transmission
- Clutch
- Manual gearbox
- Front axle
- Rear axle
- Chassis
- Steering
- Brake system
- Body
- Exterior
- Interior
- Electrical equipment
- Heating system
- Equipment and devices
- Electrical circuits
- General information
- Specifications
- Operation and maintenance
- 4-cylinder engine
- Engine repair
- Cooling and lubrication system
- Supply system
- Ignition system
- 6-cylinder engine
- Engine repair
- Cooling and lubrication system
- Supply system
- Fuel injection system
- Ignition system
- Transmission
- Clutch
- 4-speed manual gearbox
- 5-speed manual gearbox
- Automatic gearbox
- Cardan and rear axle
- Chassis
- Steering
- Front suspension
- Rear suspension
- Brake system
- Electrical equipment
- Equipment and devices
- Electrical circuits