
Table of contents: Removal ↓ Installation ↓
- Home
- BMW 3 Series
- E46
- Body
- Interior
- Door windows and window lifters (sedan and tourist models) — removal and installation
Door windows and window lifters (sedan and tourist models) — removal and installation (BMW 3 Series E46)
Removal
Front door glass
Note: BMW recommends replacing the plastic glass "holders" each time the glass is released from the clamps.
1. Lower the glass completely and raise it approximately 140 mm (the distance is measured along the rear edge of the glass).
2. On models with power windows, disconnect the cable from the negative battery terminal (see chapter 5A).
3. Remove the door trim and sound insulation (see paragraph 12).
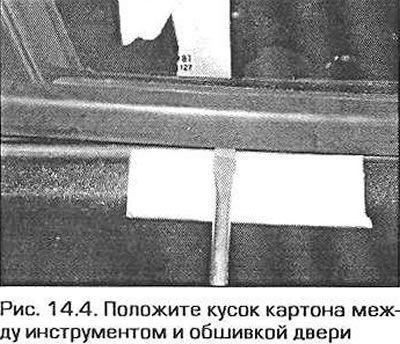
4. Using a wide, flat tool, carefully separate the outer glass seal from the door (start working from the trailing edge of the seal) (Fig. 14.4) Place a piece of cardboard between the door and the tool (to avoid scratching the paintwork).
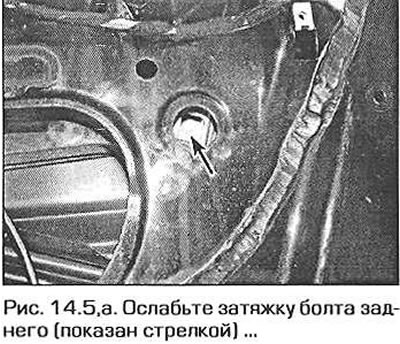
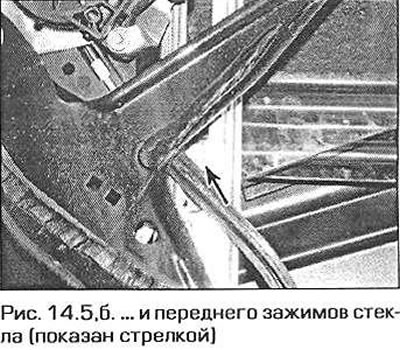
5. Loosen the front and rear glass clamp bolts (fig. 14.5, a, b).
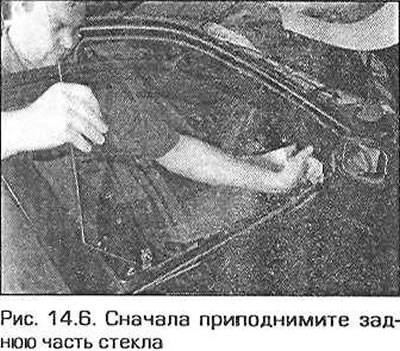
6. Remove the glass from the window opening (starting from the back) and remove it from the vehicle (Fig. 14.6).
Front door window lifter
7. Release the glass from the window regulator clamps (see above). Keep in mind that it is not necessary to remove the glass. It is enough to secure the glass in the fully raised position with tape.
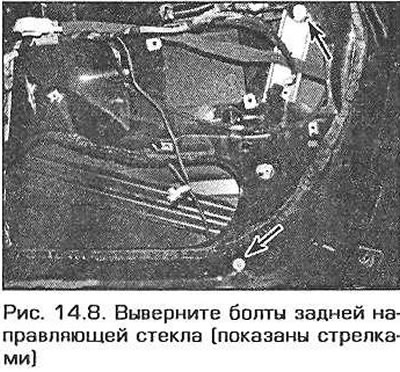
8. Unscrew the bolts securing the rear glass guide and lower the guide down (Fig. 14.8).
9. On models with power windows, disconnect the wiring connectors from the window motor and release the wiring harness from its fasteners.
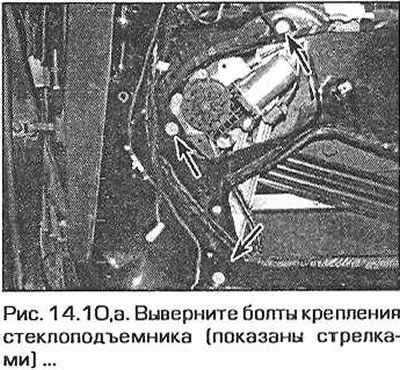
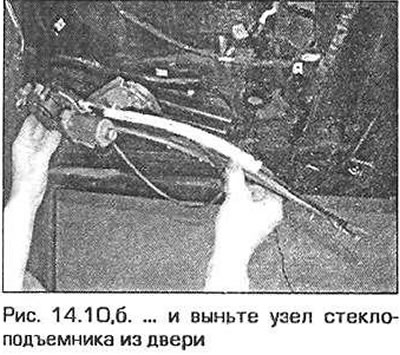
10. On all models, loosen the window regulator mounting nuts, remove the clips and lower the window regulator assembly down. Remove the window regulator from the door opening (first remove the rear part of the window regulator) (fig. 14.10, a, b).
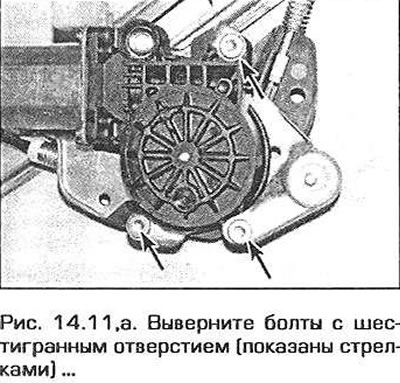
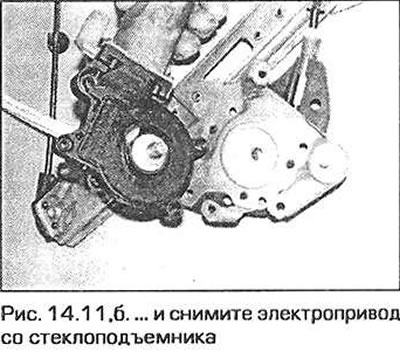
11. Unscrew the mounting bolts and disconnect the electric motor from the window lifter (if it exists) (fig. 14.11, a, b).
Rear door glass
Note: BMW recommends replacing the plastic glass "holder" each time the glass is released from the clamps.
12. Remove the door trim and sound insulation (see paragraph 12).
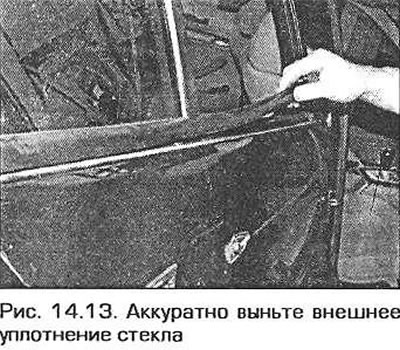
13. Using a wide, flat tool, carefully separate the outer glass seal from the door (start working from the trailing edge of the seal) (fig. 14.13). Place a piece of cardboard between the door and the tool (to avoid scratching the paintwork).
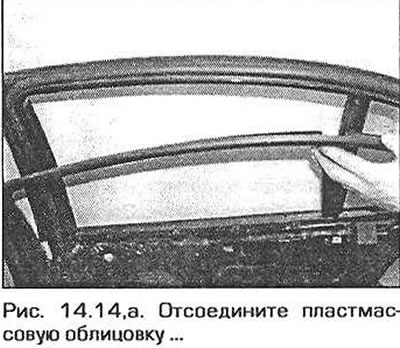
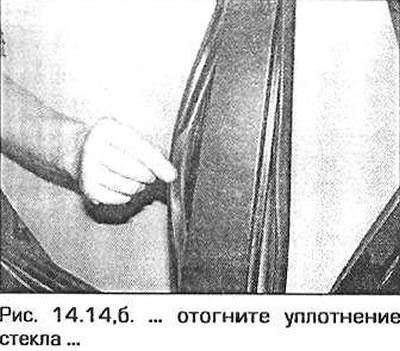
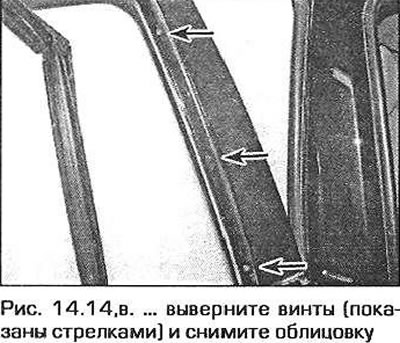
14. Carefully detach the plastic door trim, then bend back the inner glass seal in the area of the front end of the door (to access the screws that secure the trim). Remove the screws, detach the protective film from the trim and remove the trim from the car (fig. 14.14, a-c).
15. Lower the glass completely, then raise it approximately 115 mm (measuring along the front edge of the glass). On models with power windows, disconnect the cable from the negative battery terminal (see chapter 5A).
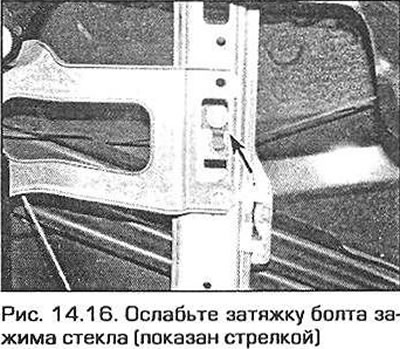
16. Loosen the glass clamp screw (fig. 14.16).
17. Remove the glass from the door.
Fixed rear door glass
18. Since the fixed rear door glass is glued, replacement of this glass must be carried out at a specialized service station.
Rear door window lifter
19. Remove the door trim and sound insulation (see paragraph 12).
20. Lower the glass completely, then raise it approximately 11.5 mm (measuring along the front edge of the glass) so that the glass clamp screw is visible. Loosen the screw and lift the glass completely (fig. 14.16). Secure the glass with tape (fig. 14.20).

21. On models with power windows, disconnect the cable from the negative battery terminal (see chapter 5A). Disconnect the electrical wiring connector from the window lift motor (fig. 14.21) and release the wiring harness from the fasteners.

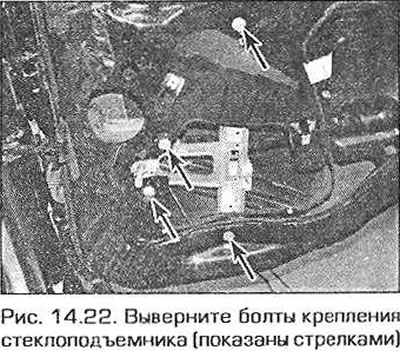
22. On all models, remove the window regulator mounting bolts, lift the lower part of the window regulator and remove the window regulator from the door opening (fig. 14.22).
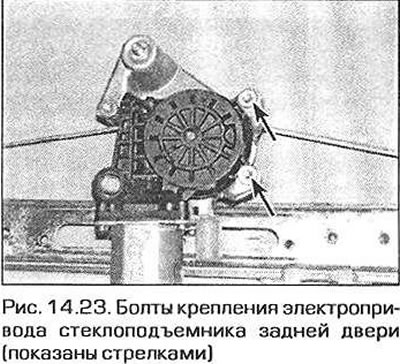
23. Unscrew the two mounting bolts and remove the electric motor from the window lifter (if it exists) (fig. 14.23).
Rear side fixed glass (tourist model)
24. Since the rear fixed side glass is glued, replacement of this glass must be carried out at a specialized service station.
Installation
Front door glass
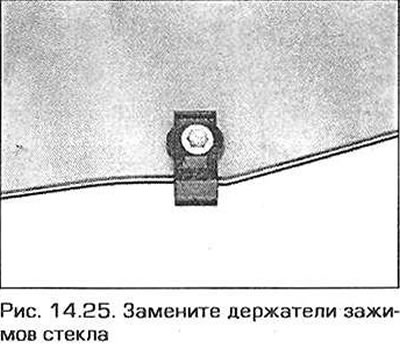
25. Installation is carried out in the reverse order of removal. Wet the outer glass seal with soapy water (dishwashing liquid). Install new glass clamp "holders" (fig. 14.25). Before installing the door sound insulation, loosen the rear glass guide mounting bolts (Fig. 14.8) Connect the battery (if it was turned off) and lower the window completely. Tighten the rear guide mounting bolts. Check the operation of the window lifter and make sure that the glass moves smoothly and without sticking.
Front door window lifter
26. Installation is performed in the reverse order of removal. Install the glass and adjust it (see above).
Rear door glass
27. Installation is performed in the reverse order of removal. Install new glass clamp "holders" (fig. 14.25). Before installing door sound insulation, check the operation of the window lift and make sure that the glass moves smoothly and without sticking.
Fixed rear door glass
28. Installation is carried out in the reverse order of removal. Make sure that the glass seal is correctly positioned in the door.
Rear door window lifter
29. Installation is performed in the reverse order of removal. Before installing the door sound insulation, check the operation of the window lifter and make sure that the glass moves smoothly and without jamming.
This article is available at russian, bulgarian, belarusian, ukrainian, serbian, croatian, romanian, polish, slovak, hungarian
Article verified: Ilyinsky Matvey
Share information:
Previous articles
БМВ E46: Interior
Next articles
Door handles and locks — removal and installation
Interior door trim — removal and installation
Doors — removal, installation and adjustment
Carpet and Upholstery Care
Technical data. Tightening torques of connections, Nm
Interior door trim — removal and installation
Doors — removal, installation and adjustment
Carpet and Upholstery Care
Technical data. Tightening torques of connections, Nm
Door glass, window lifters and rear vent window (coupe model) —…
Trunk Lid/Tailgate and Support Pillars — Removal and Installation
Trunk Lid/Tailgate Lock Components — Removal and Installation
Central locking system components — removal and installation
Power Window Components — Removal and Installation
Trunk Lid/Tailgate and Support Pillars — Removal and Installation
Trunk Lid/Tailgate Lock Components — Removal and Installation
Central locking system components — removal and installation
Power Window Components — Removal and Installation
Similar articles on other types of BMW cars:
Removal and installation the door window lifter BMW 5 Series E28 (1981-1988)
Removal and installation gas-filled shock absorbers of the rear door… BMW 5 Series E39 (1995-2003)
Removal and installation of window lifters BMW 7 Series E38 (1994-2001)
Door — removal, installation and adjustment BMW 7 Series E32 (1986-1994)
Removal and installation the rear door BMW X3 E83 (2003-2010)
Removal and installation the front door window lift with electric… BMW X5 E53 (1999-2006)
Link in different formats to this page
Visitor comments
No comments yet
- General information
- Manual
- Maintenance
- Power unit
- Engine repair
- Cooling system
- Power system (gasoline)
- Injection system (gasoline)
- Fuel system (diesel)
- Exhaust system
- Ignition system
- Charge and launch systems
- Transmission
- Car gearbox
- Clutch and drive shafts
- Chassis
- Brake system
- Suspension front and rear
- Steering
- Body
- Body care and repair
- Exterior
- Interior
- Electrical equipment
- Troubleshooting
- Lighting and signaling
- Equipment and devices
- Heater and air conditioner
- Electrical circuits
- General information
- Manual
- Repair on the road
- Weekly checks
- Maintenance
- Troubleshooting
- Power unit
- 4 cylinder engines
- 6 cylinder engines
- Engine overhaul
- Cooling and heating
- Fuel and exhaust system
- Starting and charging system
- Ignition system
- Transmission
- Clutch
- Mechanical gearbox
- Automatic gearbox
- Cardan and drive shafts
- Chassis
- Brake system
- Wheel suspension
- Steering
- Body
- Exterior
- Interior
- Electrical equipment
- Equipment and devices
- Electrical circuits
- General information
- Maintenance
- Power unit
- Engine repair
- Cooling system
- Ignition system
- Supply system
- Fuel injection system
- Exhaust system
- Transmission
- Clutch
- Car gearbox
- Front and rear axle
- Chassis
- Steering
- Brake system
- Body
- Exterior
- Interior
- Electrical equipment
- Heating system
- Equipment and devices
- Power devices
- Electrical circuits
- Power unit
- M10/M20 engine
- M40 engine
- Ignition system
- Lubrication system
- Cooling system
- Supply system
- Fuel injection
- Exhaust system
- Transmission
- Clutch
- Manual gearbox
- Front axle
- Rear axle
- Chassis
- Steering
- Brake system
- Body
- Exterior
- Interior
- Electrical equipment
- Heating system
- Equipment and devices
- Electrical circuits
- General information
- Specifications
- Operation and maintenance
- 4-cylinder engine
- Engine repair
- Cooling and lubrication system
- Supply system
- Ignition system
- 6-cylinder engine
- Engine repair
- Cooling and lubrication system
- Supply system
- Fuel injection system
- Ignition system
- Transmission
- Clutch
- 4-speed manual gearbox
- 5-speed manual gearbox
- Automatic gearbox
- Cardan and rear axle
- Chassis
- Steering
- Front suspension
- Rear suspension
- Brake system
- Electrical equipment
- Equipment and devices
- Electrical circuits