
Removal and installation the left wishbone
Note: If the lower wishbone was disconnected from the rear axle beam/trailing arm, the wheel alignment must be checked and adjusted after installation.
1. Remove the rear wheel.
2. Disconnect the anti-roll bar from the rear axle beam.
3. Support the rear axle gearbox and disconnect it from the rear axle beam.
Caution: To avoid damaging the axle shaft, the trailing arm must be supported with a jack.
4. Support the trailing arm with a jack.
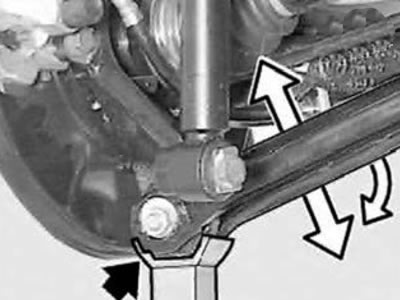
5. Loosen and remove the lower control arm cover.
Note:
- When installing, make sure that the slot in the casing is facing upwards.
- Replace the damaged plug.
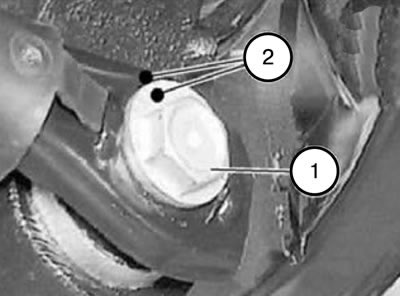
6. Using a punch (2), mark the position of the eccentric bolt (1) in relation to the lower wishbone.
7. Transfer the mark from the old part to the new one.
Note: Only when replacing the lower control arm.
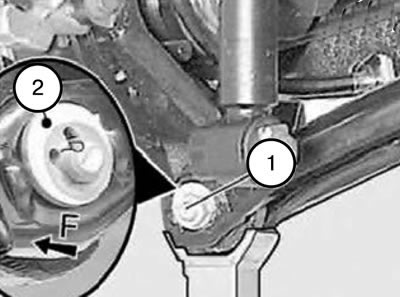
8. Unscrew the nut (1) and remove the eccentric (2).
9. Remove the eccentric bolt forward.
Note:
- When installing, make sure that the eccentric bolt is inserted from the correct side.
- Align the eccentric bolt with the mark relative to the lower wishbone.
- Install the eccentric in place.
- Replace the self-locking nut.
- Tighten the bolt when the vehicle is normally loaded.
Tightening torque: 100 Nm.
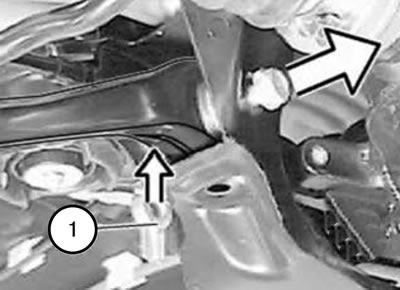
10. Unscrew the bolt and remove the nut (1), grasping it from below.
11. Push the rear axle gearbox to the side and remove the bolt.
12. Remove the lower control arm by moving it to the side.
Note:
- When installing, it is necessary to insert a washer with an internal thread into the recess of the rear axle beam.
- Tighten the bolt when the vehicle is normally loaded.
Tightening torque: 77 Nm.
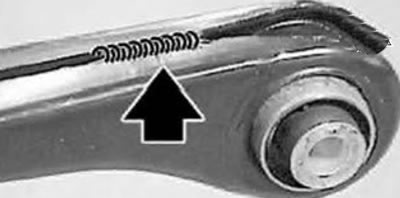
Note: The wishbone weld should be on top.
13. Installation should be carried out in the reverse order of removal, taking into account the above notes.
14. Check the correct position of the axle shaft in the rear axle gearbox.
15. Check and adjust the wheel alignment angles.
(You can find the original version on the portal «BMWMAN.ru»)