
Attention:
- It is necessary to strictly follow the sequence of actions when removing and installing the exhaust camshaft.
- Risk of damage.
- The upper and lower support bars must be secured with a total of six 114461 fixtures.
1. Remove the cylinder head cover.
2. Remove the VANOS system actuator.
3. Adjust the valve timing.
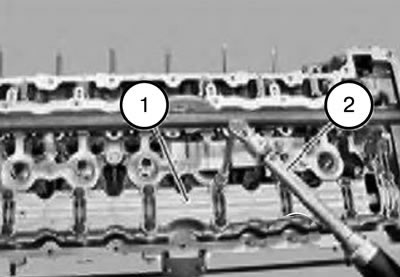
Note: The threaded fastening of the support strips must be unscrewed starting from the edges and moving towards the center.
4. Remove the upper and lower support strips (1) with the exhaust camshaft in an upward motion.
5. Remove the upper support bar (1).
6. Remove the exhaust camshaft from the lower support plate.
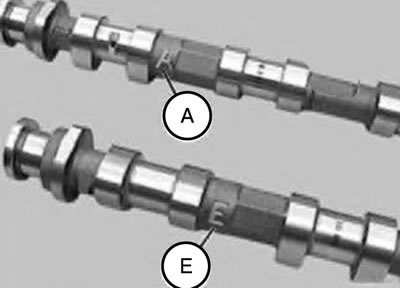
Attention:
- The markings on the intake camshaft and the exhaust camshaft are different.
- Installing the intake camshaft in place of the exhaust camshaft and vice versa will damage the engine.
A - Exhaust camshaft.
E - Intake camshaft.
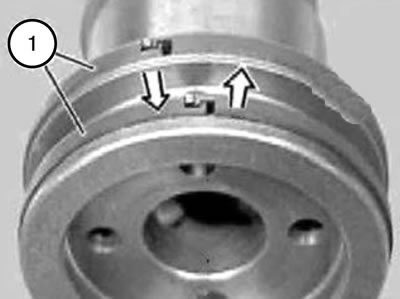
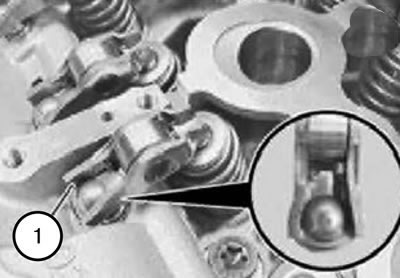
7. Check the rectangular rings (1) for damage and replace if necessary.
8. The rings (1) of rectangular cross-section snap into place at the joint.
9. Unclasp the rectangular ring (1), one end up, the other end down, and remove it forward.
Caution: Rectangular rings (1) are easily broken.
Attention:
Removal on engine:
- Set the engine to the TDC position of the 1st cylinder.
Removed cylinder head:
- When using tool 119000, the aluminum gasket must be removed.
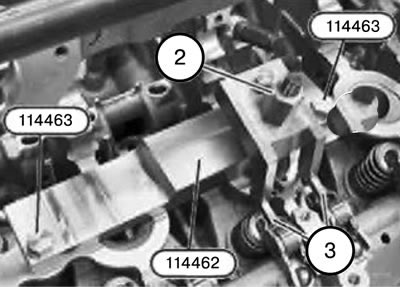
10. Pre-install tool 114462 on the 2nd cylinder.
11. Insert tool 114463 into the cylinder head cover mounting hole.
Attention:
- Tool 114463 is a special screw.
- Press the lever (3) of the 2nd cylinder pusher with the nut (2) of the spindle of the device 114462.
Note: Before installing the exhaust camshaft, pay attention to the position of the pushrod lever (1) on the hydraulic valve clearance compensation system element.

12. Place the lower support bar (1) with the exhaust camshaft (2) on the pushrod levers.
13. Adjust the exhaust camshaft (2).
Note:
- The cams of the 2nd and 4th cylinders are set to overlap the valves.
- The cams (3) of the 1st cylinder point upwards at an angle.
- The part number (4) on the flat of the exhaust camshaft (2) points upwards.

Attention:
- There should be no oil residue in the threaded holes of the cylinder head.
- Clean the threaded holes.
14. Put on the upper support bar (1).
15. Install bolts dry.
16. Tighten the bolts securing the upper support bar (1) to the exhaust camshaft on supports 3 and 5 by 1/2 turn.
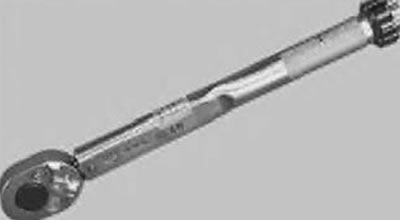
17. Tighten the exhaust camshaft mounting bolts with the upper and lower support plates (1) using a torque wrench (2) from the middle to the edges with a torque of 8 Nm.
18. Loosen all bolts securing the upper support bar (1) from the middle to the edges by 90°.

Note:
- When installing, the upper and lower support strips must be aligned with each other on the sanded surfaces (1 and 2).
- Make sure that the thrust disc and support of the 114461 fixtures fit snugly against the milled surfaces.
Note:
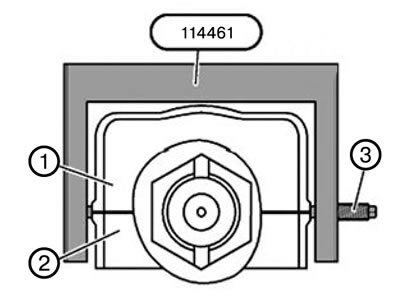
- Schematic representation of the 114461 fixture on the upper support bar (1) and the lower support bar (2).
- All 114461 fittings must be pre-tensioned using fitting 114350 only.
Caution: Tighten the screw (3) on the thrust disc to a torque of 2 Nm.
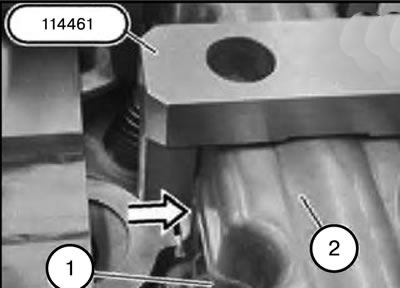
19. Place tool 114461 onto the threaded fastening of the support strips.
20. Make sure that the supports fit precisely against the ground surfaces of the upper support bar (2) and the lower support bar (1).
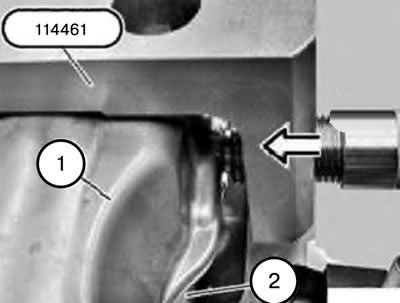
21. Install the screw of the device 114461 on the ground surfaces of the upper support bar (1) and the lower support bar (2).
Caution: Tighten the screws on the thrust disc to 2 Nm.
Attention:
- Adjust tool 114350 to 2 Nm.
- All 114461 fittings must be pre-tensioned using fitting 114350 only.
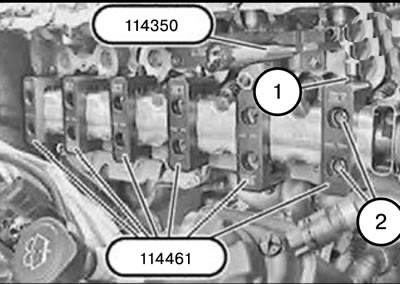
22. Install tools 114461 with screw (1) to the inside of the cylinder head.
23. Install tool 114461 on the 2nd cylinder with the screw facing outward.
24. Place the 114461 tool so that the bolts (2) securing the support strips are accessible.
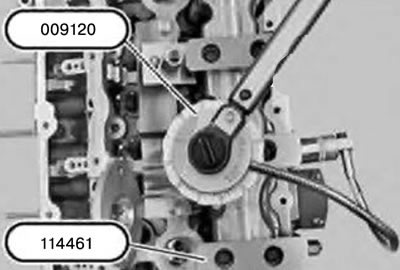
25. Tighten the upper and lower support strips using tool 009120.
Tightening torque: 8 Nm + 60°.
Caution: Tool 114461 can only be removed when the exhaust camshaft threads are tightened.
26. Assemble the engine.
[The original article is posted on the resource: bmwman.ru]