
Note. You will need new steering column shear bolts and a new pinch bolt and countershaft yoke nut for installation.
Withdrawal
1. Disconnect the wire from the negative battery terminal (see chapter 5A).
2. Remove the steering wheel (see paragraph 17).
3. Remove the steering column switch assembly (see chapter 12, paragraph 4).
4. In the engine compartment, mark with paint or a marker to align the lower end of the steering column with the intermediate shaft hinge.
5. Turn away a nut of a coupling bolt and disconnect a column from an intermediate shaft.
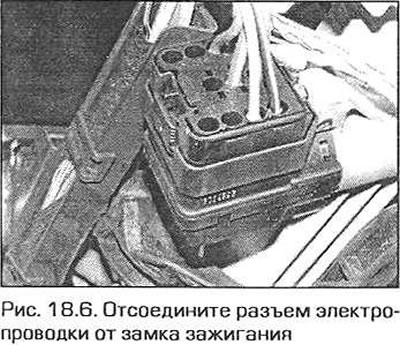
6. Disconnect the wiring connector from the ignition switch, then disconnect the wiring harness from the steering column (pic. 18.6).
7. Press the latch, then disconnect the lock cable from the steering column (if it exists) (see fig. 19.6).
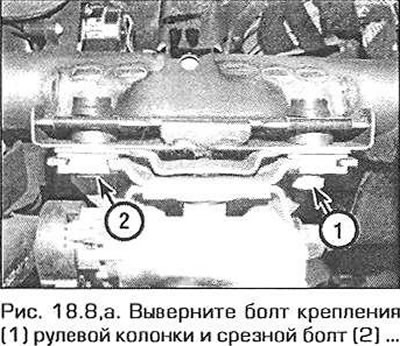
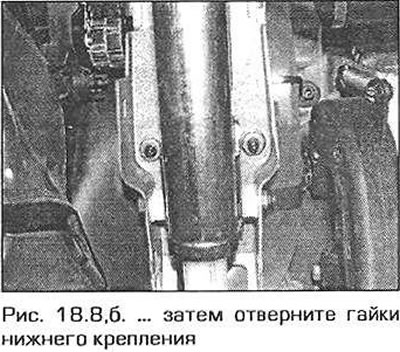
8. The steering column is attached with two nuts, one bolt and one shear bolt. You can try to unscrew the shear bolt with a hammer and chisel. Alternatively, drill a hole in the center of the bolt, insert a stud extractor and remove the bolt. Remove remaining bolts/nuts (pic. 18.8, a, b).
9. Pull the column up and out of the bulkhead, then remove the rubber support, seat, washer, and retaining ring from the bottom end of the column. Remove the steering column bushings.
Examination
10. The steering column is telescopic (to improve safety). In a frontal collision, the shaft folds up to avoid injury to the driver. Before installing the steering column, pay special attention to the inspection of the support bushings. If bushings show signs of wear or damage, replace them.
11. Inspect the steering shaft and make sure there is no play between it and the bushings. If the shaft is damaged or its bushings are worn, the steering column must be repaired. Repairing a steering column is a very difficult job that requires special tools, so it is best to entrust it to service station specialists.
Installation
12. Make sure the rubber bushings are in place, then install the steering column support bushings.
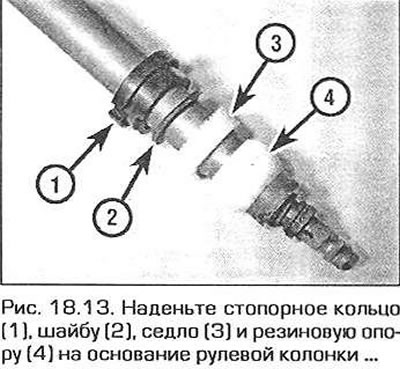
13. Install the retaining ring, washer, seat and rubber support on the steering column base (pic. 18.13).
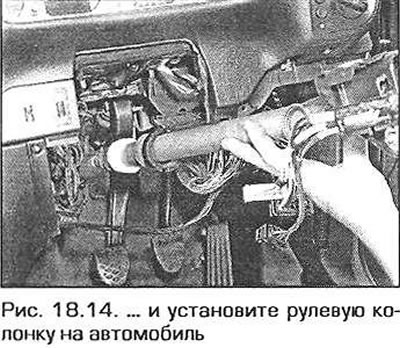
14. Install the steering column in place, aligning it with the splines of the intermediate shaft, and taking into account the marks made before removal (pic. 18.14).
15. Install the column on the bottom support, then screw in the mounting bolts and a new shear bolt. Lightly tighten the bolts.
16. Tighten the shear bolt until the head breaks off. Tighten the rest of the column fasteners securely.
17. Connect the connector of the electrical wiring of the ignition switch and fix the wiring harness on the steering column.
18. Make sure. that the marks on the intermediate shaft and column match, then insert the column into the shaft. Insert a new pinch bolt and nut and tighten to the correct torque.
19. Connect the lock cable (if it exists).
20. Install the switch assembly (see chapter 12).
21. Install the steering wheel (see paragraph 17).