
- Home
- BMW 3 Series
- E46
- Electrical equipment
- Equipment and devices
- Airbag System Components — Removal and Installation
Airbag System Components — Removal and Installation (BMW 3 Series E46)
Note: Please read the warnings before performing the following operations paragraph 24.
1. Disconnect the cable from the negative battery terminal (see chapter 5A), then continue working in accordance with the recommendations of the relevant subparagraph.
Driver's airbag
2. Cars are equipped with two different types of airbags. Models produced since 2000 are equipped with airbags with two-stage filling. If the impact is relatively small, the airbag is not inflated very much. In the case of a strong impact, the airbag is inflated more strongly. Thus, the airbag inflates just enough to ensure safety
Regular airbag
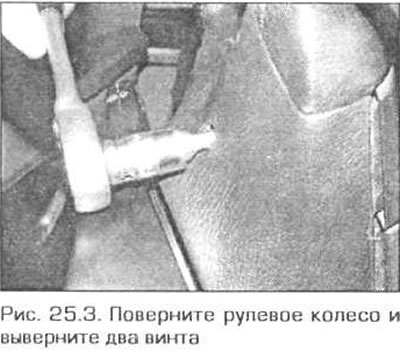
3. Remove the two airbag mounting screws from the rear of the steering wheel. To make it easier to access the screws, turn the steering wheel in the desired direction (Fig. 25.3).
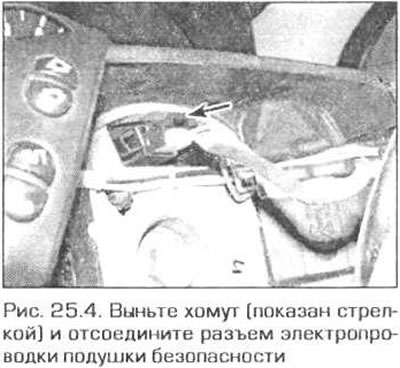
4. Turn the steering wheel to the straight-ahead position, then carefully remove the airbag from the steering wheel. Unfasten the retainer and disconnect the airbag wiring connector from the steering wheel (Fig. 25.4). Keep in mind that the airbag must not be allowed to fall or be hit. The airbag must be stored with the cover facing up.
5. When installing, connect the wiring connector and install the unit on the steering wheel. Make sure that the wires are not pinched. Insert the mounting screws, tighten them to the required torque and connect the battery.
Pillow with stepped filling
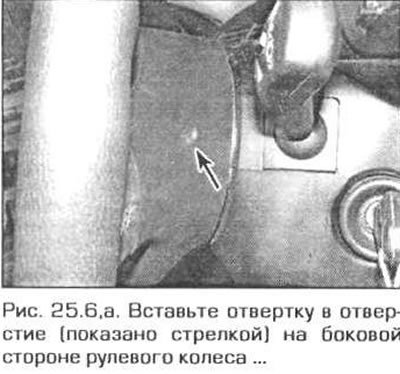
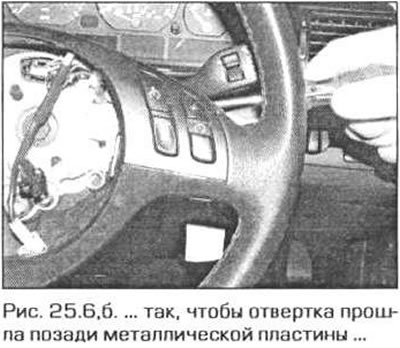
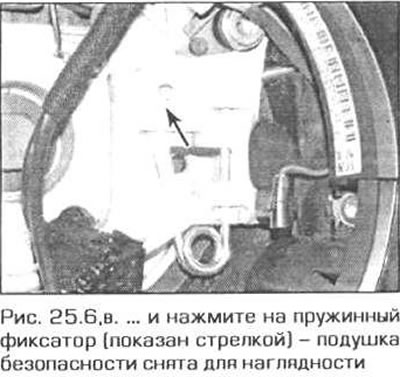
6. Turn the steering wheel to the straight-ahead position, then insert a screwdriver into the hole at the back of the steering wheel at an angle of 90° to the steering column and release the spring clip, then pull one side of the cushion out from the steering wheel (rice, 25.6, a-b). Repeat this procedure on the other side of the steering wheel.
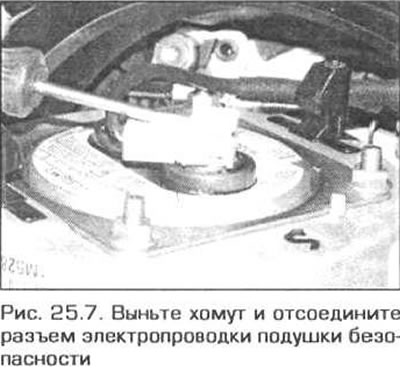
7. To disconnect the electrical wiring connectors, use a small flat-head screwdriver to pry up the lock and pull out the connector (Fig. 25.7). Note that the cushion must not be dropped or hit. The cushion must be stored with the pad facing up
8. When installing, connect the electrical connectors and make sure that their locks are in place. Note that the connectors have different colors. Install the airbag on the steering wheel and press it down until the spring clips click into place. Connect the battery.
Passenger airbag
9. Using a plastic or wooden tool, carefully remove the trim panel above the glove box on the passenger side.
10. Remove the two screws and take out the ventilation duct from the passenger side.
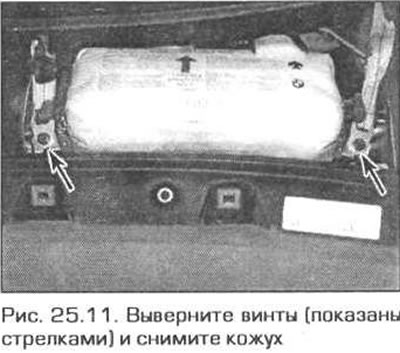
11. Carefully remove the lower edge of the airbag from the faceplate. Remove the two screws and remove the cover (fig. 25.11). Please note that once the airbag has deployed you will need a new cover.
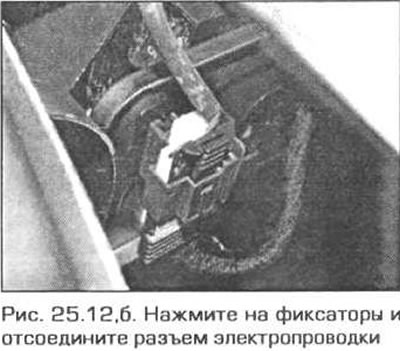
12. Loosen the mounting nuts and remove the airbag. Press the clips and disconnect the electrical wiring connector from the airbag (fig. 25.12, a, b).

13. Installation is performed in the reverse order of removal. Tighten the airbag mounting screws to the specified torque and connect the battery.
Airbags in the doors
14. Remove the door trim (see chapter 11).
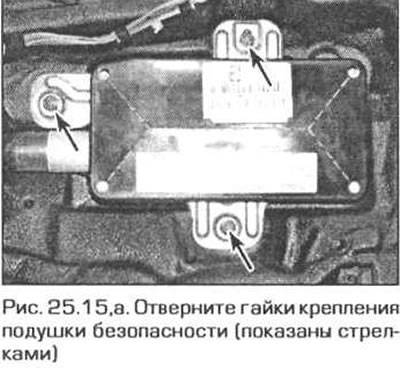
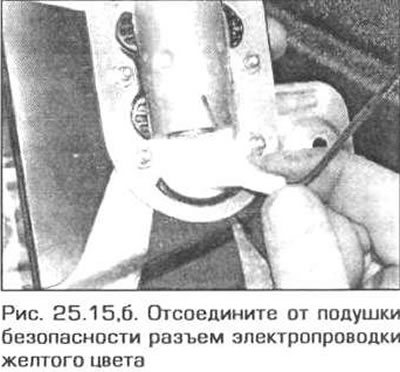
15. Remove the three screws and lift the airbag unit. Disconnect the electrical wiring connector from the airbag (fig. 25.15, a, b). If necessary, disconnect the wiring harness from the mountings.
16. Installation is performed in the reverse order of removal. Tighten the airbag mounting screws to the specified torque and connect the battery.
Overhead airbags
17. Upper airbags are installed on both sides of the passenger compartment (for head protection). When deployed, these airbags appear at the bottom of the front pillars of the body and have a length of about 1.5 m and a diameter of 130 mm (in an inflated state). To remove the cushion, you need to remove the front panel and the front pillar trim. This work cannot be done in a garage, so we recommend that you contact a specialized service station.
Airbag control unit
18. Remove the rear section of the center console (see chapter 11).
19. To access the control unit, cut the carpet in front of the parking brake lever.
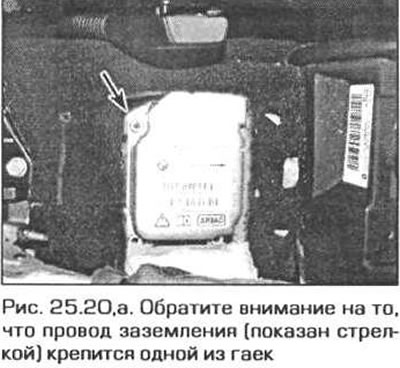
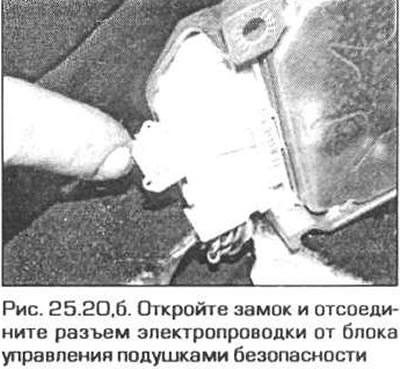
20. Unscrew the mounting nuts and lift the unit. Note that the ground wire is attached under one of the nuts. Disconnect the electrical wiring connector from the unit (fig. 25.20, a, b).
21. Installation is performed in the reverse order of removal. Note that the arrow on the block should face the front of the car. Secure the block ground wire with one of the nuts.
Shock sensor
22. The vehicle has two impact sensors: one on each side of the passenger compartment. Remove the seats (see chapter 11).
23. Remove the door sill trim and fold the mat to the side. If necessary, remove the footwell heating duct.
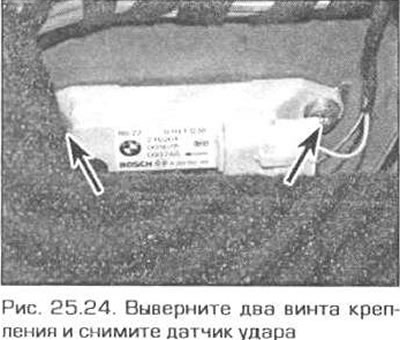
24. Unscrew the two mounting screws and remove the sensor (fig. 25.24). Disconnect the electrical wiring connector from the sensor.
25. Installation is performed in the reverse order of removal. Please note that the arrow on the sensor should point towards the threshold.
This article is available at russian, bulgarian, belarusian, ukrainian, serbian, croatian, romanian, polish, slovak, hungarian
Article verified: Ilyinsky Matvey
Share information:
Previous articles
БМВ E46: Equipment and devices
Next articles
Similar articles on other types of BMW cars:
Removal and installation the injection pump of the Kugelfischer system BMW 5 Series E12 (1972-1981)
Removal and installation the actuator motor/microswitch of the… BMW 5 Series E39 (1995-2003)
Exhaust system components — removal and installation BMW 7 Series E32 (1986-1994)
Removal and installation of the exhaust system BMW 7 Series E38 (1994-2001)
Removal and installation the airbag system module in the left or… BMW X3 E83 (2003-2010)
Removal and installation of the module of the systems in the airbag… BMW X5 E53 (1999-2006)
Link in different formats to this page
Visitor comments
No comments yet
- General information
- Manual
- Maintenance
- Power unit
- Engine repair
- Cooling system
- Power system (gasoline)
- Injection system (gasoline)
- Fuel system (diesel)
- Exhaust system
- Ignition system
- Charge and launch systems
- Transmission
- Car gearbox
- Clutch and drive shafts
- Chassis
- Brake system
- Suspension front and rear
- Steering
- Body
- Body care and repair
- Exterior
- Interior
- Electrical equipment
- Troubleshooting
- Lighting and signaling
- Equipment and devices
- Heater and air conditioner
- Electrical circuits
- General information
- Manual
- Repair on the road
- Weekly checks
- Maintenance
- Troubleshooting
- Power unit
- 4 cylinder engines
- 6 cylinder engines
- Engine overhaul
- Cooling and heating
- Fuel and exhaust system
- Starting and charging system
- Ignition system
- Transmission
- Clutch
- Mechanical gearbox
- Automatic gearbox
- Cardan and drive shafts
- Chassis
- Brake system
- Wheel suspension
- Steering
- Body
- Exterior
- Interior
- Electrical equipment
- Equipment and devices
- Electrical circuits
- General information
- Maintenance
- Power unit
- Engine repair
- Cooling system
- Ignition system
- Supply system
- Fuel injection system
- Exhaust system
- Transmission
- Clutch
- Car gearbox
- Front and rear axle
- Chassis
- Steering
- Brake system
- Body
- Exterior
- Interior
- Electrical equipment
- Heating system
- Equipment and devices
- Power devices
- Electrical circuits
- Power unit
- M10/M20 engine
- M40 engine
- Ignition system
- Lubrication system
- Cooling system
- Supply system
- Fuel injection
- Exhaust system
- Transmission
- Clutch
- Manual gearbox
- Front axle
- Rear axle
- Chassis
- Steering
- Brake system
- Body
- Exterior
- Interior
- Electrical equipment
- Heating system
- Equipment and devices
- Electrical circuits
- General information
- Specifications
- Operation and maintenance
- 4-cylinder engine
- Engine repair
- Cooling and lubrication system
- Supply system
- Ignition system
- 6-cylinder engine
- Engine repair
- Cooling and lubrication system
- Supply system
- Fuel injection system
- Ignition system
- Transmission
- Clutch
- 4-speed manual gearbox
- 5-speed manual gearbox
- Automatic gearbox
- Cardan and rear axle
- Chassis
- Steering
- Front suspension
- Rear suspension
- Brake system
- Electrical equipment
- Equipment and devices
- Electrical circuits