
Note. You will need new top shock mount nuts and a new gasket when installing.
Withdrawal
1. Support the front wheels. Raise the rear of the car and place it on stands (cm. "Lifting and placing the car on supports"). For better access, remove the rear wheel.
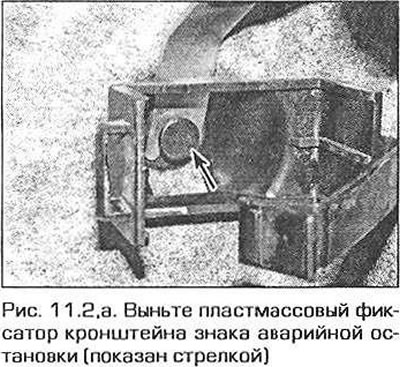
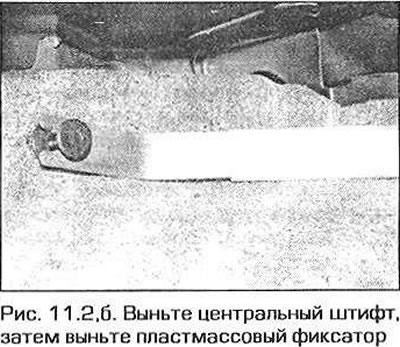
2. On models "sedan" And "coupe" Raise the floor of the luggage compartment and remove the battery/changing tray cover. On the left side, remove the triangular warning triangle, remove the plastic retainer and remove the warning triangle bracket. Remove the fasteners of the side cladding panel, then remove the cladding panel and insulating panel (for easier access to the upper shock absorber support) (pic. 11.2, a, b).
3. On the Touring model, remove the luggage compartment trim side panel (see paragraph 27 of chapter 11).
4. Place a jack under the trailing arm and raise the arm. This will prevent the arm from dropping after the shock is removed.
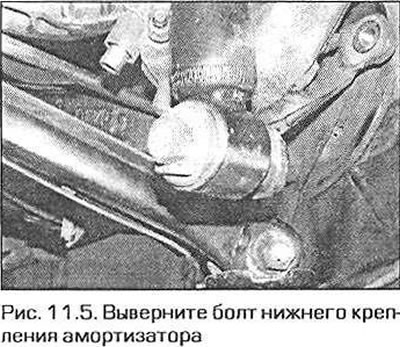
5. Turn out a bolt of fastening of the shock-absorber to the trailing arm (pic. 11.5).
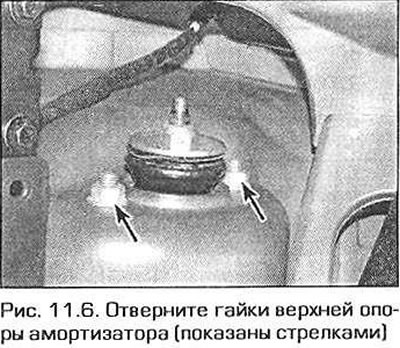
6. In the luggage compartment, unscrew the nuts of the upper shock absorber mounting (pic. 11.6). Remove the shock absorber from under the car and remove the gasket that is located between the upper support and the body.
Repair
Note. You will need a new damper rod nut.
7. Remove the cover from the top side of the shock absorber, then clean the shock absorber. Unscrew the stem nut and remove the washer, noting its location.
8. Remove the top support plate, then remove the boot.
9. Remove bushing and buffer from damper rod.
10. Check shock absorber for leaks. Inspect the stem along its entire length for pitting and the shock body for damage. While holding the shock absorber in a vertical position, check its operation by moving the piston through the entire stroke, and then in 50-100 mm increments. In both cases, you should feel a uniform and constant resistance. If jerking or uneven resistance is felt, as well as if wear or damage is visually detected, the shock absorber must be replaced.
11. Inspect the rest of the parts and make sure they are in good condition. Replace defective parts if necessary.
12. Put the buffer and bushing on the shock absorber rod, then put on the boot.
13. Install base plate, washer, install new nut and tighten securely. Install the cover.
Installation
14. Clean the upper base plate and body from dirt, then install a new gasket on the base plate.
15. Install the shock absorber in place and screw on the new nuts of the upper support.
16. Make sure the lower shock mount bushing is rotated so that the thrust washer of the bushing is facing towards the bolt. Screw in a bolt of the lower fastening of the shock-absorber and tighten it by hand.
17. Tighten the top mounting nuts to the correct torque. Install the insulating panel and luggage compartment trim panel, tail light access cover and speaker (if it was taken).
18. Install the wheel, lower the vehicle to the ground and tighten the shock absorber lower mounting bolt and wheel mounting bolts to the required torque.