
- Home
- BMW 3 Series
- E46
- Electrical equipment
- Equipment and devices
- Exterior Light Bulbs — Replacement
Exterior Light Bulbs — Replacement (BMW 3 Series E46)
Basic information
1. When replacing light bulbs, please keep the following in mind.
- a) Remember that the light bulb may be hot immediately after switching off.
- b) Always check the reliability of the contact between the bulb and its socket. Before installing a new bulb, clean the contact surfaces from dirt or corrosion.
- c) For bulbs installed in bayonet-type sockets, check that the bulb contact is securely pressed against the socket contact.
- d) Before installing a new bulb, make sure it has the correct dimensions and a clean surface. This is especially important for headlight and fog light bulbs (see below).
Headlights
Halogen (main) lamps
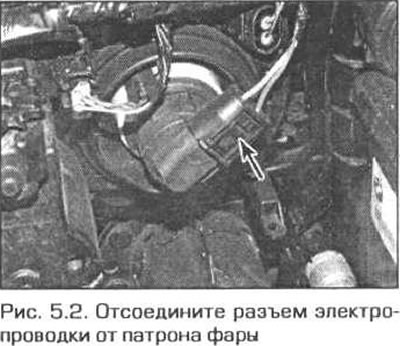
2. Disconnect the electrical wiring connector from the back of the cartridge (Fig. 5.2).
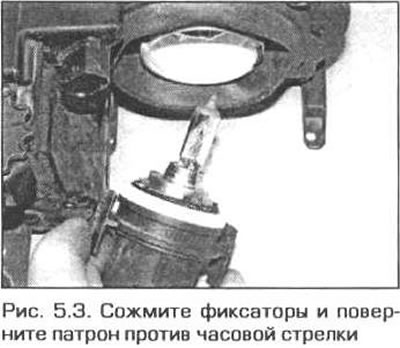
3. Squeeze the latches, turn the socket counterclockwise and remove it from the headlight (Fig. 5.3). To make it easier to access the left headlight, remove the air cleaner housing (see chapter 4A).
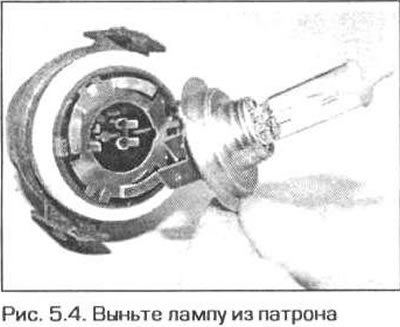
4. Remove the pump from the cartridge (Fig. 5.4).
5. When installing, handle the bulb only through a clean cloth or thin paper, as fingerprints can cause this type of bulb to darken and quickly fail. If you accidentally touch the glass with your fingers, wipe the bulb with methyl alcohol.
6. Insert the new lamp into the socket. Make sure that the contacts of the lamp are in the corresponding sockets.
7. Insert the socket into the headlight and turn it clockwise until it stops. Connect the electrical wiring connector to the socket.
Xenon lamps
8. Models with xenon lamps have increased voltage, so before starting work, disconnect the wire from the negative terminal of the battery (see chapter 5A). To make it easier to access the left headlight, remove the air cleaner housing (see chapter 4A).
9. Remove the plastic cover from the back of the headlight (from the outside).
10. Turn the lamp igniter unit counterclockwise and disconnect it (Fig. 5.10).
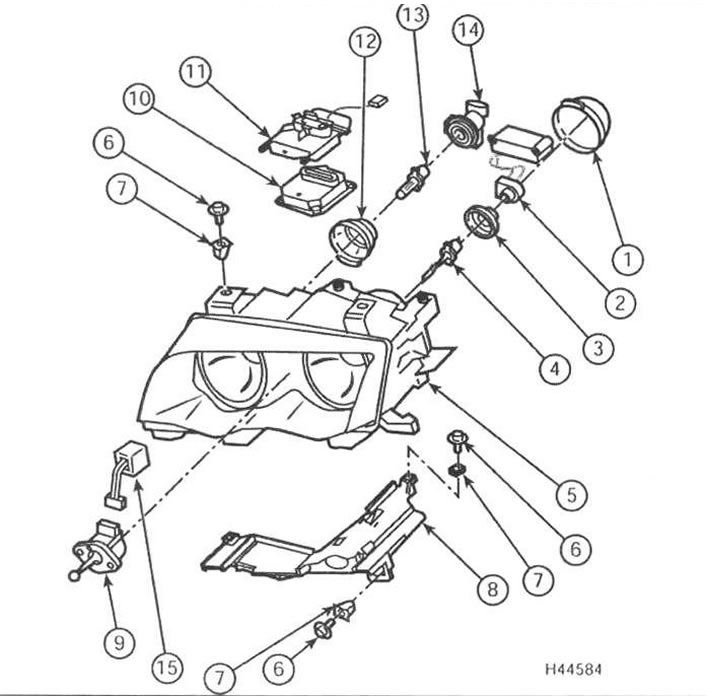
Fig. 5.10. Headlight with xenon lamps
1 Low beam lamp housing
2 Xenon lamp igniter unit
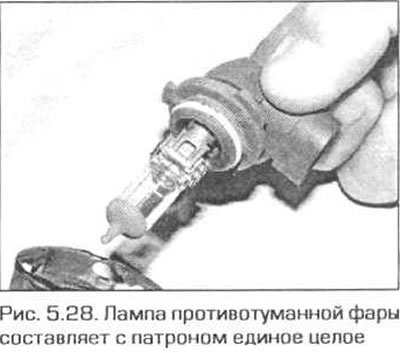
3 Retaining ring
4 Xenon lamp
5 Headlight housing
6 Screw
7 Plastic nut
8 Headlight support plate
9 Headlight dimmer stepper motor
10 Xenon lamp control unit
11 Bracket
12 High beam lamp housing
13 High beam lamp
14 Lamp holder
15 Connector
11. Turn the bulb retaining ring counterclockwise and remove it together with the bulb from the headlight.
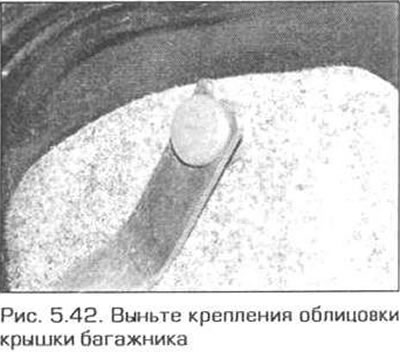
12. Install the new bulb into the headlight and secure it with the retaining ring.
13. Install the igniter block on the lamp and turn it clockwise until it stops.
14. Install the casing on the rear side of the unit. If necessary, install the air cleaner housing.
15. Connect the battery (see chapter 5A).
Front side lights
16. To gain easier access to the left headlight on 6-cylinder models, remove the air cleaner housing (see chapter 4A).
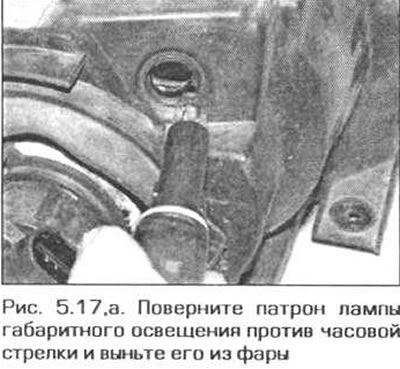
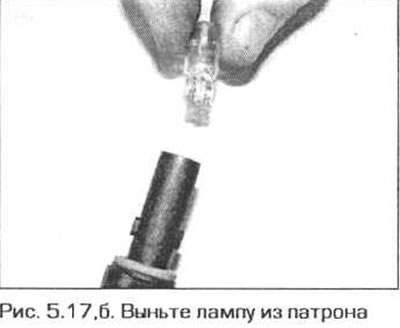
17. Turn the bulb holder counterclockwise and remove it from the headlight. Remove the bulb from the holder (fig. 5.17, a, b).
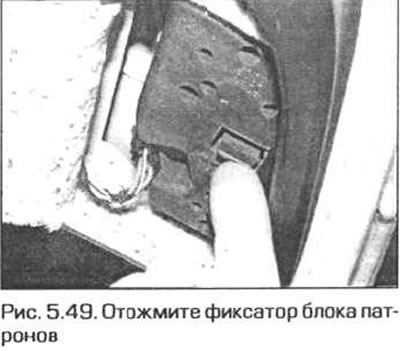
18. Installation is carried out in the reverse order of removal.
Front direction indicators
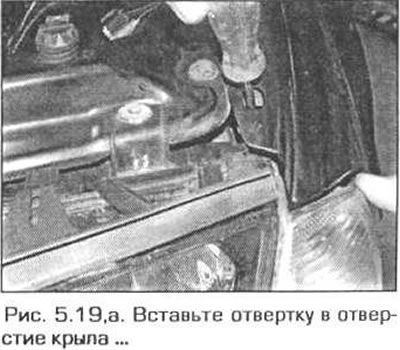
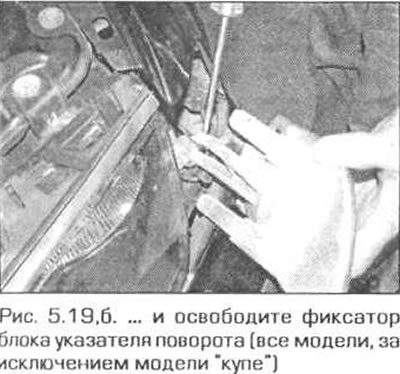
19. On all models except the coupe, insert a screwdriver into the hole on the inside of the side mudguard, press the lock down and release the light. Remove the turn signal light from the wing. On the coupe, the light is secured with a screw (fig. 5.19, a-c).
20. Disconnect the electrical wiring connector, turn the lamp holder counterclockwise and remove it from the unit.
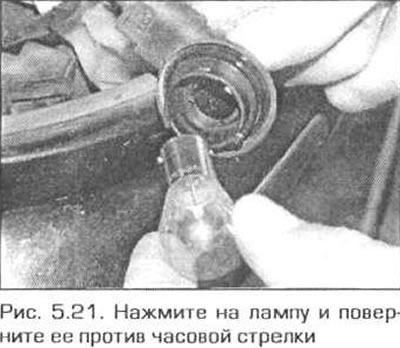
21. The lamp has a bayonet socket. Press the lamp lightly, turn it counterclockwise and remove it from the socket (Fig. 5.21).
22. Installation is performed in the reverse order of removal. Make sure that the turn signal lamp is securely fastened to the wing.
Side turn signal repeater
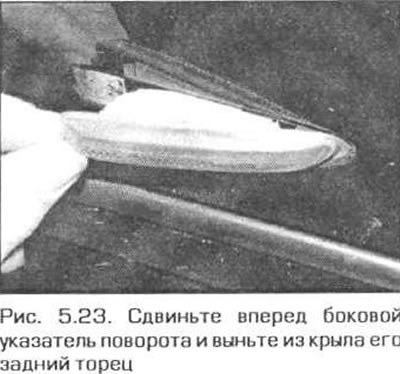
23. Carefully push the side turn signal repeater lens forward. Pull the rear edge of the lens and remove it from the wing (Fig. 5.23).
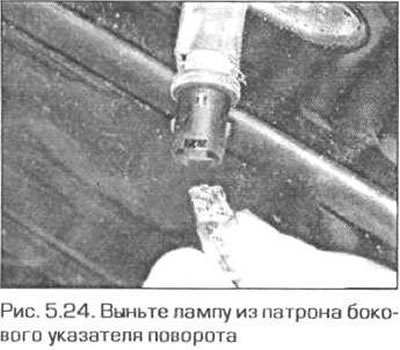
24. Turn the pump cartridge counterclockwise and remove it, then remove the pump from the cartridge (Fig. 5.24).
25. Installation is carried out in the reverse order of removal.
Front fog lights
"Sedan" and "Tourist" models
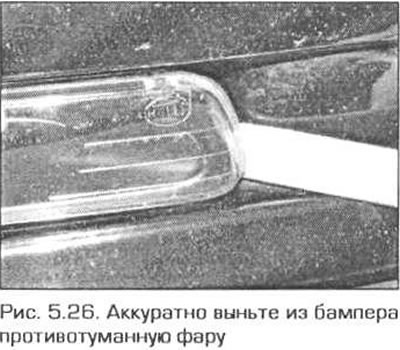
26. Using a wooden or plastic tool, carefully remove the headlight from the bumper, starting from the inner corner (Fig. 5.26). Disconnect the electrical wiring connector from the headlight.
27. Turn the socket counterclockwise and remove it from the headlight.
28. The lamp and the socket form a single whole (Fig. 5.28).
29. When installing, handle the bulb only through a clean cloth or thin paper, as fingerprints can cause this type of bulb to darken and quickly fail. If you accidentally touch the glass with your fingers, wipe the bulb with methyl alcohol.
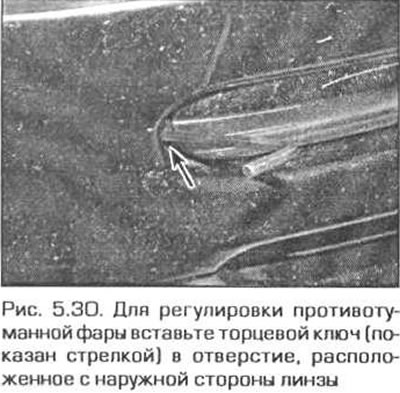
30. Installation is performed in the reverse order of removal. If necessary, adjust the headlights by turning the adjusting screw located next to the headlight lens (Fig. 5.30).
Model "coupe"
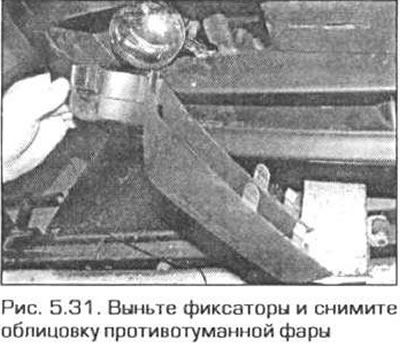
31. Remove the clips and remove the fog light trim from the bumper (Fig. 5.31).
32. Remove the screws and headlight. Disconnect the electrical wiring connector from the headlight.
33. Turn the socket counterclockwise, then remove the lamp from the socket.
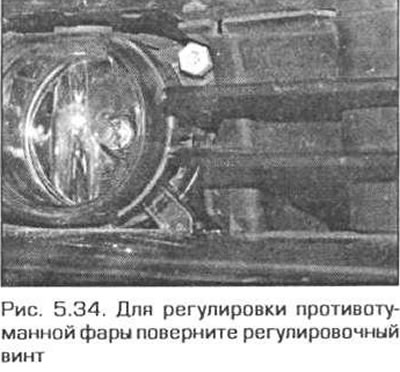
34. Installation is performed in the reverse order of removal. If necessary, adjust the headlights by turning the adjusting screw located next to the headlight lens (Fig. 5.34).
Rear lights
Body-mounted lights - "sedan" and "coupe" models
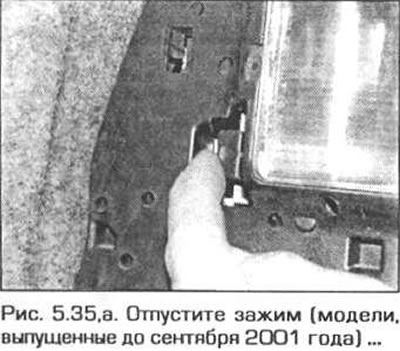
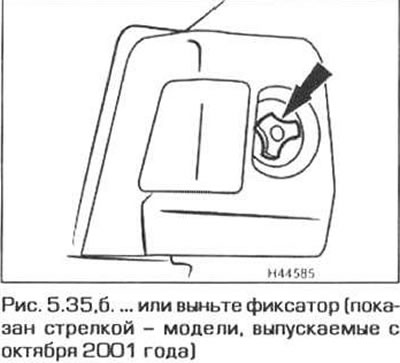
35. Inside the luggage compartment, release the clamp (in models manufactured before September 2001) or remove the retainer(in models produced since October 2001) and remove the cartridge block from the rear light (fig. 5.35, a, b).
36. Press lightly on the corresponding lamp, turn it counterclockwise and remove it from the socket (Fig. 5.36).
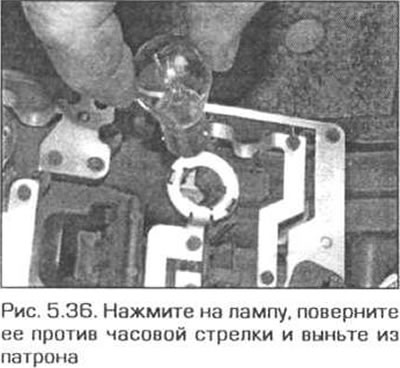
Note: When replacing dual filament bulbs (brake light/side light bulb) please note that the lamp pins only allow one position of the lamp in the socket.
37. Installation is carried out in the reverse order of removal.
Body mounted lights - "tourist" model
38. To access the bulb socket, bend the luggage compartment flap back. To make it easier to access the left lamp, remove the warning triangle.
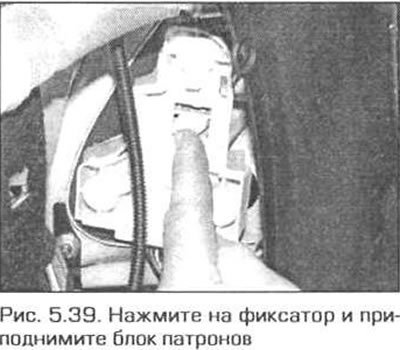
39. Disconnect the retainer and lift the cartridge slightly (Fig. 5.39).
40. Press lightly on the corresponding lamp, turn it counterclockwise and remove it from the socket.
41. Installation is carried out in the reverse order of removal.
Trunk-mounted lights - "sedan" and "coupe" models
42. Remove the two fasteners and bend the part of the trunk lid trim away from the light assembly (Fig. 5.42).
43. Release the clamp and remove the cartridge from the trunk lid (Fig. 5.43).

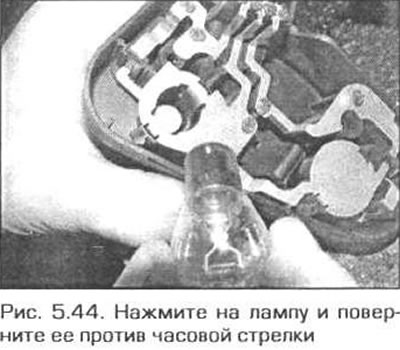
44. Pressing lightly on the lamp, turn it counterclockwise and remove it from the socket (Fig. 5.44).
45. Installation is carried out in the reverse order of removal.
Lights located on the tailgate - "tourist" model
46. Carefully disconnect the luggage compartment light from the luggage compartment door trim. Disconnect the electrical wiring connector from the unit.
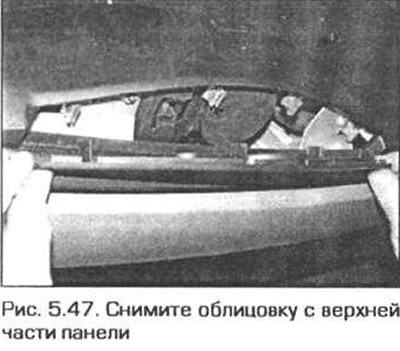
47. Bend back a small piece of trim from the top of the door panel (Fig. 5.47).
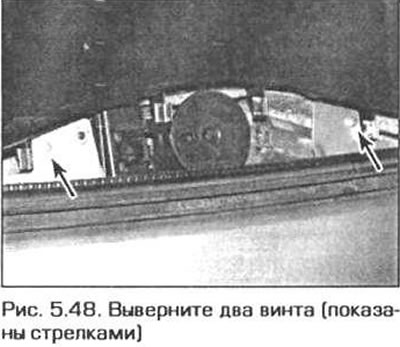
48. Remove the two screws located in the upper corner and carefully release the panel clips (Fig. 5.48). Remove the panel.
49. Disconnect the electrical wiring connector from the rear light unit, release the clamp and remove the socket (Fig. 5.49).
50. Pressing lightly on the bulb, turn it counterclockwise and remove it from the socket.
51. Installation is carried out in the reverse order of removal.
High-mounted brake light
52. Gently pull down the front end of the housing, then slide the block housing forward and remove it. There are two types of housings installed on cars. The single housing has two covers on the front side, and the housing consisting of two halves has two pin fasteners on the front side.
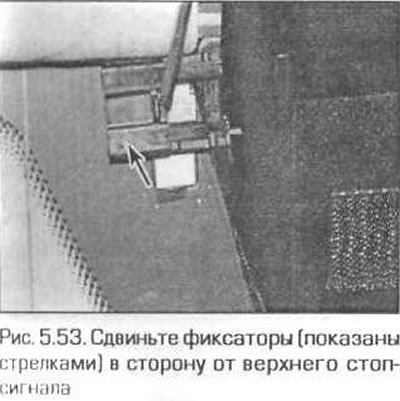
53. Pull out the two clips and remove the unit (Fig. 5.53). Disconnect the electrical wiring connector from the unit. The high brake light is a row of LEDs. If the unit is faulty, consult a BMW dealer or specialist.
54. Installation is performed in the reverse order of removal. Make sure that the protrusions on the rear end of the block are in the corresponding grooves.
License plate light
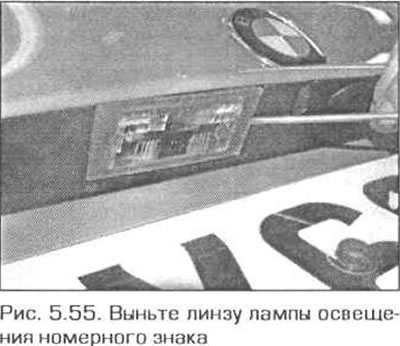
55. Carefully pry the lens with a small screwdriver at the inner corner and remove the lens from the trunk lid/tailgate (Fig. 5.55).
56. Remove the lamp from the contacts.
57. Installation is performed in the reverse order of removal. Make sure that the pump is securely held by the contacts.
This article is available at russian, bulgarian, belarusian, ukrainian, serbian, croatian, romanian, polish, slovak, hungarian
Article verified: Ilyinsky Matvey
Share information:
Previous articles
БМВ E46: Equipment and devices
Next articles
Similar articles on other types of BMW cars:
Engine suspension cushion replacement BMW 5 Series E12 (1972-1981)
Light switch BMW 5 Series E34 (1988-1996)
Filter replacement BMW 7 Series E32 (1986-1994)
Instructions for replacing incandescent light bulbs (interior… BMW X3 E83 (2003-2010)
Emergency light signaling BMW X5 E53 (1999-2006)
Engine suspension cushion replacement BMW 5 Series E12 (1972-1981)
Light switch BMW 5 Series E34 (1988-1996)
Filter replacement BMW 7 Series E32 (1986-1994)
Instructions for replacing incandescent light bulbs (interior… BMW X3 E83 (2003-2010)
Emergency light signaling BMW X5 E53 (1999-2006)
Link in different formats to this page
Visitor comments
No comments yet
- General information
- Manual
- Maintenance
- Power unit
- Engine repair
- Cooling system
- Power system (gasoline)
- Injection system (gasoline)
- Fuel system (diesel)
- Exhaust system
- Ignition system
- Charge and launch systems
- Transmission
- Car gearbox
- Clutch and drive shafts
- Chassis
- Brake system
- Suspension front and rear
- Steering
- Body
- Body care and repair
- Exterior
- Interior
- Electrical equipment
- Troubleshooting
- Lighting and signaling
- Equipment and devices
- Heater and air conditioner
- Electrical circuits
- General information
- Manual
- Repair on the road
- Weekly checks
- Maintenance
- Troubleshooting
- Power unit
- 4 cylinder engines
- 6 cylinder engines
- Engine overhaul
- Cooling and heating
- Fuel and exhaust system
- Starting and charging system
- Ignition system
- Transmission
- Clutch
- Mechanical gearbox
- Automatic gearbox
- Cardan and drive shafts
- Chassis
- Brake system
- Wheel suspension
- Steering
- Body
- Exterior
- Interior
- Electrical equipment
- Equipment and devices
- Electrical circuits
- General information
- Maintenance
- Power unit
- Engine repair
- Cooling system
- Ignition system
- Supply system
- Fuel injection system
- Exhaust system
- Transmission
- Clutch
- Car gearbox
- Front and rear axle
- Chassis
- Steering
- Brake system
- Body
- Exterior
- Interior
- Electrical equipment
- Heating system
- Equipment and devices
- Power devices
- Electrical circuits
- Power unit
- M10/M20 engine
- M40 engine
- Ignition system
- Lubrication system
- Cooling system
- Supply system
- Fuel injection
- Exhaust system
- Transmission
- Clutch
- Manual gearbox
- Front axle
- Rear axle
- Chassis
- Steering
- Brake system
- Body
- Exterior
- Interior
- Electrical equipment
- Heating system
- Equipment and devices
- Electrical circuits
- General information
- Specifications
- Operation and maintenance
- 4-cylinder engine
- Engine repair
- Cooling and lubrication system
- Supply system
- Ignition system
- 6-cylinder engine
- Engine repair
- Cooling and lubrication system
- Supply system
- Fuel injection system
- Ignition system
- Transmission
- Clutch
- 4-speed manual gearbox
- 5-speed manual gearbox
- Automatic gearbox
- Cardan and rear axle
- Chassis
- Steering
- Front suspension
- Rear suspension
- Brake system
- Electrical equipment
- Equipment and devices
- Electrical circuits