
Basic information
1. See paragraph 5. item 1.
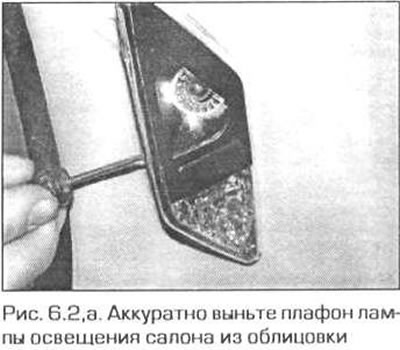
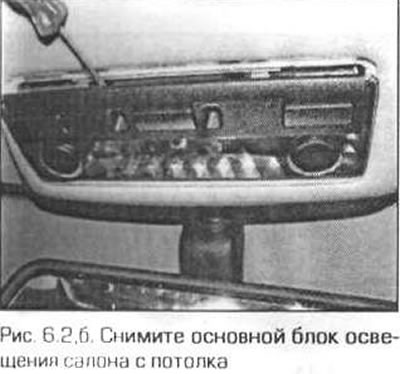
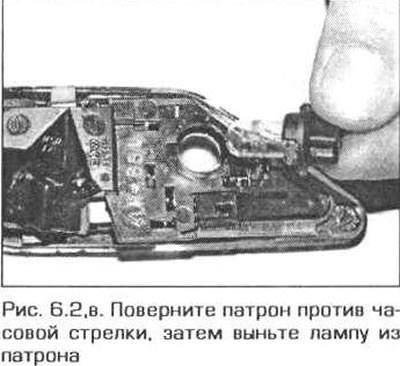
Ceiling lamps for interior lighting
2. Using a small flathead screwdriver, carefully pry the cover off and disconnect its electrical connector. When removing the center cover (or rear cover in the model "tourist") push down the rear corner of the block and slide the block. Twist and pull out the socket, then take the bulb out of the socket (pic. 6.2, a-c).
3. Insert a new lamp (s) into the cartridge (s) and put the block back in place. Keep in mind that when installing the center light, you must first insert the front end, then insert the rear end.
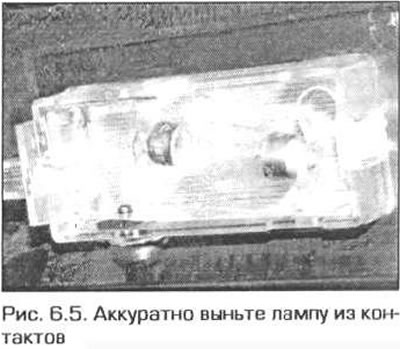
Footwell lamps
4. Carefully remove the lens from the block.
5. Remove the lamp from the contacts (pic. 6.5).
6. Install a new lamp, then install the lens.
Luggage compartment lamp
7. See p.p. 4-6.
Light signaling lamps/dashboard lights
8. The instrument panel is backlit with LEDs that cannot be replaced.
Glove box light
9. Open the glove box. Using a small flathead screwdriver, carefully pry up the top edge of the unit and pry it out. Remove the lamp from the contacts.
10. Insert the new bulb and make sure it is securely held in place, then reinstall the unit.
Illumination of the heater control panel
Models with automatic air conditioning
11. The heater control panel in these models is backlit with LEDs that are not replaceable. In the event of a malfunction, contact your BMW dealer.
Other models
12. Pull out the heater control buttons. then remove the screws and remove the outer panel from the control panel.
13. Using narrow pliers, turn the pampa cartridge counterclockwise and remove it. On some models, the control panel is backlit with LEDs that are not replaceable.
14. Installation is carried out in sequence. reverse withdrawal.
Switch illumination lamps
15. Lamps installed in all switches (LEDs) illumination. Some switches also have lamps (LEDs), signaling the inclusion of the circuit. All lamp switches (LEDs) cannot be replaced individually, so if the lamp fails, the switch assembly must be replaced.
Ashtray lamp
16. Remove the lining of the gear lever (selector). Turn out two screws of fastening of an ashtray located in front in a nest of facing.
17. Lift the bottom edge of the storage compartment and remove the unit from the front panel. Remove the two screws located at the top of the storage compartment slot and remove the carrier frame from the front panel.
18. Disconnect the wiring connector, squeeze the two clips together and remove the cartridge. The lamp forms a single whole with the cartridge.
19. Installation is made in sequence, return to removal.