
Table of contents: Removal ↓ Installation ↓
- Home
- BMW 3 Series
- E46
- Power unit
- Fuel and exhaust system
- Fuel tank — removal and installation
Fuel tank — removal and installation (BMW 3 Series E46)
Removal
1. Disconnect the negative cable from the battery.
2. Before removing the tank, it is necessary to remove all remaining fuel from it. Since there is no drain plug in the tank, it is necessary to use up as much fuel as possible before removing the tank.
3. Raise the rear of the vehicle and support it securely.
4. Disconnect the parking brake cables from the levers as described in Chapter 9.
5. Remove the driveshaft as described in Chapter 8.
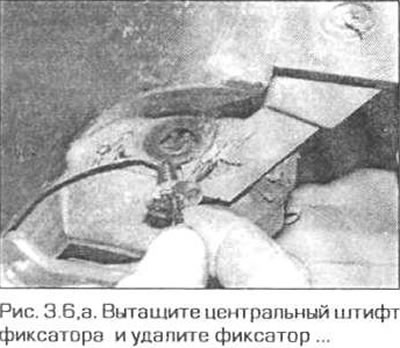
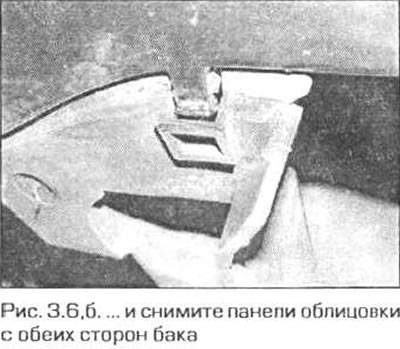
6. Remove the trim from the left side of the tank and the threshold trim (fig. 3.6,a,b). Repeat the same steps on the right side of the tank.
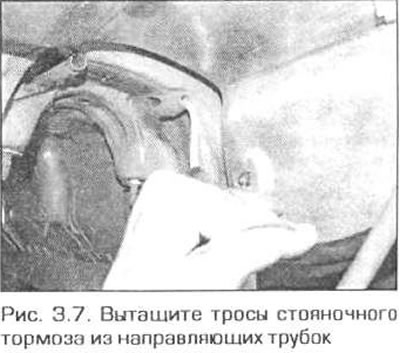
7. Remove the parking brake cables from the guide tubes (Fig. 3.7).
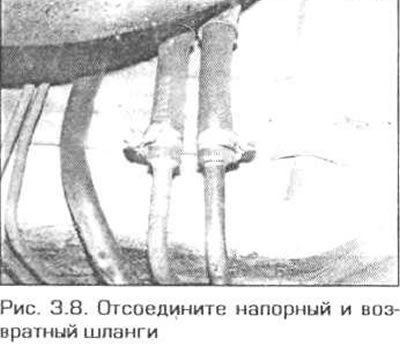
8. Disconnect the pressure and return hoses from the tank. Mark them before removing them to avoid confusion during assembly (Fig. 3.8). Be prepared for fuel to flow from the pipes - plug the openings of the hoses and pipes to avoid leaks and protect the system from dirt.
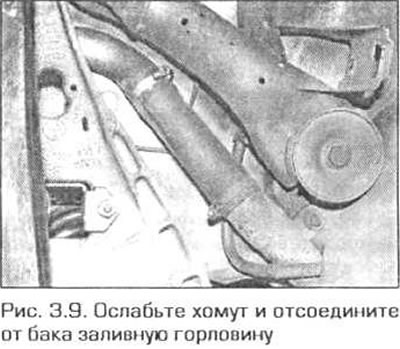
9. Loosen the filler neck clamp and disconnect it from the tank (Fig. 3.9).
10. Support the tank with a trolley jack, placing a wooden block on the jack platform.
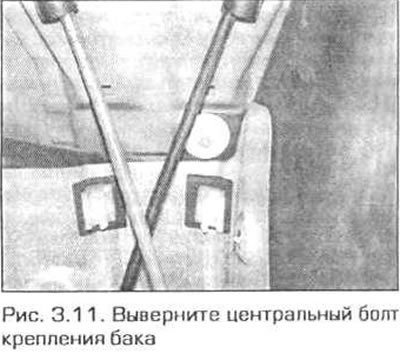
11. Unscrew the tank mounting bolt in the center on its rear side, as well as the tank clamp bolts (Fig. 3.11).
12. Lower the tank slightly and disconnect the electrical connector.
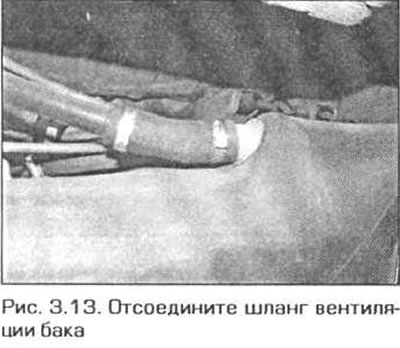
13. Loosen the clamp and disconnect the ventilation hose from the tank (Fig. 3.13). Lower the tank and pull it out from under the car.
Installation
14. Install the tank in the reverse order of removal. Keep in mind that after removing the tank, at least 5 liters of fuel must be poured into it to fill the fuel system.
This article is available at russian, bulgarian, belarusian, ukrainian, serbian, croatian, romanian, polish, slovak, hungarian
Article verified: Ilyinsky Matvey
Share information:
Previous articles
БМВ E46: Fuel and exhaust system
Next articles
Similar articles on other types of BMW cars:
Removal and installation, checking of the fuel tank ventilation valve BMW 5 Series E34 (1988-1996)
Removal and installation the fuel tank BMW 5 Series E28 (1981-1988)
Removal and installation the fuel tank BMW 7 Series E38 (1994-2001)
Expansion tank — removal and installation BMW 7 Series E32 (1986-1994)
Removal and installation the fuel tank BMW X3 E83 (2003-2010)
Removal the fuel tank BMW X5 E53 (1999-2006)
Link in different formats to this page
Visitor comments
No comments yet
- General information
- Manual
- Maintenance
- Power unit
- Engine repair
- Cooling system
- Power system (gasoline)
- Injection system (gasoline)
- Fuel system (diesel)
- Exhaust system
- Ignition system
- Charge and launch systems
- Transmission
- Car gearbox
- Clutch and drive shafts
- Chassis
- Brake system
- Suspension front and rear
- Steering
- Body
- Body care and repair
- Exterior
- Interior
- Electrical equipment
- Troubleshooting
- Lighting and signaling
- Equipment and devices
- Heater and air conditioner
- Electrical circuits
- General information
- Manual
- Repair on the road
- Weekly checks
- Maintenance
- Troubleshooting
- Power unit
- 4 cylinder engines
- 6 cylinder engines
- Engine overhaul
- Cooling and heating
- Fuel and exhaust system
- Starting and charging system
- Ignition system
- Transmission
- Clutch
- Mechanical gearbox
- Automatic gearbox
- Cardan and drive shafts
- Chassis
- Brake system
- Wheel suspension
- Steering
- Body
- Exterior
- Interior
- Electrical equipment
- Equipment and devices
- Electrical circuits
- General information
- Maintenance
- Power unit
- Engine repair
- Cooling system
- Ignition system
- Supply system
- Fuel injection system
- Exhaust system
- Transmission
- Clutch
- Car gearbox
- Front and rear axle
- Chassis
- Steering
- Brake system
- Body
- Exterior
- Interior
- Electrical equipment
- Heating system
- Equipment and devices
- Power devices
- Electrical circuits
- Power unit
- M10/M20 engine
- M40 engine
- Ignition system
- Lubrication system
- Cooling system
- Supply system
- Fuel injection
- Exhaust system
- Transmission
- Clutch
- Manual gearbox
- Front axle
- Rear axle
- Chassis
- Steering
- Brake system
- Body
- Exterior
- Interior
- Electrical equipment
- Heating system
- Equipment and devices
- Electrical circuits
- General information
- Specifications
- Operation and maintenance
- 4-cylinder engine
- Engine repair
- Cooling and lubrication system
- Supply system
- Ignition system
- 6-cylinder engine
- Engine repair
- Cooling and lubrication system
- Supply system
- Fuel injection system
- Ignition system
- Transmission
- Clutch
- 4-speed manual gearbox
- 5-speed manual gearbox
- Automatic gearbox
- Cardan and rear axle
- Chassis
- Steering
- Front suspension
- Rear suspension
- Brake system
- Electrical equipment
- Equipment and devices
- Electrical circuits