
Attention:
- High pressure in the refrigerant circuit.
- Observe safety precautions when handling R134a refrigerant.
- Avoid contact with refrigerant and refrigeration oil.
- Observe safety precautions when handling refrigeration oil.
Attention:
- Start the engine only when the air conditioner is charged according to all the rules.
- Follow the instructions for disassembling and replacing refrigerant circuit parts.
- If the air conditioner is left open for more than 24 hours, replace the air conditioner dehumidifier element.
Note: This process does not include pumping, vacuuming, or refilling the air conditioner.
1. Remove the heater partition.
Note: Disconnect the coolant hoses.
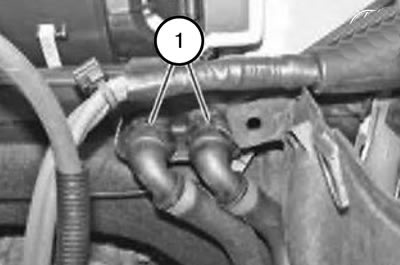
2. Disconnect the hot coolant supply hoses (1) from the heater and blow out the coolant from the heating element.
3. Seal the connections on the heater with plugs.
Note: When installing, be careful not to reverse the cooling system hoses.
Attention:
- When disconnecting the cooling system hoses, coolant leaks out.
- Have a collecting vessel on hand.
- Collect the leaking coolant and dispose of it.
- Observe the applicable national disposal regulations.
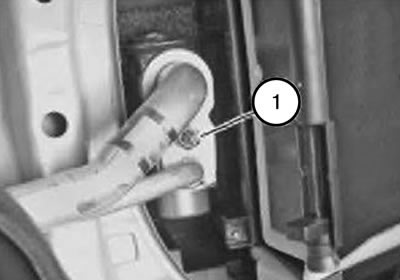
4. Loosen the bolt (1) and disconnect the refrigerant line from the expansion valve.
Note: All O-rings must be replaced during installation.
Tightening torque: 8 Nm.
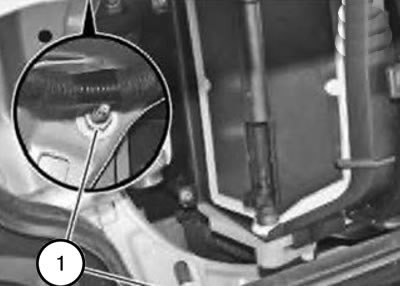
5. Remove the screws (1) on both sides.
Tightening torque: 6 Nm.
6. Remove the instrument panel trim.
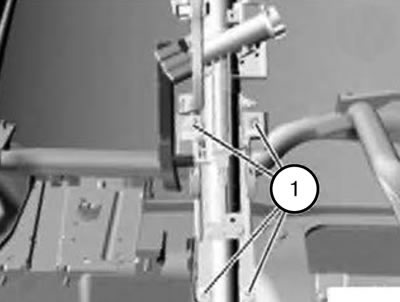
7. Loosen the screws (1) and lower the steering column (2) down.
Tightening torque: 21 Nm.
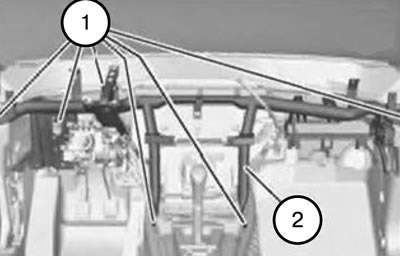
8. Loosen the screws (1) and remove the support tube (2) from the vehicle (call an assistant if necessary).
Tightening torque: 21 Nm.
9. Remove the ventilation ducts (1) on both sides.
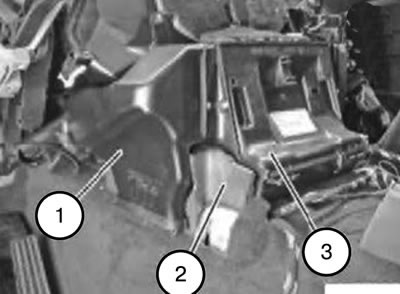
10. Remove the foam element (2) and take the heater (3) out of the vehicle (call an assistant if necessary).
11. Disconnect and pull out the corresponding heater wiring harness (3).
Note: Make sure the heater (3) and foam element (2) are positioned correctly on both sides.
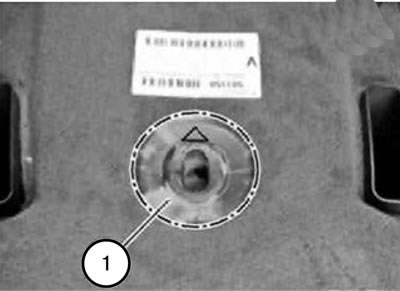
Note: Pay attention to the correct position of the rubber bushing (1), which ensures normal drainage of condensate.
12. Assemble the heater.
Note: When replacing the heater.
13. Installation should be carried out in the reverse order of removal, taking into account the above notes.
14. Bleed the cooling system and check it for leaks.
15. Evacuate and charge the air conditioner.
Examine the original source using the link on the website «bmwman.ru»