
- Home
- BMW 3 Series
- E30
- Transmission
- Clutch
- Removal and installation, clutch check
Removal and installation, clutch check (BMW 3 Series E30)
Removal
Remove the gearbox (see section "Removal and installation the gearbox").
Gradually loosen the drive disk mounting bolts by 1-1½ turns each time until it is relieved.
Caution: If the bolts come loose immediately, the diaphragm spring may be defective.
To prevent the flywheel from turning when unscrewing the bolts, block the flywheel with a screwdriver or rod.
Finally, completely unscrew the bolts.
Remove the drive and driven disks.
Caution: Protect the drive and driven discs from impacts, as damage may result in difficulty disengaging the clutch or the clutch jerking after installation.
Wipe the flywheel with a rag soaked in gasoline.
Examination
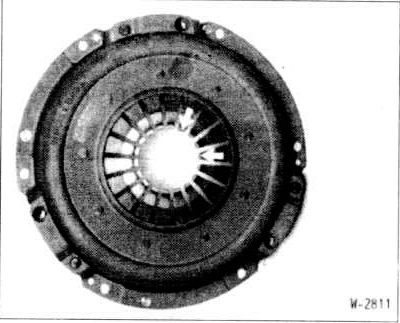
Check the drive disk for scratches and burnt areas.
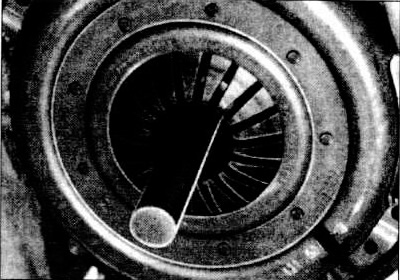
Check the integrity of the diaphragm spring (arrow).
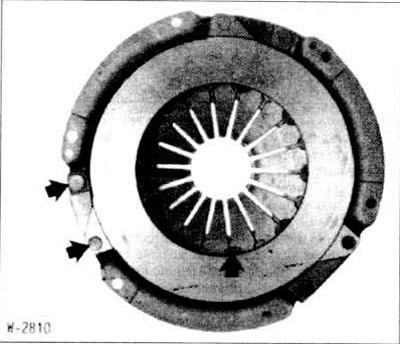
Check the spring connections of the drive disk and cover for cracks and the reliability of the rivet connections. Replace the clutch with damaged or unreliable rivet connections.
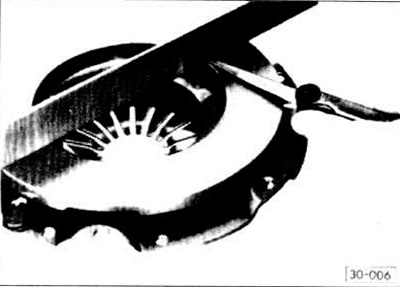
Check the working surface of the drive disk for cracks, burnt areas and wear. Drive disks that are bent inward by up to 0.3 mm can still be reinstalled. The check is performed using a ruler and a set of feeler gauges.
Check the flywheel for scratches and burnt areas.
Treat the drive disk and flywheel with very fine sandpaper.
Oily and mechanically damaged drive disks must be replaced.
Measure the thickness of the drive disk linings with a caliper. The minimum permissible thickness is 7.5 mm, otherwise the disk must be replaced. The drive disk is also replaced if there are burnouts.
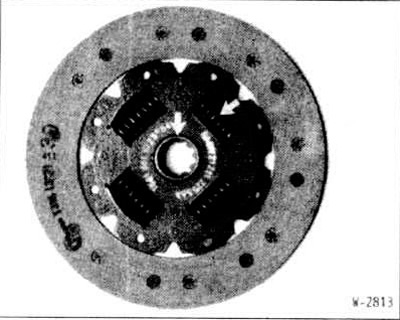
Check the spring windows, torsion springs and hub for signs of wear. With a composite flywheel, the driven disk has a rigid structure without dampers. In this case, torsion dampers are installed in the flywheel.
Remove the release bearing from the front gearbox cover and inspect (see section "Removal and installation the release bearing").
At the service station, you can check the runout of the driven disk. The lateral runout should not exceed 0.5 mm.
Note: This check must be carried out if there were difficulties in disengaging the clutch when reinstalling the previous driven disk.
Check the ease of movement of the ball bearing in the crankshaft groove. If necessary, remove the bearing with a puller and replace it.
Installation
Before installing a new clutch, remove the anti-corrosion protective coating from it.
Insert the drive and driven disks into the flywheel. Place the drive clutch disk on the corresponding mounting pins. Center the driven disk in the drive disk. For centering, it is best to use a HAZET shaft or the primary shaft from an old gearbox.
When installing the previous drive disk, install it according to the marking. The marking should be facing the gearbox.
Screw in the drive disk mounting bolts.
Tighten the drive disk mounting bolts sequentially by 1-1½ turns. Then remove the centering shaft.
Caution: When tightening the bolts, the drive disc must enter the flywheel evenly and freely. Tightening torque of the fastening bolts class 8.8 (indicated on the bolt head) 23 nm, class 12.9-30 nm.
Lightly lubricate the gearbox input shaft keyways with Molykote Longthern 2. For a composite flywheel, lubricate the keyways with Microlube 261.
Install the gearbox (see section "Removal and installation the gearbox").
This article is available at russian, bulgarian, belarusian, ukrainian, serbian, croatian, romanian, polish, slovak, hungarian
Article verified: Polikarpov Saveliy
Share information:
Previous articles
БМВ E30: Clutch
Next articles
Similar articles on other types of BMW cars:
Removal and installation, clutch check BMW 5 Series E34 (1988-1996)
Removal and installation the clutch master cylinder BMW 5 Series E12 (1972-1981)
Removal and installation the clutch pedal BMW 7 Series E38 (1994-2001)
Fan/Fan Clutch — Removal and Installation BMW 7 Series E32 (1986-1994)
Removal and installation the clutch master cylinder BMW X3 E83 (2003-2010)
Removal and installation the clutch BMW X5 E53 (1999-2006)
Link in different formats to this page
Visitor comments
No comments yet
- General information
- Manual
- Maintenance
- Power unit
- Engine repair
- Cooling system
- Power system (gasoline)
- Injection system (gasoline)
- Fuel system (diesel)
- Exhaust system
- Ignition system
- Charge and launch systems
- Transmission
- Car gearbox
- Clutch and drive shafts
- Chassis
- Brake system
- Suspension front and rear
- Steering
- Body
- Body care and repair
- Exterior
- Interior
- Electrical equipment
- Troubleshooting
- Lighting and signaling
- Equipment and devices
- Heater and air conditioner
- Electrical circuits
- General information
- Manual
- Repair on the road
- Weekly checks
- Maintenance
- Troubleshooting
- Power unit
- 4 cylinder engines
- 6 cylinder engines
- Engine overhaul
- Cooling and heating
- Fuel and exhaust system
- Starting and charging system
- Ignition system
- Transmission
- Clutch
- Mechanical gearbox
- Automatic gearbox
- Cardan and drive shafts
- Chassis
- Brake system
- Wheel suspension
- Steering
- Body
- Exterior
- Interior
- Electrical equipment
- Equipment and devices
- Electrical circuits
- General information
- Maintenance
- Power unit
- Engine repair
- Cooling system
- Ignition system
- Supply system
- Fuel injection system
- Exhaust system
- Transmission
- Clutch
- Car gearbox
- Front and rear axle
- Chassis
- Steering
- Brake system
- Body
- Exterior
- Interior
- Electrical equipment
- Heating system
- Equipment and devices
- Power devices
- Electrical circuits
- Power unit
- M10/M20 engine
- M40 engine
- Ignition system
- Lubrication system
- Cooling system
- Supply system
- Fuel injection
- Exhaust system
- Transmission
- Clutch
- Manual gearbox
- Front axle
- Rear axle
- Chassis
- Steering
- Brake system
- Body
- Exterior
- Interior
- Electrical equipment
- Heating system
- Equipment and devices
- Electrical circuits
- General information
- Specifications
- Operation and maintenance
- 4-cylinder engine
- Engine repair
- Cooling and lubrication system
- Supply system
- Ignition system
- 6-cylinder engine
- Engine repair
- Cooling and lubrication system
- Supply system
- Fuel injection system
- Ignition system
- Transmission
- Clutch
- 4-speed manual gearbox
- 5-speed manual gearbox
- Automatic gearbox
- Cardan and rear axle
- Chassis
- Steering
- Front suspension
- Rear suspension
- Brake system
- Electrical equipment
- Equipment and devices
- Electrical circuits