
- Home
- BMW 3 Series
- E46
- Chassis
- Brake system
- Removal and installation front brake pads
Removal and installation front brake pads (BMW 3 Series E46)
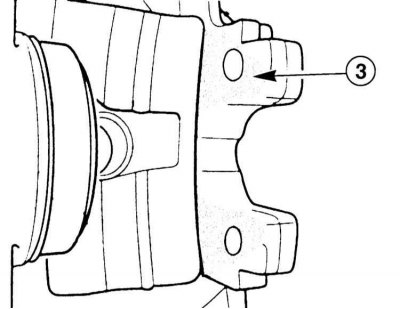
Front disc brake caliper
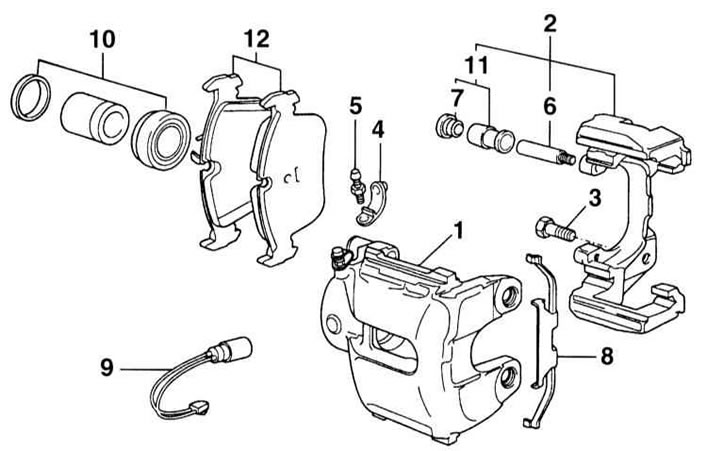
1 — support
2 - guide
3 — bolt, 110 Nm
4 - dust cap
5 - air bleed nipple
6 - guide pin
7 - cork
8 — retaining spring
9 - wear sensor
10 — Caliper sealing kit
11 - Guide bush repair kit
12 - brake pads (asbestos free)
Removal
1. Mark the position of the front wheel relative to the hub with paint. This will allow the balanced wheel to be installed in its original position. Loosen the wheel mounting bolts with the car on the ground. Raise the front of the car and remove the wheel.
If the brake pads are to be reused, they must be marked when removed. Do not interchange the pads on the right and left wheels. This may result in uneven braking. Only use BMW pads or pads approved by BMW. Always replace all front disc brake pads at the same time, even if one pad has reached the wear limit.
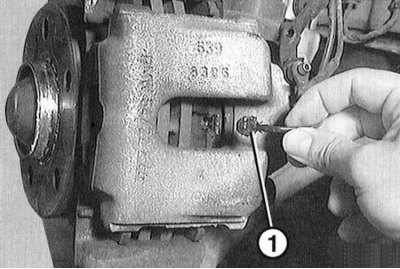
2. Disconnect the connector of the wear indicator "1" at the left caliper. Do not pull on the cable.
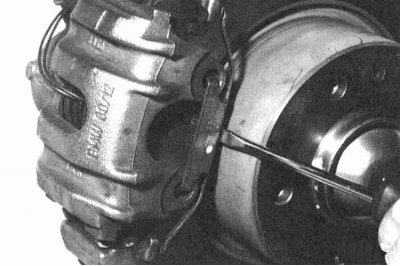
3. Press the bracket using a screwdriver.
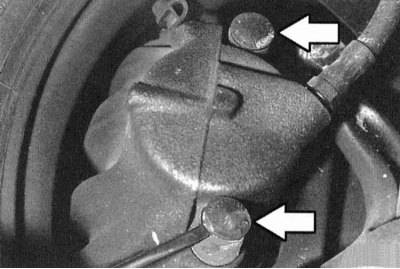
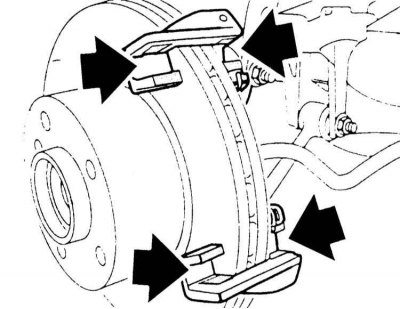
4. Remove the plastic caps of the mounting bolts using a screwdriver (arrows in the illustration).
5. Remove both screws located under the plastic caps using a socket wrench.

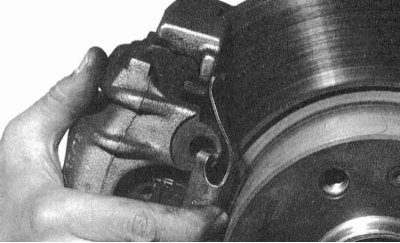
6. Remove the caliper back from the bracket and hang it on the wire from the suspension.
Do not disconnect the brake hose. Otherwise, the system will need to be bled after installation. Make sure that the hose is not subjected to stretching loads.
7. Remove the outer brake shoe.

8. The inner brake shoe is secured by spring "6" in the brake piston. Remove the brake shoe.
Installation
Do not press the brake pedal after removing the brake pads. Otherwise, the brake will be pressed out of the housing.
1. Check the brake pad wear sensor. If the contact plate insulation is worn out, the cable insulation is damaged or the plastic element is worn out, the wear sensor should be replaced.
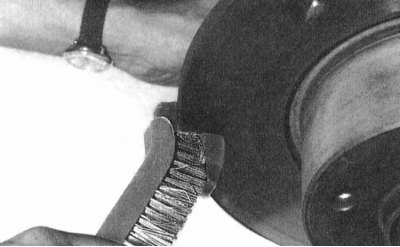
2. Clean the guide surface or the seat of the pads in the housing shaft with a light metal brush or wipe with a cloth soaked in alcohol. Do not use solvents containing mineral oils or tools with sharp edges. If the pads are to be used again, they must also be cleaned.
3 Before installing the pads in place, check the brake disc with your fingers for scratches. If damage is found, the disc should be replaced.
4. Measure the thickness of the brake disc, refer to Section Measuring the thickness of the brake disc.
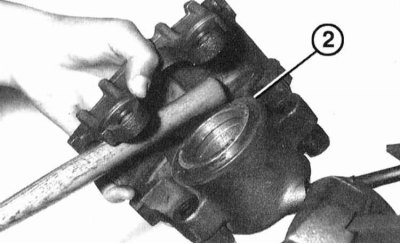
5. Check the dust cap of the brake piston "2" for cracks. If there are cracks, replace the cap immediately, as contamination will quickly lead to loss of sealing of the caliper. To do this, remove and disassemble the caliper (work of the service station).
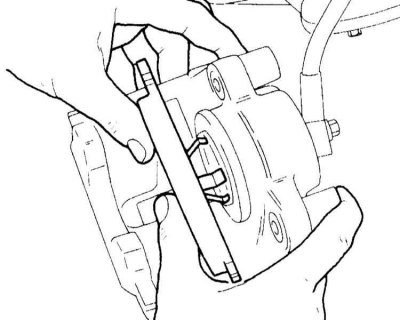
6. Press the piston in using a suitable tool. This can be done with a block of hard wood (with a hammer handle). When doing this, pay special attention to ensure that the piston is not warped and that the piston surface and dust cap are not damaged.
- When the pistons are pressed out of the brake cylinders, the level in the brake fluid reservoir rises. Monitor the level, suck out the fluid if necessary.
- To suck out the brake fluid, use a special or plastic bottle that is designed only for this purpose! Do not use drinking water bottles for this! Brake fluid is poisonous and should never be sucked out by mouth through a hose. Use a special device for this. After replacing the brake pads, the fluid level in the reservoir should not be higher than the MAX mark, since the fluid expands when heated. Leaking brake fluid flows down the main brake cylinder, damaging the paintwork and causing corrosion.
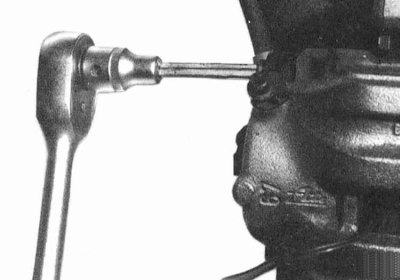
- If the brake pads are heavily worn, check the ease of movement of the piston. To do this, insert a wooden block into the caliper and ask an assistant to slowly press the brake pedal. The brake piston should move in and out easily. All other calipers must be inserted in their places to perform the check. Make sure that the piston does not come out completely. If the piston moves hard, the caliper is subject to repair (work of the service station).
- Cover the adjacent surfaces of the caliper with anti-squeal brake paste.
- To prevent disc brakes from squealing during operation, some areas of the caliper must be coated with a thin layer of a special paste, for example, "Never Seez Compound".
- The paste should not under any circumstances come into contact with the dust seals, friction surfaces of the brake pads or the brake disc. If necessary, wipe the paste off immediately with alcohol and replace the dust seal with a new one. Do not cover the brake pad backing plate with paste.
7. Apply a thin layer of anti-squeal paste to the mating surface of the brake piston against the brake pad.
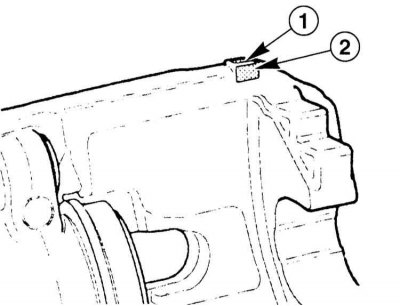
8. Clean the mating surfaces "1" and "2" of the brake pad T-heads at the caliper and coat with a thin layer of anti-squeal paste.
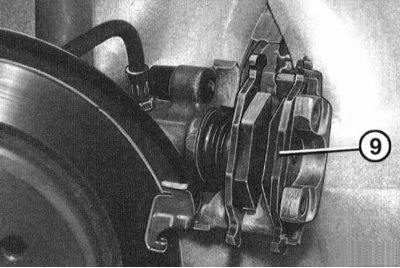
9. Clean the mating surface "3" of the caliper and apply a thin layer of anti-squeal paste in the areas shaded in the illustration.
10. Clean the bracket at the T-head guides (arrows in the illustration) and apply a thin layer of anti-squeal brake paste in the areas shaded in the illustration.
11. Insert the brake shoe with the spring into the piston.
12. Insert the outer pad "9" into the caliper and place the caliper on the guide. Make sure the pads are clean.

13. Visually inspect the two caliper mounting bolts, clean the bracket from dirt if necessary. If necessary, go through the thread in the bracket with a tap. Replace the bolts that have rust or damaged threads. Secure the bolts with a 7 mm socket wrench to a torque of 30 N·m.
Just clean the bolts, no need to lubricate them.
14. Replace the protective caps on the mounting bolts.
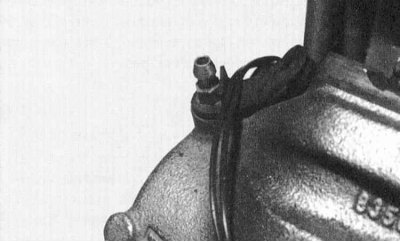
15. Connect the brake pad wear indicator sensor connector on the left side of the vehicle. The wire should pass through the loop of the bleed nipple cover.
16. Install the bracket on the caliper.
17. Reinstall the wheel so that the markings applied during removal match. Pre-lubricate the wheel disc seat on the hub with a thin layer of bearing grease. Do not lubricate the wheel mounting bolts. Replace rusty bolts with new ones. Secure the wheel with bolts. Lower the car onto the wheels and tighten the bolts crosswise to a torque of 100 N·m.
While standing, press the brake pedal hard several times until you feel resistance. This will cause the brake pads to lie against the brake disc and take their working position
18. Check the brake fluid in the reservoir, top it up to the MAX mark if necessary.
- Is the brake hose secured in the holder?
- Are the air bleed nipples tightened?
- Is there enough brake fluid?
- With the engine running, check for leaks. To do this, press the brake pedal with a force of 200 - 300 N (20 - 30 kg) within 10 sec. The pedal should not weaken. Check all connections for leaks.
Carefully allow the new brake pads to break in. To do this, brake the car several times from 80 to 40 km/h, lightly pressing the pedal. Allow the brake to cool between braking.
Brake discs must be disposed of as special materials in some regions. Local authorities inform drivers about possible disposal sites.
This article is available at russian, bulgarian, belarusian, ukrainian, serbian, croatian, romanian, polish, slovak, hungarian
Article verified: Sevastyanov Nikolay
Share information:
Previous articles
БМВ E46: Brake system
Next articles
Similar articles on other types of BMW cars:
Removal and installation front disc brake pads BMW 5 Series E39 (1995-2003)
Removal and installation front brake pads BMW 5 Series E34 (1988-1996)
Front brake pads — removal and installation BMW 7 Series E32 (1986-1994)
Removal and installation the airbag system module in the left or… BMW X3 E83 (2003-2010)
Removal and installation front door glass BMW X5 E53 (1999-2006)
Link in different formats to this page
Visitor comments
No comments yet
- General information
- Manual
- Maintenance
- Power unit
- Engine repair
- Cooling system
- Power system (gasoline)
- Injection system (gasoline)
- Fuel system (diesel)
- Exhaust system
- Ignition system
- Charge and launch systems
- Transmission
- Car gearbox
- Clutch and drive shafts
- Chassis
- Brake system
- Suspension front and rear
- Steering
- Body
- Body care and repair
- Exterior
- Interior
- Electrical equipment
- Troubleshooting
- Lighting and signaling
- Equipment and devices
- Heater and air conditioner
- Electrical circuits
- General information
- Manual
- Repair on the road
- Weekly checks
- Maintenance
- Troubleshooting
- Power unit
- 4 cylinder engines
- 6 cylinder engines
- Engine overhaul
- Cooling and heating
- Fuel and exhaust system
- Starting and charging system
- Ignition system
- Transmission
- Clutch
- Mechanical gearbox
- Automatic gearbox
- Cardan and drive shafts
- Chassis
- Brake system
- Wheel suspension
- Steering
- Body
- Exterior
- Interior
- Electrical equipment
- Equipment and devices
- Electrical circuits
- General information
- Maintenance
- Power unit
- Engine repair
- Cooling system
- Ignition system
- Supply system
- Fuel injection system
- Exhaust system
- Transmission
- Clutch
- Car gearbox
- Front and rear axle
- Chassis
- Steering
- Brake system
- Body
- Exterior
- Interior
- Electrical equipment
- Heating system
- Equipment and devices
- Power devices
- Electrical circuits
- Power unit
- M10/M20 engine
- M40 engine
- Ignition system
- Lubrication system
- Cooling system
- Supply system
- Fuel injection
- Exhaust system
- Transmission
- Clutch
- Manual gearbox
- Front axle
- Rear axle
- Chassis
- Steering
- Brake system
- Body
- Exterior
- Interior
- Electrical equipment
- Heating system
- Equipment and devices
- Electrical circuits
- General information
- Specifications
- Operation and maintenance
- 4-cylinder engine
- Engine repair
- Cooling and lubrication system
- Supply system
- Ignition system
- 6-cylinder engine
- Engine repair
- Cooling and lubrication system
- Supply system
- Fuel injection system
- Ignition system
- Transmission
- Clutch
- 4-speed manual gearbox
- 5-speed manual gearbox
- Automatic gearbox
- Cardan and rear axle
- Chassis
- Steering
- Front suspension
- Rear suspension
- Brake system
- Electrical equipment
- Equipment and devices
- Electrical circuits