
Table of contents: Removal ↓ Installation ↓
- Home
- BMW 5 Series
- E39
- Chassis
- Brake system
- Removal and installation front disc brake pads
Removal and installation front disc brake pads (BMW 5 Series E39)
Removal
Mark the position of the front wheels relative to the hubs with paint. This will allow the balanced wheel to be installed in its original position. When unscrewing the wheel bolts, the car must stand on its wheels. Raise the car from the front and remove the front wheels.
Caution: If the brake pads are to be re-installed, their position must be marked before removal. It is not permitted to replace the brake pads of the right wheel with the pads of the right wheel. Changing the position of the pads may result in uneven braking action. It is mandatory to use only genuine BMW brake pads or brake pads approved by the company. Brake pads must be replaced only as a set and simultaneously on all wheels of the axle, even if only one pad has reached the wear limit.
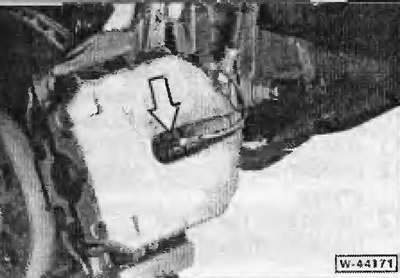
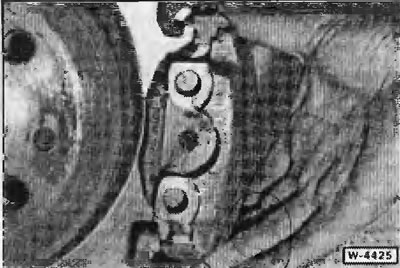
Using your fingers, disconnect the "arrow" connector of the brake pad wear indicator sensor on the left disc brake caliper, but do not pull on the wire.
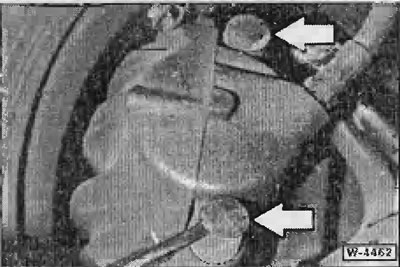
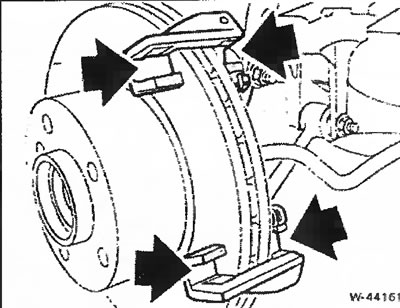
Use a screwdriver to press out the plastic caps "arrows" that cover the caliper mounting bolts.
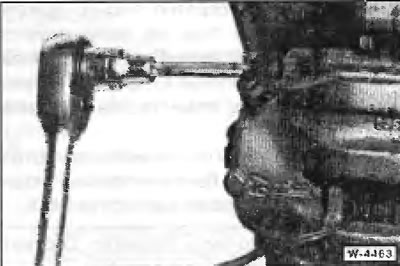
Unscrew both caliper mounting bolts located under the caps using a 7 mm Allen key.
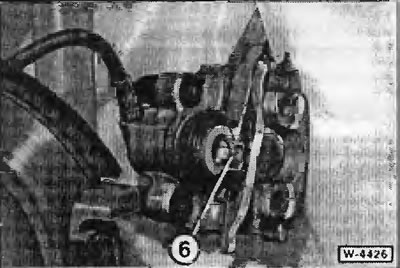
Press down the retaining spring with a screwdriver.
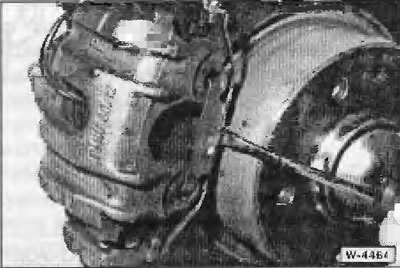
Pull the caliper out backwards and hang it on the body using a wire.
Caution: Do not disconnect the brake hose, otherwise the system will need to be bled after installation. Make sure that the brake hose is not stretched.
Remove the outer brake lining.
The inner brake lining is secured with spring "6" to the brake cylinder piston. Remove the brake lining.
Installation
Caution: When the brake pads are removed, do not depress the brake pedal, otherwise the piston will be pushed out of the caliper body.
Check the brake pad wear sensor. If the contact plate insulation is worn through, the wire insulation is damaged, or the plastic part is ground off, replace the wear sensor.
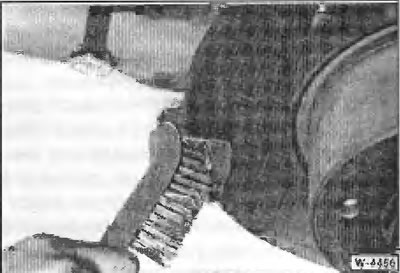
Clean the guide surfaces and lining areas of the pads with a suitable soft metal brush or wipe with a cloth soaked in alcohol. Do not use solutions containing mineral oils or tools with sharp edges. If the old brake linings are installed, they should also be cleaned.
Before installing the pads, examine the brake discs by touch with your fingers for the absence of indentations. Discs with indentations must be replaced with new ones. Discs with a gray or blue color must be cleaned before installing new brake pads.
Measure the thickness of the brake discs.
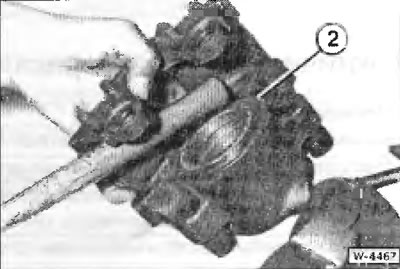
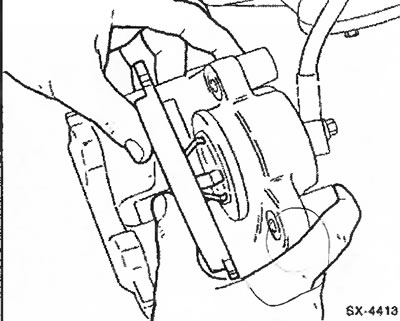
Check the dust cap "2" of the brake cylinder piston for cracks. Replace damaged caps immediately, as penetrating dirt will quickly damage the caliper's seal. In this case, the caliper must be removed and disassembled (workshop work).
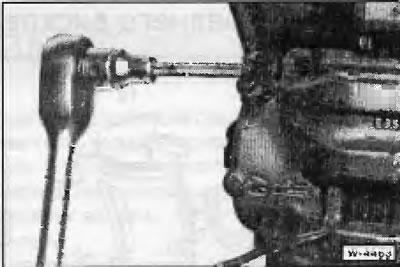
The brake cylinder piston is pushed back into the cylinder using a return device. A hardwood rod can also be used for this purpose (with a hammer handle), however, special care should be taken to ensure that the piston is not tilted and that the piston surfaces and dust cap are not damaged.
Note: When installing the piston into the cylinder, the brake fluid from the brake cylinder is squeezed into the expansion tank. Monitor the fluid level in the tank and, if necessary, suck out excess fluid with a siphon.
For suction, use a bottle that was used to remove air from the hydraulic system, or a plastic bottle that has previously only come into contact with brake fluid. Do not use bottles intended for drinking liquids! Brake fluid is poisonous and should never be sucked out by mouth through a hose, use a siphon. After replacing the brake pads, the brake fluid level in the expansion tank should also not exceed the MAX level, since the liquid expands when heated. Brake fluid flowing out of the tank gets under the main brake cylinder, destroys the varnish coating and leads to corrosion.
Note: If the brake pads are very worn, check the ease of movement of the piston. To do this, insert a wooden block into the brake caliper and ask an assistant to slowly press the brake pedal. The piston should be easily pressed out and retracted. During the check, the caliper of the other brake should be in a stopped position. Make sure that the piston is not completely pressed out. If the piston is difficult to move, the caliper must be repaired (workshop work).
To prevent disc brake squeal, apply a thin coat of grease (for example, Plastilube, Tunap VC 582/S, Chavron SRJ/2, Liqui Moly LM-36 or LM-50B-ASC) surfaces named below.
The contact surfaces of the piston with the brake lining.
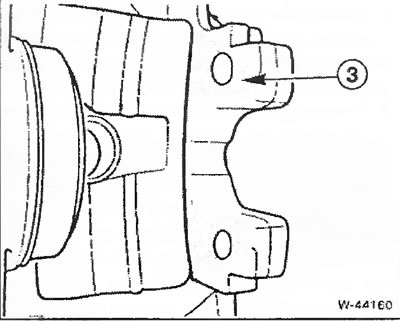
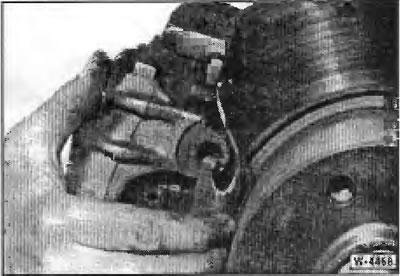
Clean the mating surfaces "3" of the caliper and lightly treat the shaded areas with anti-squeal lubricant - figure -.
The caliper holders at the rectangular guide heads should be cleaned and thinly treated with anti-screeching grease in the shaded areas "drawing".
Caution: Under no circumstances should grease come into contact with dust seals, brake pads or brake discs. If grease does come into contact with the dust seals, wipe it off immediately, remove traces with a cloth soaked in alcohol or cover the dust seals.
Caution: Do not lubricate the reverse side of the brake pad.
Insert the brake pad with the spring into the piston.
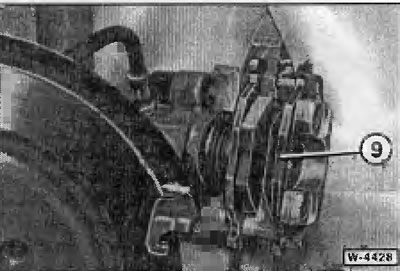
Insert the outer brake pad "9" into the caliper and slide it onto the brake disc. Make sure the brake pads fit well in the guides.
Perform a visual inspection of the two caliper mounting bolts, clean the threads from dirt if necessary. Clean the threaded holes in the brake shield with a tap if necessary. Replace bolts with poor threads or rust deposits with new ones. Using a 7 mm Allen key, tighten the bolts to 30 Nm.
Note: Only clean bolts, do not lubricate.
Insert protective caps into both bolt holes.
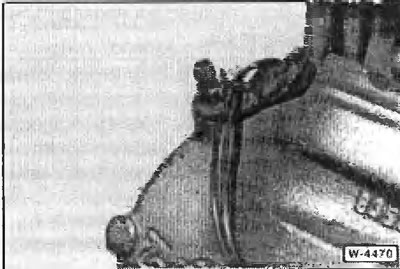
Connect the plug of the brake pad wear indicator to the right side of the vehicle. Route the connecting wire into the loop of the bleed valve cap.
Insert the retaining spring into the caliper.
Tighten the front wheels. Do not lubricate the wheel bolts. Position the wheel so that the marks made before removal match. Lower the car, tighten the wheel bolts crosswise
Caution: Press the brake pedal hard several times until you feel strong resistance. This will cause the brake pads to contact the discs and take the correct position for the operating conditions.
Check the brake fluid level in the expansion tank and, if necessary, top up the level to the MAX mark.
Attention: Perform a safety compliance check:
- Are the brake hoses tightened securely?
- Is the brake hose in the holder?
- Are the air bleed valves tightened?
- Is there enough fluid in the brake system?
- With the engine running, perform a leak test. To do this, apply a force of 200 to 300 N to the brake pedal for approximately 10 seconds (from 20 to 30 kg). Do not release the brake pedal. Weld all connections for leaks.
New brake pads should be carefully worked in by repeatedly braking the car from 80 km/h to 40 km/h by lightly pressing the brake pedal. Allow the brakes to cool between braking operations.
Caution: On a section of the road up to 200 km long, braking to a complete stop must not be undertaken.
Note: Brake linings must be disposed of as special waste. Local authorities must provide information on whether disposal via normal household waste collection points is permitted.
This article is available at russian, bulgarian, belarusian, ukrainian, serbian, croatian, romanian, polish, slovak, hungarian
Article verified: Ilyinsky Matvey
Share information:
Previous articles
БМВ E39: Brake system
Next articles
Similar articles on other types of BMW cars:
Removal and installation of brake pads — disc brakes of the front… BMW 3 Series E30 (1982-1994)
Removal and installation disc brake pads BMW 3 Series E21 (1975-1983)
Front brake pads — removal and installation BMW 7 Series E32 (1986-1994)
Brake pads for front disc brakes BMW X3 E83 (2003-2010)
Front disc — removal and installation BMW X5 E53 (1999-2006)
Link in different formats to this page
Visitor comments
No comments yet
- General information
- Governing bodies
- Manual
- Maintenance
- Power unit
- Engine repair
- Lubrication system
- Cooling system
- Ignition system
- Supply system
- Injection system (gasoline)
- Injection system (diesel)
- Exhaust system
- Transmission
- Clutch
- Car gearbox
- Front axle
- Rear axle
- Chassis
- Steering
- Brake system
- Wheels and tires
- Body
- Interior
- Exterior
- Heating system
- Electrical equipment
- Equipment and devices
- Power devices
- Windscreen wipers
- Electrical circuits
- General information
- Manual
- Maintenance
- Power unit
- Engine repair
- Ignition system
- Engine lubrication system
- Cooling system
- Fuel system (gasoline)
- Fuel system (diesel)
- Exhaust system
- Transmission
- Clutch
- Car gearbox
- Chassis
- Front and rear suspension
- Steering
- Brake system
- Body
- Exterior
- Interior
- Electrical equipment
- Heating system
- Equipment and devices
- Power devices
- Electrical circuits
- General information
- Manual
- Maintenance
- Power unit
- Engine in a car
- Engine overhaul
- Cooling system
- Supply system
- Ignition system
- Control system
- Transmission
- Clutch
- Manual gearbox
- Automatic gearbox
- Transmission line
- Chassis
- Steering
- Front suspension
- Rear suspension
- Brake system
- Body
- Body elements
- Car care and painting
- Electrical equipment
- Heater and air conditioner
- Equipment and devices
- Starter and generator
- Electrical circuits
- General information
- Operation and maintenance
- Specifications
- Power unit
- Engine repair
- Cooling and lubrication system
- Supply system
- Ecotronic power supply system
- Fuel injection system
- Ignition system
- Transmission
- Clutch
- Gearbox BMW 242/4
- Gearbox Getrag 262/8
- Gearbox Getrag 265/6
- Automatic gearbox
- Cardan gear
- Rear axle
- Chassis
- Steering
- Front suspension
- Rear suspension
- Brake system
- Electrical equipment
- Equipment and devices
- Electrical circuits