
Removal and installation brake pads on the front disc brakes
1. Remove the wheels.
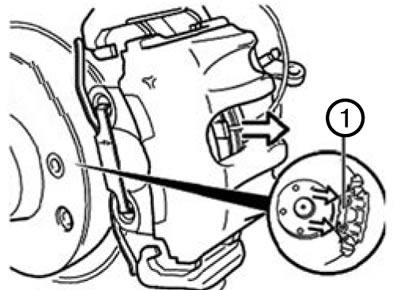
2. Remove the retaining spring (1).
3. Disconnect the brake pad wear sensor connector.
Note: Replace the brake pad wear sensor if necessary.
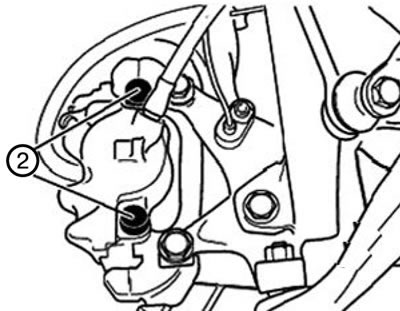
4. Remove the plastic caps (2).
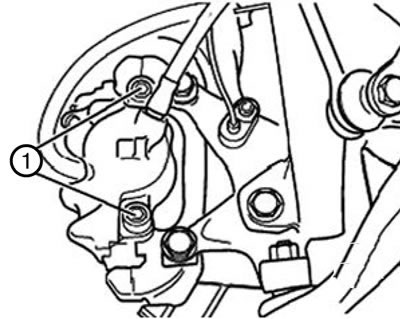
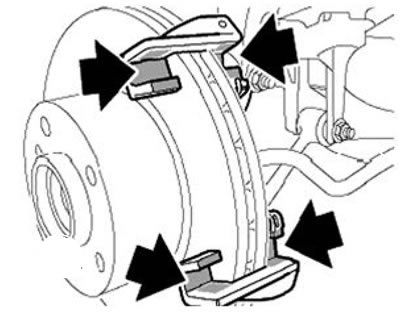
5. Unscrew the guide pins (1) and remove the caliper by pulling it back.
Note: Do not allow the caliper to hang by the brake hose as this may damage the brake hose.
Note:
- When installing, it is necessary to clean (but do not lubricate) guide fingers.
- Check the condition of the threads.
- Replace fingers with defects.
Tightening torque: 30 Nm.
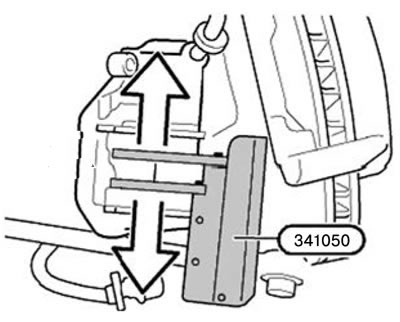
Caution: Monitor the brake fluid level while moving the piston. Overflowing brake fluid can damage the paintwork.
6. Move the piston as far as possible into the cylinder using tool 34 1 050.
Attention:
- Mark the worn-in pads.
- Do not confuse the pads if there is wear on one side.
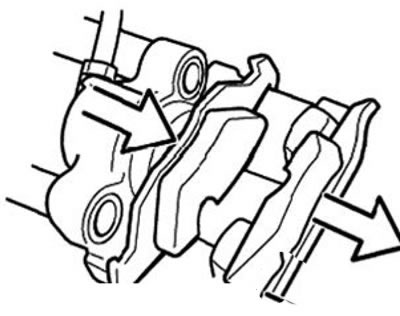
7. Remove the outer shoe.
Note:
- The pressure spring holds the inner shoe on the piston.
- Pay attention to the minimum thickness of the linings.
Note: When installing, it is necessary to clean the brake pads. Do not apply grease to the rear plates of the brake pads.
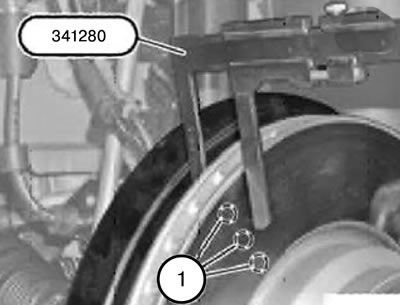
8. Check the minimum thickness of the brake disc.
1) Place the 341280 device on three points in area (1) and take readings.
2) Compare the smallest of the obtained values with the given value.
Please note: Brake pads should only be replaced if the brake disc thickness is greater than or equal to the minimum thickness (MIN TH).
Note: The minimum brake disc thickness is selected in such a way that it will last for the service life of another set of pads, provided that it is not less than the MIN TH value.
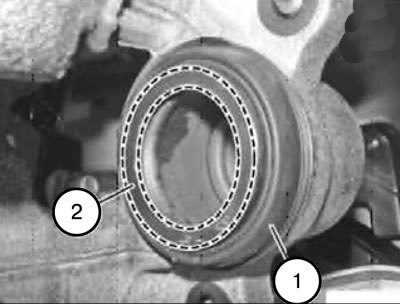
Caution: Avoid contact between the dust seal and Plastilube paste, as this may cause the seal to swell.
9. Check the dust seal (1) for damage and replace it if necessary.
10. Clean the mating surface (2) of the brake cylinder piston and apply a thin layer of anti-squeak paste to it.
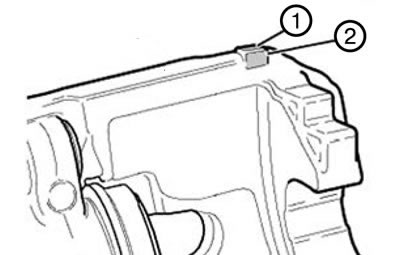
11. Clean the contact surfaces (1, 2) of the T-shaped ends of the brake pads and the caliper body and lubricate them with a thin layer of paste that prevents squealing of brake mechanism parts.
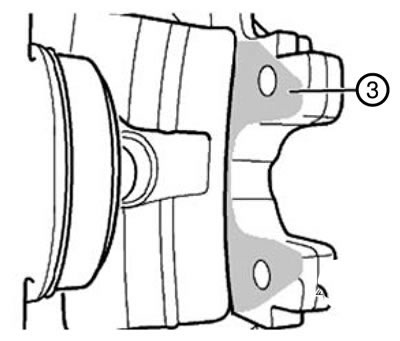
12. Clean the contact surface (3) of the caliper and lubricate it with a thin layer of anti-squeak paste.
13. Clean the T-shaped guides of the caliper clamps and lubricate them with a thin layer of paste that prevents squealing of brake parts.
Note: Upon completion of work:
- Press the brake pedal several times to ensure that the brake pads are in contact with the brake discs.
- When installing new brake pads on the front and rear wheels, you need to bring the brake fluid level up to the "MAX" mark.
- Follow the instructions for breaking in new brake discs/pads.
14. Installation should be carried out in the reverse order of removal, taking into account the above notes.