
- Home
- BMW 7 Series
- E38
- Electrical equipment
- Heating and air conditioning
- Removal and installation of fans and resistor assemblies
Removal and installation of fans and resistor assemblies (BMW 7 Series E38)
Fan of the integrated heating and air conditioning system unit
1. Remove the instrument panel trim (see chapter Body).

2. Release the air duct mounting clamp.
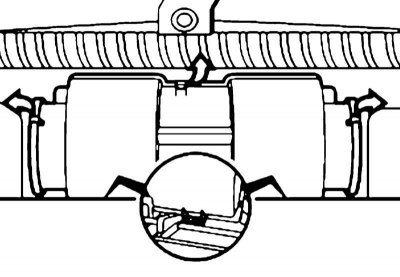
3. Fold back the lid fastening latches and remove the lid. Make sure the lid is in the correct position.
4. Disconnect the connector, remove the screws and take out the fan.
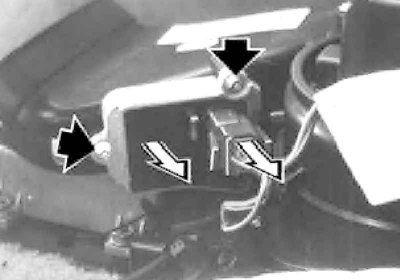
Fan of the integrated automatic heating and air conditioning system unit
1. Remove the instrument panel trim (see chapter Body).
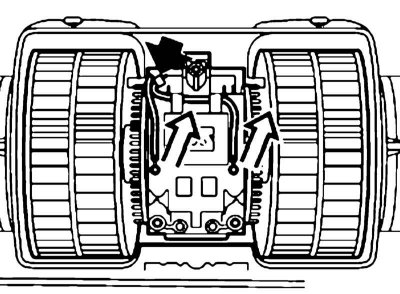
2. Release the air duct mounting clamp (see illustration).
3. Release the right and left clamps securing the rods and levers.
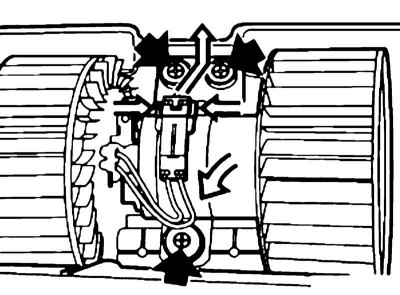
4. Disconnect the connector, cut the wiring harness clamp, remove the screws and remove the cover.
5. Remove the screws (similar to illustration) and remove the fan electric motor.
6. If necessary, remove the resistor assembly as described below.
7. Disconnect the connector and cut the wiring harness clamp.
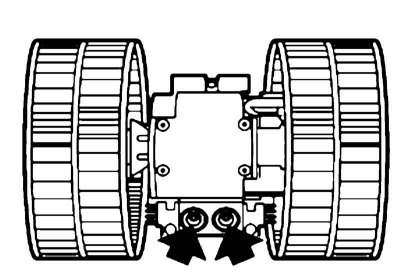
8. Remove the screws and the resistor assembly.
9. Installation is carried out in reverse order.
Rear compartment fan
1. Remove the decorative trim of the heater control levers in the rear of the passenger compartment, as well as the fan control panel (see chapter Body).
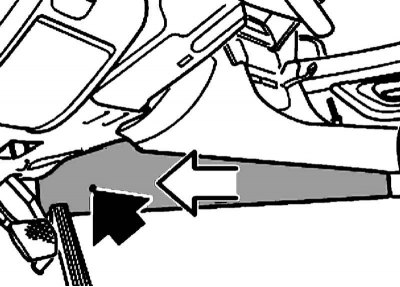
2. Remove the screws on both sides and pull the front side panel of the tunnel out of the mounts.
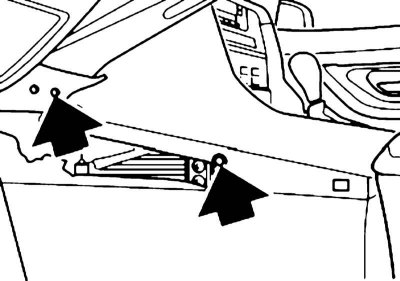
3. Remove the screws on the driver's side.
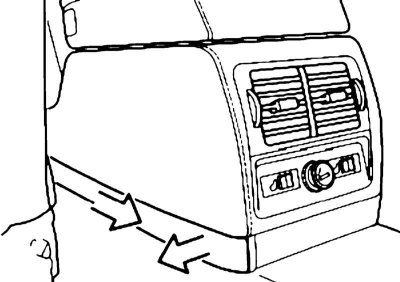
4. Unfasten the side panels on the rear storage compartment on both sides and pull them out of the mountings towards the rear.
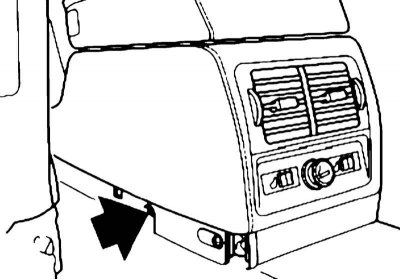
5. Unscrew the screws located under the pads on the left and right sides.
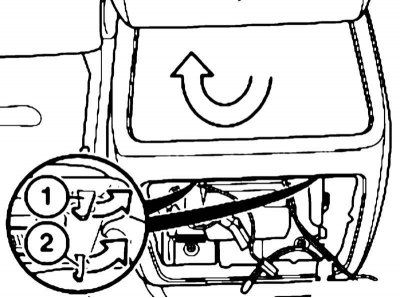
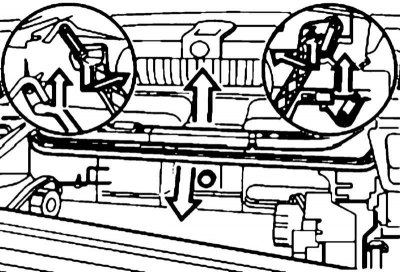
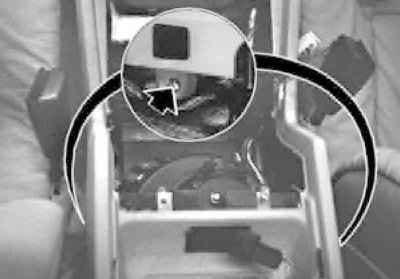
6. Through the hole, release the decorative panel of the rear glove compartment from the fasteners at the back (1) and front (2).
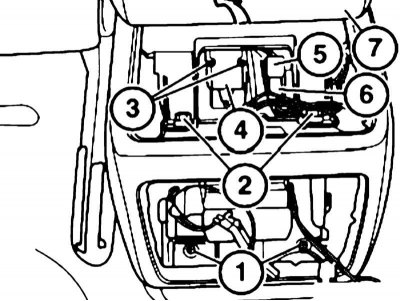
7. Loosen the screws (1-3), disconnect the connectors (4 and 5), unlock the contact block (6) and disconnect it.
Be careful not to damage the decorative wood trim panel when removing the middle trim panel. Slide the middle panel (7) for small items forward and upward and remove it.
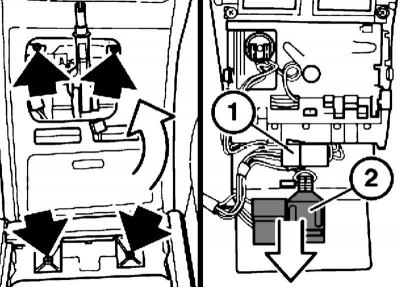
8. Remove the screws and pull out the wooden panel of the glove box (middle part) forward. Disconnect the connector (1) (under the wooden panel) and pull back the harness connector holder (2) as an assembly.

9. Remove the screw.
10. Lift the glove box from the rear and remove the screws on the left and right sides.
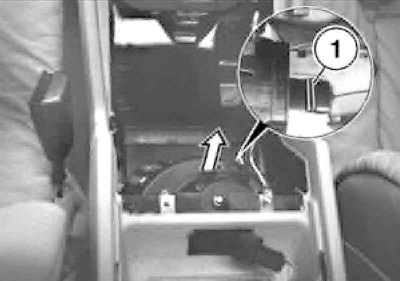
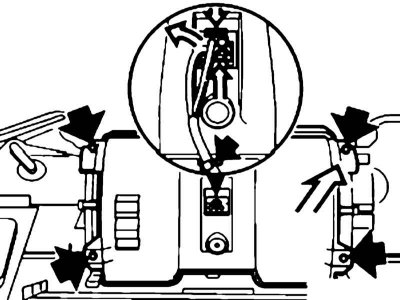
11. Pull the rear passenger compartment fan forward from the holder (1) and pull it out upwards towards the rear.
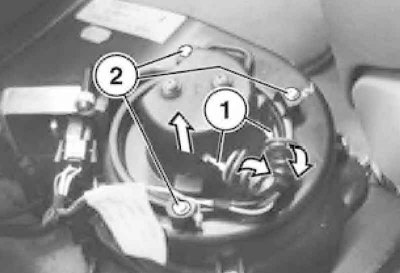
12. Slide the rubber caps and disconnect the connector (1). Remove the screws (2) and take out the rear passenger compartment fan.
13. If necessary, disconnect the connector, remove the screws and remove the resistor assembly.
This article is available at russian, bulgarian, belarusian, ukrainian, serbian, croatian, romanian, polish, slovak, hungarian
Article verified: Polikarpov Saveliy
Share information:
Previous articles
БМВ E38: Heating and air conditioning
Next articles
Similar articles on other types of BMW cars:
Removal and installation the contact ignition distributor BMW 3 Series E21 (1975-1983)
Removal and installation the oil pan BMW 5 Series E12 (1972-1981)
Pistons — removal and installation BMW X3 E83 (2003-2010)
Removal and installation the engine BMW X5 E53 (1999-2006)
Removal and installation the contact ignition distributor BMW 3 Series E21 (1975-1983)
Removal and installation the oil pan BMW 5 Series E12 (1972-1981)
Pistons — removal and installation BMW X3 E83 (2003-2010)
Removal and installation the engine BMW X5 E53 (1999-2006)
Link in different formats to this page
Visitor comments
No comments yet
- General information
- Introduction to guide
- Manual
- Maintenance
- Power unit
- Engine M60/1, M60/2 (petrol)
- M62 engine (petrol)
- M57 engine (diesel)
- M67 engine (diesel)
- Cooling system
- Fuel system (petrol)
- Fuel system (diesel)
- Exhaust system
- Ignition and control systems
- Charge and launch systems
- Transmission
- Clutch
- Mechanical gearbox
- Automatic gearbox
- Cardan and drive shafts
- Chassis
- Brake system
- Front suspension
- Rear suspension
- Steering
- Body
- Exterior
- Interior
- Electrical equipment
- Equipment and devices
- Lighting
- Heating and air conditioning
- Electrical circuits
- General information
- Care and maintenance
- Power unit
- Minor engine repair
- Engine overhaul
- Lubrication system
- Cooling system
- Ignition system
- Supply system
- Injection system (petrol)
- Injection system (diesel)
- Exhaust system
- Transmission
- Clutch
- Manual gearbox
- Automatic gearbox
- Cardan gear
- Rear axle and shafts
- Chassis
- Front suspension
- Rear suspension
- Steering
- Wheels and tires
- Brake system
- Body
- Body elements
- Electrical equipment
- Equipment and devices
- Electrical circuits