
- Home
- BMW 7 Series
- E38
- Electrical equipment
- Heating and air conditioning
- Removal and installation the heater radiator
Removal and installation the heater radiator (BMW 7 Series E38)
Models with integrated heating and air conditioning systems
1. Remove the top engine cover.
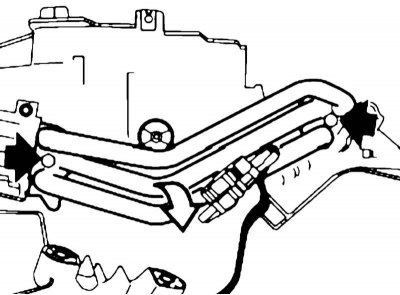
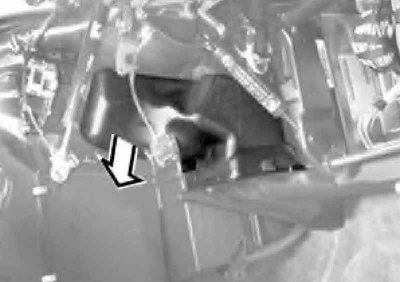
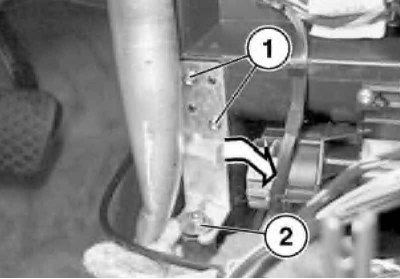
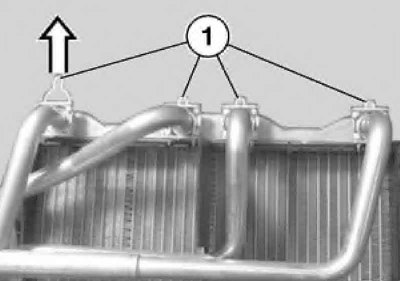
2. Remove the hoses (1) cooling system on the engine compartment bulkhead. Carefully blow out the connections to remove any remaining coolant from the radiator.
3. Remove the storage box, lower steering column cover and front footwell trim (see chapter Suspension and steering). Remove the left footwell air duct.
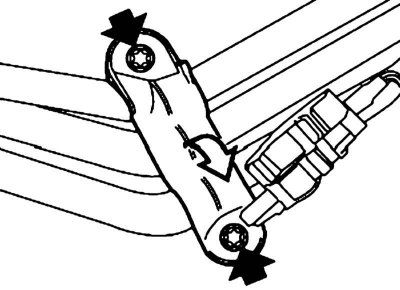
4. Remove the screws and set the holder aside.
5. Unscrew the bolts and remove the tubes.
Replace the tube sealing rings when installing.
6. Loosen the screws and remove the heater radiator cover.
7. Remove the heating element.
Models with automatic K/V system
1. Remove the top engine cover.
2. Remove the hoses (1) cooling system on the engine compartment bulkhead. Carefully blow out the connections to remove any remaining coolant from the radiator.
3. Remove the glove box (see chapter Body).
4. Remove the steering column (see chapter Suspension and steering).
5. Remove the left side trim and the left stiffener (see chapter Body).

6. Remove the left and right footwell air ducts.
Right footwell air duct
7. Remove the left and right rear air ducts.
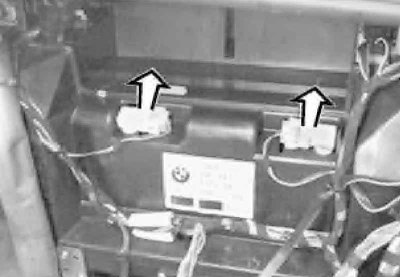
8. Remove the right and left footwell air vent servos. Set the vent to a roughly horizontal position and hang up the lever mechanism.
Right footwell air supply flap servo
Left footwell air supply flap servo
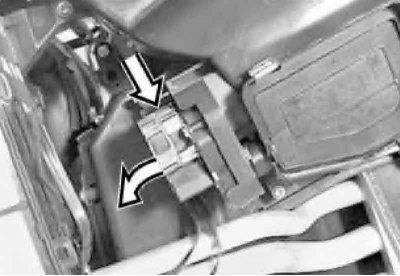
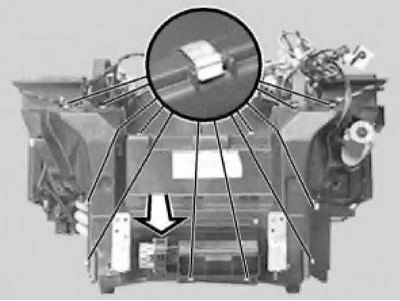
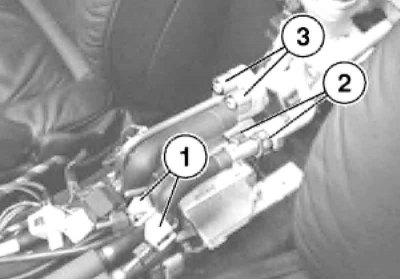
9. Remove the screws (1), loosen the nut (2) and remove the left and right holders.
10. Release the fastening bracket and remove the temperature sensor. Cut the clamp fastening the electrical harness on the cover.
Use new clamps when installing.
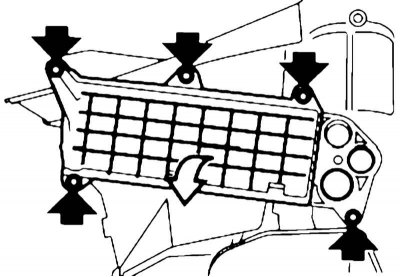
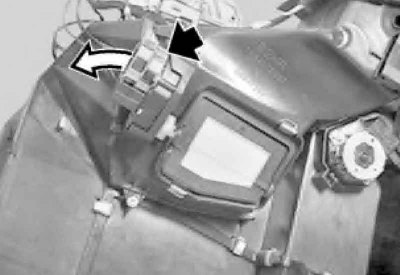
11. Remove the brackets and remove the radiator cap.
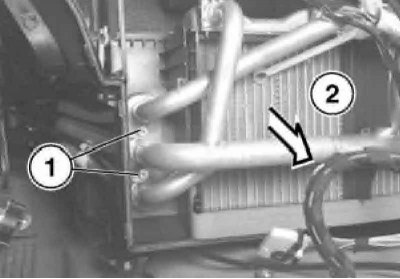
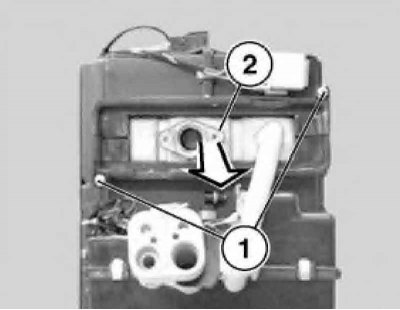
12. Remove the screws (1) and take out the radiator (2).
Replace the sealing rings when installing.
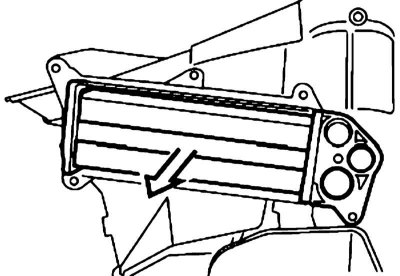
13. When replacing the heating element, remove the retaining clips and reroute the wires.
14. Installation is carried out in reverse order.
Rear passenger compartment heater radiator
1. Remove the front and rear storage compartments (see chapter Body).
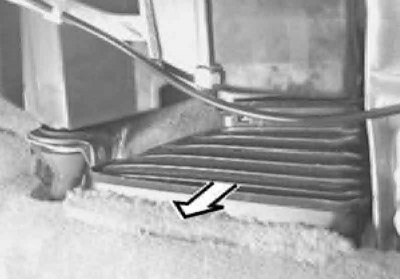
2. Clamp the hoses (1). Loosen the union nuts (2) and disconnect the coolant pipes without disconnecting the refrigerant lines.
Replace the sealing rings when installing.

3. Remove the insulating material on the water valve. Loosen the bolts (1) and remove the water valve (2) with the supply hose.
In the illustration, the heating and air conditioning unit is shown removed for greater clarity, but it does not need to be removed.
4. Unscrew the bolts (1) and remove the radiator (2) with the drain pipe from the housing.
[Examine the original source using the link on the website: BMWMAN]
This article is available at russian, bulgarian, belarusian, ukrainian, serbian, croatian, romanian, polish, slovak, hungarian
Article verified: Polikarpov Saveliy
Share information:
Previous articles
БМВ E38: Heating and air conditioning
Next articles
Removal and installation of fans and resistor assemblies
Removal and installation an additional water pump and water valve
Removal and installation of deflectors for heating, ventilation and…
Removal and installation the air conditioning compressor
Removal other components of the air conditioning system
Removal and installation an additional water pump and water valve
Removal and installation of deflectors for heating, ventilation and…
Removal and installation the air conditioning compressor
Removal other components of the air conditioning system
Similar articles on other types of BMW cars:
Removal and installation/checking the resistance of the heater fan… BMW 3 Series E30 (1982-1994)
Removal and installation the heater temperature sensor BMW 3 Series E36 (1990-2000)
Removal and installation the heater BMW 5 Series E12 (1972-1981)
Removal and installation the radiator BMW 5 Series E34 (1988-1996)
Removal and installation the heater BMW X3 E83 (2003-2010)
Removal and installation the radiator BMW X5 E53 (1999-2006)
Link in different formats to this page
Visitor comments
No comments yet
- General information
- Introduction to guide
- Manual
- Maintenance
- Power unit
- Engine M60/1, M60/2 (petrol)
- M62 engine (petrol)
- M57 engine (diesel)
- M67 engine (diesel)
- Cooling system
- Fuel system (petrol)
- Fuel system (diesel)
- Exhaust system
- Ignition and control systems
- Charge and launch systems
- Transmission
- Clutch
- Mechanical gearbox
- Automatic gearbox
- Cardan and drive shafts
- Chassis
- Brake system
- Front suspension
- Rear suspension
- Steering
- Body
- Exterior
- Interior
- Electrical equipment
- Equipment and devices
- Lighting
- Heating and air conditioning
- Electrical circuits
- General information
- Care and maintenance
- Power unit
- Minor engine repair
- Engine overhaul
- Lubrication system
- Cooling system
- Ignition system
- Supply system
- Injection system (petrol)
- Injection system (diesel)
- Exhaust system
- Transmission
- Clutch
- Manual gearbox
- Automatic gearbox
- Cardan gear
- Rear axle and shafts
- Chassis
- Front suspension
- Rear suspension
- Steering
- Wheels and tires
- Brake system
- Body
- Body elements
- Electrical equipment
- Equipment and devices
- Electrical circuits