
The door replacement operation includes its removal, installation and adjustment.
Attention! When performing door replacement operations, avoid damage to adjacent parts. Strictly observe the safety regulations when handling the inflatable airbag (NPB).
When adjusting, only minor corrections by straightening are allowed.
Adjustment of the doors must begin with the alignment of the rear doors.
After adjustment, restore the paintwork.
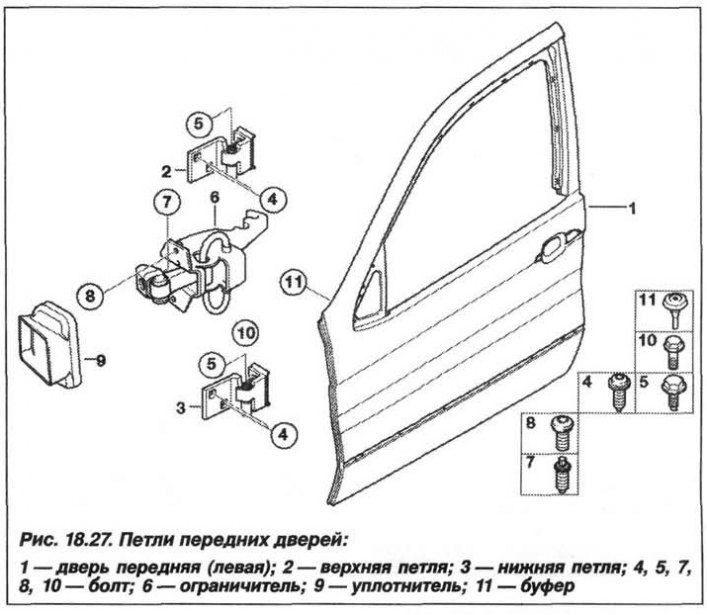
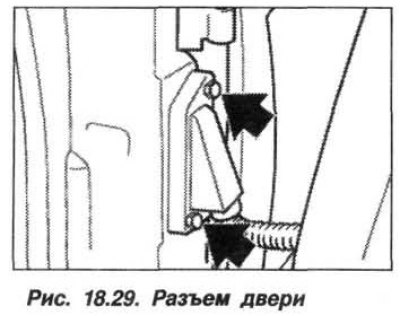
Removing the front door (right or left) must be carried out in the following order. Prepare a support for the door, open it and unscrew the bolts (arrows, Fig. 18.29) on the door connector housing. Remove the screws (5, see Fig. 18.27/18.28) between the links of the lower (3) and upper (2) hinges. Unscrew the screw (8) of the door opening limiter.
Lift the door, remove it from the hinge and lower it on a suitable stand (support). Remove the connector from the door post. Unlock it by pulling out the latch and disconnect it.
When installing the door, adjust it according to the gaps (see fig. 18.2), as described below. Loosen the bolts (1, Fig. 18.30) or nuts (2) on the hinges of the door to be adjusted, respectively at the top and bottom.
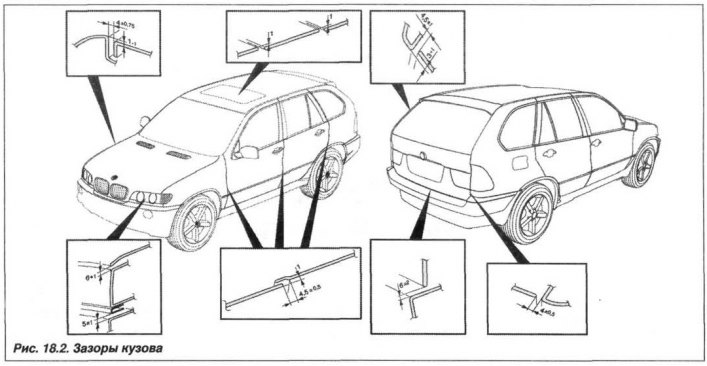
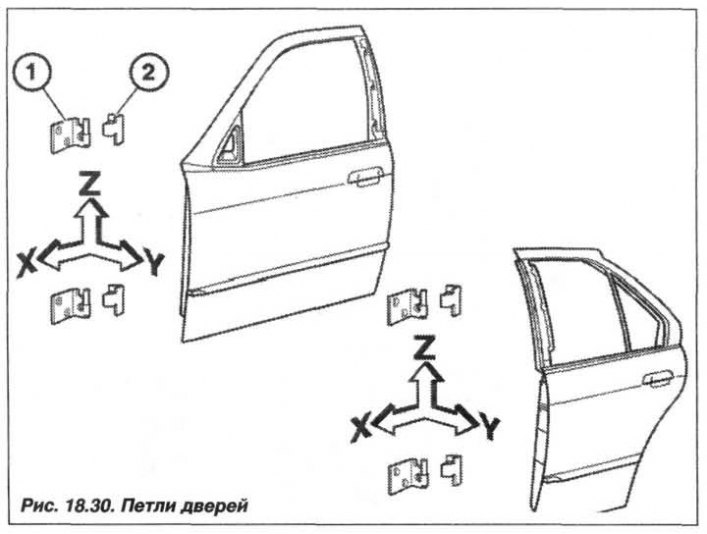
Adjust the door gap according to the specified values.
Check the installation height of adjacent body parts (see fig. 18.2) and adjust it if the parts are not at the same height. After completing the adjustment, tighten the hinge nuts or bolts.
If necessary, adjust the lock retainer by removing the cover on the door pillar. Loosen the screws (1 and 2, Fig. 18.31), adjust the clamp and retighten the screws.
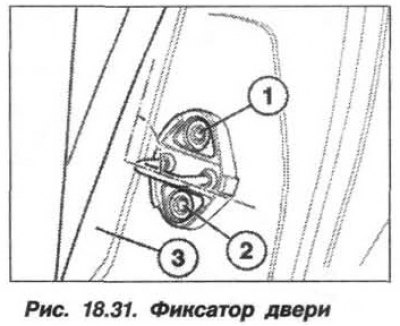
Note: Once the screws are loosened, the catch should be at a 90° angle to the inside edge of the door frame and move easily.
When closing the door, the latch should not hit or rub against the internal parts of the lock. Pay attention to the appearance of scratches.
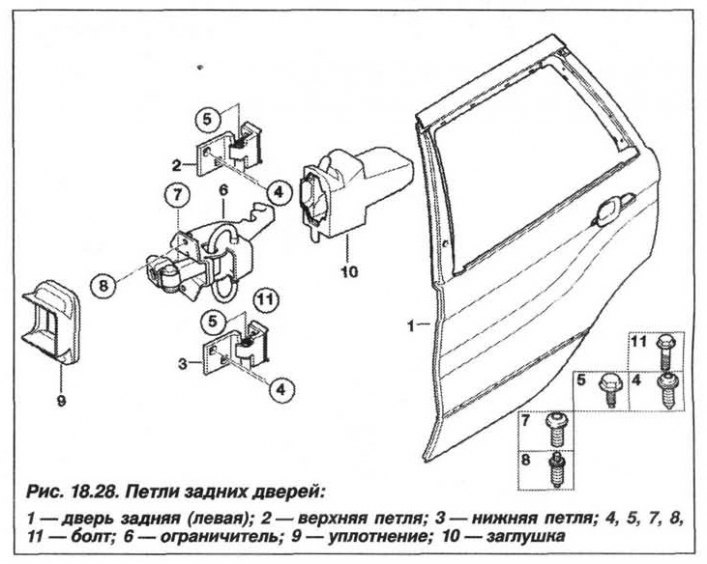
Operations for removal, installation and adjustment of rear doors (right/left) similar to the removal, installation and adjustment of the front doors (right/left).