
Caution: When installing the lock, do not apply lubricant to the latch and door lock (lock retainer).
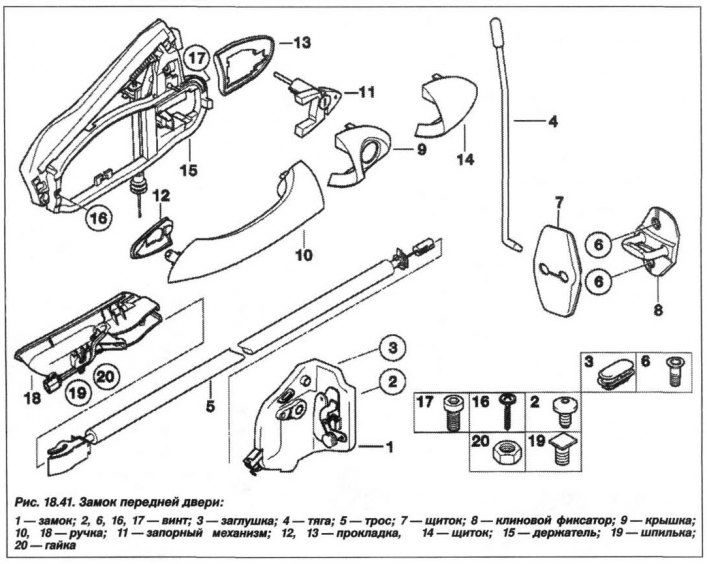
The design of the front door lock drive is shown in Figure 18.41.
Remove the front door lock in the following order. Remove the front door sound insulation, lock cylinder assembly and disconnect the "SHC" plug connection from the door lock.
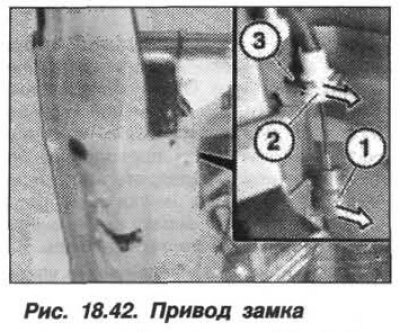
Release the ball head (1, Fig. 18.42) the lock drive from the clamps. Disconnect the drive cable (2) from the fastening (3) on the door (arrow). Unscrew the screws (2, see Fig. 18.41) lock fasteners and remove the door lock (1) with rods (4 and 5).
The installation of the front door lock should be carried out in the reverse order, while it is necessary.
Insert the locking button rod through the cutout in the inner door panel, avoiding deformation. Replace the screws (2) and tighten them to a torque of 9.0 N·m (0.9 kgf·m).
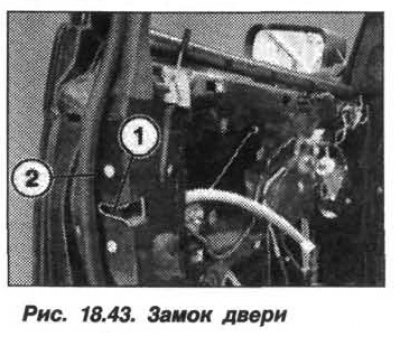
After installation, it is necessary to check the operation of the lock only with the door open, in the following order:
- close the lock (1, Fig. 18.43), using a screwdriver;
- lock the car with a key;
- unlock the car with a key;
- open the lock (1) by pulling the outside door handle;
- if the lock opens, it is working;
- if the lock (1) does not open, the lock drive must be replaced.
When replacing the front door lock, release the retainer and unhook the drive cable (5, see Fig. 18.41) from the mount. Disconnect the cable nipple from the lever and the rod (4) of the locking button from the mount on the lock.
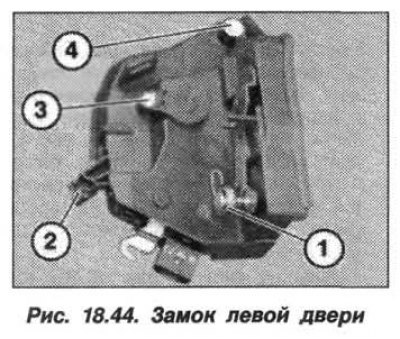
Before installing the lock (fig. 18.44) check:
- spring (1);
- fastening the cable of the drive of the inner door handle;
- locking rod mount (3);
- lock cylinder blade mount (only on the driver's door side).