
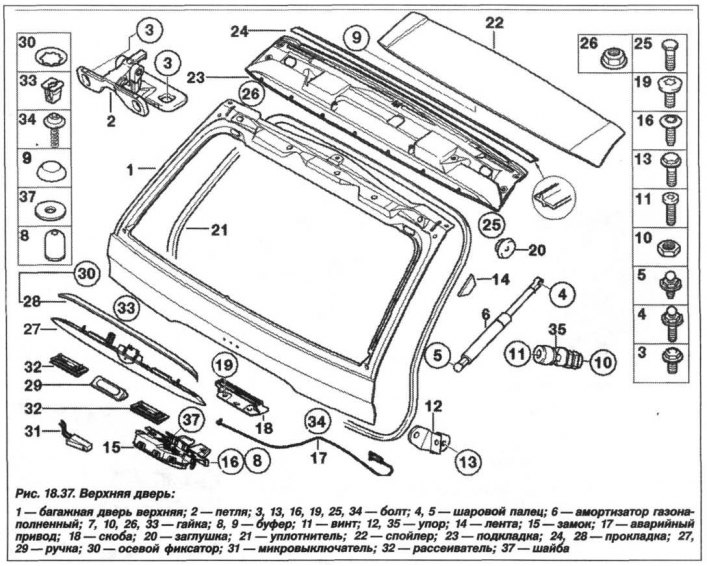
The replacement of the upper part of the trunk lid must be carried out by two people in the following order: Remove the trim panels of the upper trunk lid, disconnect the electrical connections and pull the wiring harness out of the trunk lid, after securing a nylon cord to its end, and fix the upper trunk lid so that it does not slam.
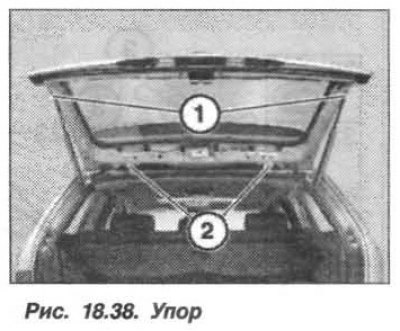
Disconnect the gas-filled struts (1, Fig. 18.38), unscrew the bolts (2) and remove the upper luggage door.
The installation of the upper part of the luggage door should be carried out in the reverse order, while it is necessary to place the bolts for fastening the door hinges according to the traces left on the hinge. In this case, there is no need to adjust the door.
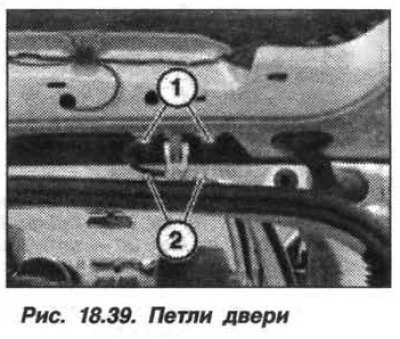
Lift the rubber seal in the left and right corner of the door. There is a hole underneath that needs to be sealed with transparent adhesive tape. The upper luggage door adjustment must be done in the following order. Loosen the screws (1, Fig. 18.39) on the door hinge and adjust the upper part of the luggage door to the specified gap values. If the adjustment range is not sufficient, additionally loosen the screws (2) on the body.
After completing the adjustment, tighten the hinge mounting screws. If necessary, loosen the lock retainer screws on the upper luggage door. Adjust the lock retainer and tighten the mounting screws.
Check and, if necessary, replace the left/right side, stop buffers installed on the body. To adjust the height of the upper luggage door, it is necessary to rotate the screw (fig. 18.40) in the stop buffer.
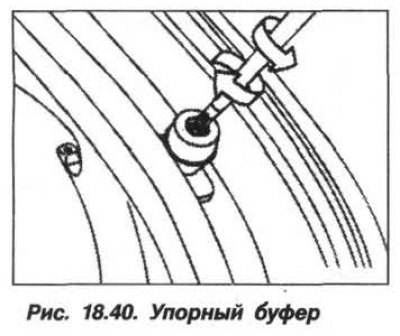
Put a strip of paper (thickness 0.1 mm) between the upper door and the buffer. The paper should be clamped, but not torn off when pulled. Insufficient clamping force leads to a knocking sound, and too much - to difficulties when closing the upper tailgate.
Since December 2005, the car has been equipped with spring-loaded buffers that do not require adjustment.