
To remove the oil sump, it is necessary to lower the front axle beam.
1. Disconnect the negative cable from the battery.
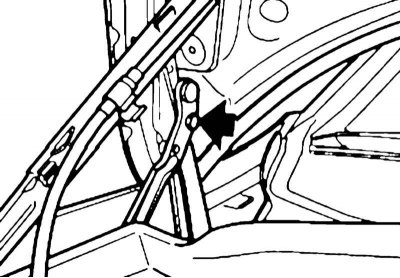
2. Lock the hood in its highest position. To do this, disconnect the damper from it, fully open the hood and secure it with bolts on the left and right.
3. Remove the top engine cover.
4. Remove the upper part of the air cleaner housing along with the MAF sensor (see Section Replacing the air cleaner element Chapters Vehicle settings and routine maintenance).
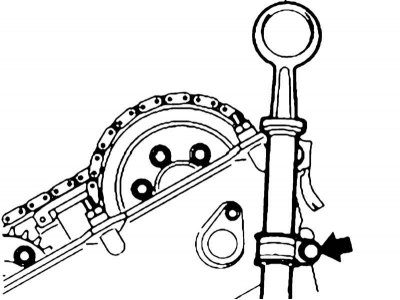
5. Remove the dipstick guide from the right timing chain cover.

6. Give the top nuts of the left and right pillows of support of the engine.
7. Hang the engine with a special tool using the engine lifting eyes.
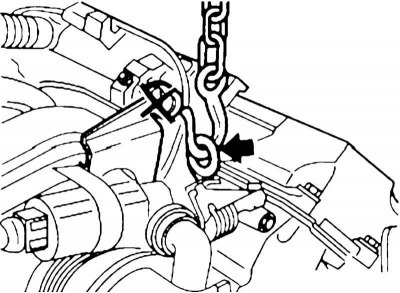
Engine front lifting eye
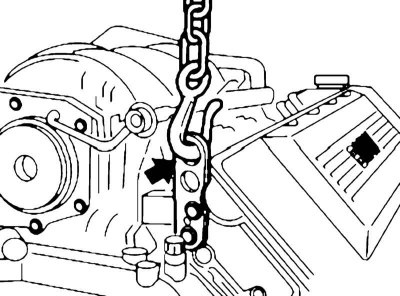
Engine rear lifting eye
8. Remove the oil pan (see Section Removal and installation of the oil pan).
9. Loosen the tension of the K / V compressor drive belt and remove the tensioner tensioner from the oil sump.
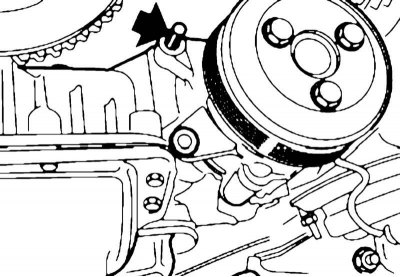
10. Remove the power steering pump without disconnecting the pipelines.
If necessary, unscrew the dowel pin from the upper section of the oil pan, set aside and tie the pump.
11. Disconnect the protective casing of the positive contact in the engine compartment from the oil sump and from the right engine support. Disconnect the positive battery cable from the starter and from the left support bracket.
12. Disconnect the guide tube of the engine oil level dipstick from the crater.
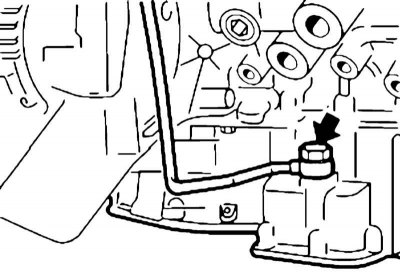
13. Disconnect the return pipe from the oil pan.
14. Disconnect the steering shaft from the steering gear (see chapter Suspension and steering).
15. Unclench the bracket of the hydraulic pipeline to the front axle beam and support the beam with a special tool.
16. Disconnect the front axle beam from the engine mount and lower it about 60 mm (see chapter Suspension and steering).
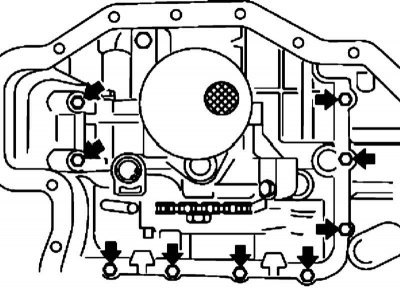
17. Remove the bolts from inside the upper section of the oil pan and remove the oil pump (see Section Removal and installation of the oil pump).
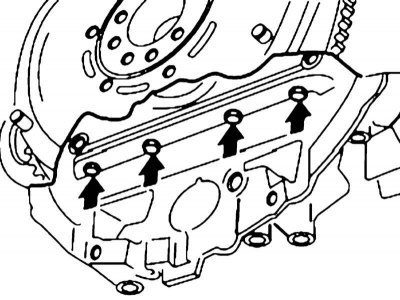
18. Turn out bolts of fastening of the top section of the pallet crankcase from transmission side.
19. If necessary, release the brackets for fastening pipelines from the oil cooler to the crankcase. Turn out the remained bolts of fastening of the top section of the pallet of a case and remove it, having shifted forward.
20. Installation is carried out in the reverse order. Pay attention to the following points:
- If necessary, replace the O-rings of the guide of the dipstick of the level of impellent oil;
- Clean the mating surfaces from the remnants of sealing materials and lubricate these surfaces with Hylomar SQ 32 M sealant;
- Replace the gasket of the upper section of the oil pan;
- The final tightening of the transmission side bolts should only be done after the engine side bolts have been tightened.