
Table of contents: Removal ↓ Installation ↓
- Home
- BMW 3 Series
- E36
- Body
- Exterior
- Removal and installation the door lock
Removal and installation the door lock (BMW 3 Series E36)
Removal
Remove the inner door trim.
The window must be closed.
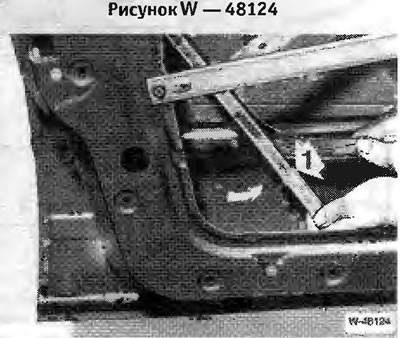
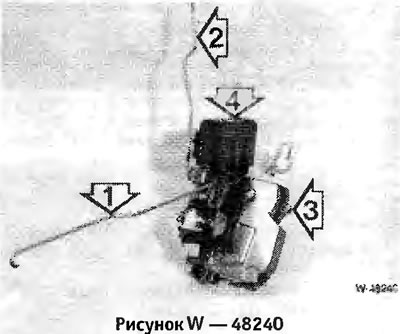
Unscrew bolt "1", tilt the glass guide bar forward and disconnect from above. Release the electrical wires, disconnect the connector. For convenience, you can completely remove the glass.
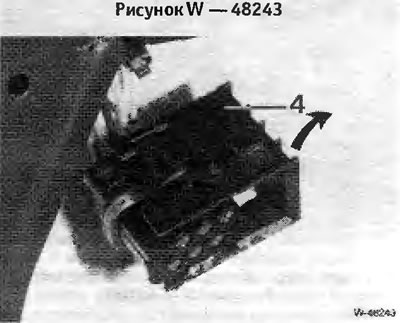
Disconnect the connector from the actuator motor of the central locking system. To do this, move the lock "4" to the side in the direction of the arrow. This will lift the connector slightly and allow it to be easily removed.
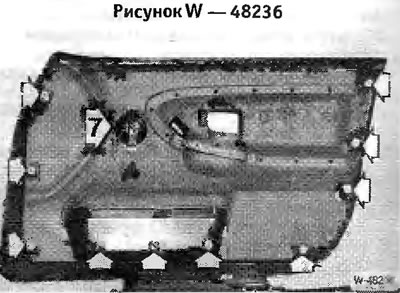
Unscrew the inner door handle, disconnect it from the actuator rod and remove it. Disconnect the rod from the rear.
Remove 3 bolts on the door.
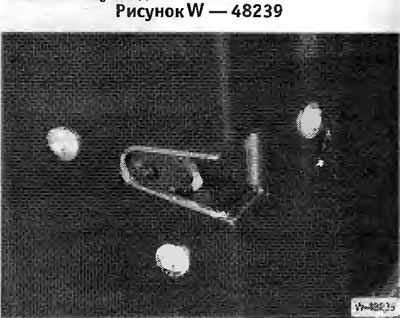
Raise the door lock slightly and disconnect the rod from the outer door handle. At the same time, raise the outer door handle slightly.
Remove the lock from the door downwards.
Installation
The rods must be connected to the lock as follows: 1 to the lock button, 2 to the door handle (lock cylinder), 3 to the remote control, 4 to the actuator motor of the central locking system.
Insert the lock into the door and connect the rods accordingly. The rods have bends. The rods are inserted so that they do not touch the door anywhere. Ensure free movement of the rods.
Secure the lock to the door with 3 bolts.
Connect and secure the connector of the actuator motor of the central locking system.
Check the operation of the lock, remote control and central locking control.
Slide the glass guide from below into the upper hook, then screw it to the door. Insert the sealing rubber into the guide.
Connect the actuator rod to the inner door handle and screw the inner door handle. The front nose must snap into place, otherwise it will be impossible to install the trim later.
Install the interior door trim.
This article is available at russian, bulgarian, belarusian, ukrainian, serbian, croatian, romanian, polish, slovak, hungarian
Article verified: Chebotarev Vladislav
Share information:
Previous articles
БМВ E36: Exterior
Next articles
Similar articles on other types of BMW cars:
Removal and installation the door lock cylinder BMW 5 Series E39 (1995-2003)
Removal and installation the outside door handle and lock cylinder BMW 5 Series E34 (1988-1996)
Door — removal, installation and adjustment BMW 7 Series E32 (1986-1994)
Removal and installation the ignition switch and steering wheel lock BMW 7 Series E38 (1994-2001)
Removal and installation the rear door BMW X3 E83 (2003-2010)
Removal and installation the upper luggage door lock BMW X5 E53 (1999-2006)
Link in different formats to this page
Visitor comments
No comments yet
- General information
- Manual
- Maintenance
- Power unit
- Engine repair
- Cooling system
- Power system (gasoline)
- Injection system (gasoline)
- Fuel system (diesel)
- Exhaust system
- Ignition system
- Charge and launch systems
- Transmission
- Car gearbox
- Clutch and drive shafts
- Chassis
- Brake system
- Suspension front and rear
- Steering
- Body
- Body care and repair
- Exterior
- Interior
- Electrical equipment
- Troubleshooting
- Lighting and signaling
- Equipment and devices
- Heater and air conditioner
- Electrical circuits
- General information
- Manual
- Repair on the road
- Weekly checks
- Maintenance
- Troubleshooting
- Power unit
- 4 cylinder engines
- 6 cylinder engines
- Engine overhaul
- Cooling and heating
- Fuel and exhaust system
- Starting and charging system
- Ignition system
- Transmission
- Clutch
- Mechanical gearbox
- Automatic gearbox
- Cardan and drive shafts
- Chassis
- Brake system
- Wheel suspension
- Steering
- Body
- Exterior
- Interior
- Electrical equipment
- Equipment and devices
- Electrical circuits
- General information
- Maintenance
- Power unit
- Engine repair
- Cooling system
- Ignition system
- Supply system
- Fuel injection system
- Exhaust system
- Transmission
- Clutch
- Car gearbox
- Front and rear axle
- Chassis
- Steering
- Brake system
- Body
- Exterior
- Interior
- Electrical equipment
- Heating system
- Equipment and devices
- Power devices
- Electrical circuits
- Power unit
- M10/M20 engine
- M40 engine
- Ignition system
- Lubrication system
- Cooling system
- Supply system
- Fuel injection
- Exhaust system
- Transmission
- Clutch
- Manual gearbox
- Front axle
- Rear axle
- Chassis
- Steering
- Brake system
- Body
- Exterior
- Interior
- Electrical equipment
- Heating system
- Equipment and devices
- Electrical circuits
- General information
- Specifications
- Operation and maintenance
- 4-cylinder engine
- Engine repair
- Cooling and lubrication system
- Supply system
- Ignition system
- 6-cylinder engine
- Engine repair
- Cooling and lubrication system
- Supply system
- Fuel injection system
- Ignition system
- Transmission
- Clutch
- 4-speed manual gearbox
- 5-speed manual gearbox
- Automatic gearbox
- Cardan and rear axle
- Chassis
- Steering
- Front suspension
- Rear suspension
- Brake system
- Electrical equipment
- Equipment and devices
- Electrical circuits