
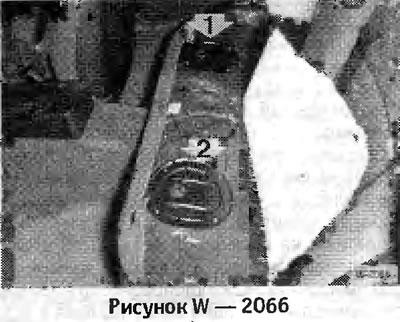
Unscrew cover "1".
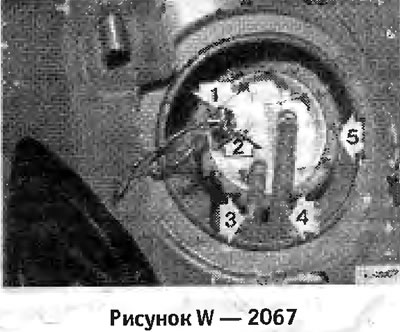
1 — fuel pump connector; 2 — fuel level sensor connector; 3 - fuel hose for supplying fuel to the pump; 4 — fuel tank compensation hose.
Disconnect connectors "1" and "2". To disconnect, squeeze the locking tabs.
Mark fuel hoses "3" and "4" with adhesive tape and disconnect them from the fuel level sensor, releasing the hose clamps.
Caution: The fuel system is under pressure, so disconnect the hose slowly and wipe off any leaking fuel with a rag.
Carefully unscrew the union nut "5". Service stations use a special tool BMW 161020 for this. You can also get by with a wooden rod or a large screwdriver.
Lift the fuel gauge, move it aside and remove it. Place a rag underneath and wipe off any leaking fuel.
Removing the left fuel level sensor
Unscrew cover "2" (Figure W - 2066).
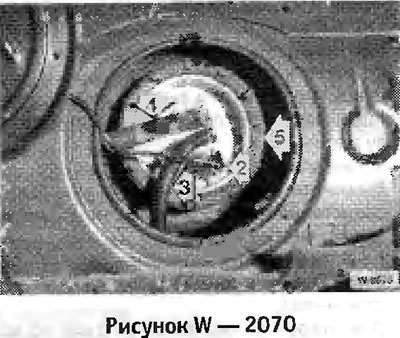
2 — fuel level sensor connector; 3 - fuel return hose; fuel compensation hose.
Disconnect connector "2". To disconnect, squeeze the locking tabs.
Mark fuel hoses "3" and "4" with adhesive tape and disconnect them from the fuel level sensor, releasing the hose clamps.
Caution: The fuel system is under pressure, so disconnect the hose slowly and wipe off any leaking fuel with a rag.
Carefully unscrew the union nut "5". Service stations use a special tool BMW 161020 for this. You can also get by with a wooden rod or a large screwdriver.
Lift the fuel gauge, move it aside and remove it. Place a rag underneath and wipe off any leaking fuel.
Installation
Caution: Be sure to replace the union nut and the fuel level sensor gasket.
Right fuel gauge
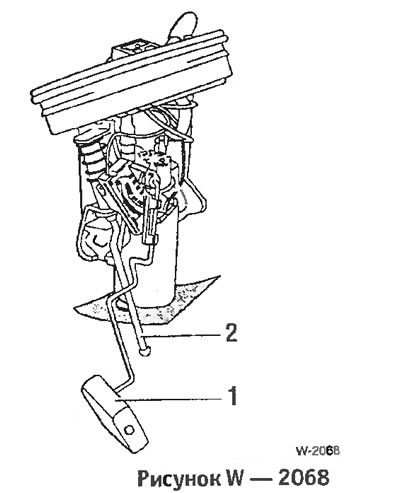
When installing, press the level probe "2" to the fuel pump body. Before final installation, make sure the fuel level sensor is in the correct position by shaking it in different directions. The level probe "2" should be perpendicular to the bottom of the fuel tank, the tank has a recess in the appropriate place. In addition, float "1" should move freely.
Left fuel gauge
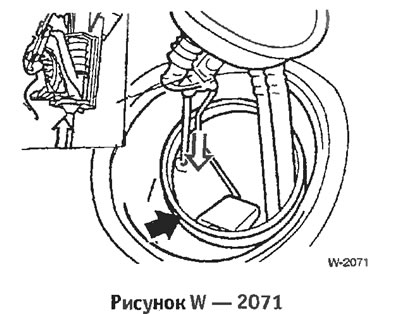
When installing, press the dipstick up and slightly to the right, overcoming the spring force, see figure. Insert the fuel gauge vertically in the required position: The dipstick should be vertical and rest against the bottom of the fuel tank.
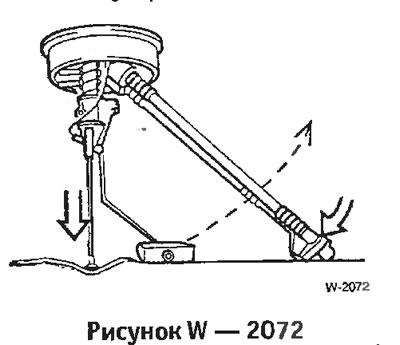
Caution: The fuel line of the fuel tank is pressed against the bottom of the tank. The level dipstick should be in the recess in the bottom of the tank. The lever with the float should move freely.
Align the fuel gauge by turning it, the edge on the flange should be facing the mark on the fuel tank. Install a new union nut and tighten it with a tightening torque of 50 Nm.
Connect the fuel hoses in accordance with the markings made and secure with new clamps.
Connect and secure the connectors.
Put the cover on and screw it on, paying attention to the correct position of the gasket. Connect the battery.
Check the operation of the fuel reserve indicator on the instrument panel.