
Withdrawal
The clutch is usually accessed by removing the transmission without removing the engine from the vehicle. If the engine does have to be removed for a major overhaul, then you should take the opportunity to check the clutch for signs of wear, replacing worn components as needed. The procedure below assumes that the engine is in the vehicle.
1. Remove the transmission from the car, using the recommendations of the Head Manual gearbox (RKPP).
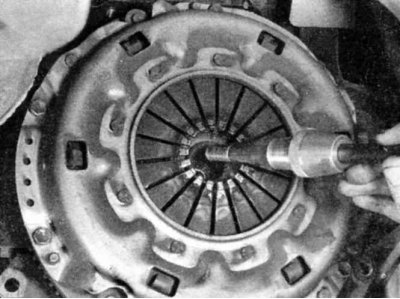
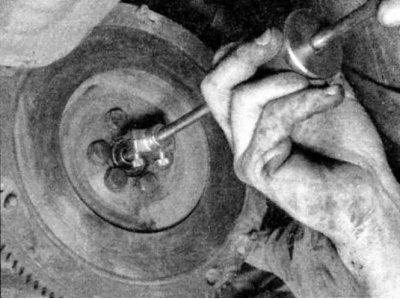
2. To support the clutch disc during removal, insert a clutch alignment tool or the old transmission input shaft into the middle of the clutch basket.
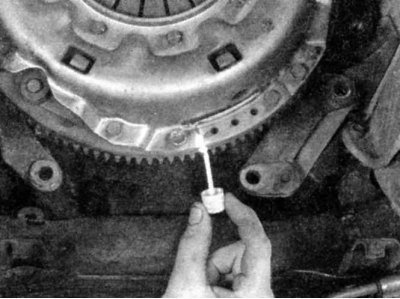
3. Carefully inspect the flywheel and pressure plate for alignment marks. If there are none, apply them with a scraper or paint so that the pressure plate and flywheel are set in the same position relative to each other during assembly.
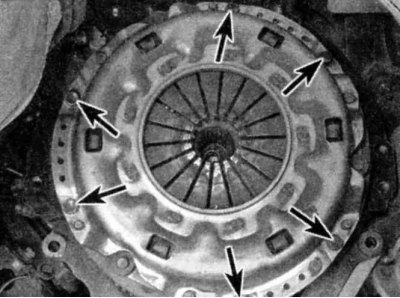
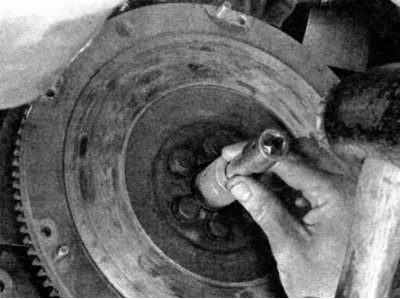
4. Loosen the bolts securing the pressure plate to the flywheel (indicated by arrows), turning each one a little at a time. Do this diagonally until all spring pressure is released.
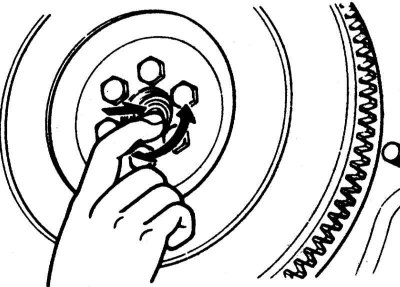
5. Grasp the pressure plate and completely give the bolts, then separate the pressure plate and driven plate from the flywheel. Pay attention to which direction the clutch disc is screwed.
Inspection
Usually, when problems occur in the operation of the clutch, they can be attributed to the wear of the clutch disc assembly. However, other components should be checked at the same time.
1. Inspect the flywheel (see part Repair work carried out without removing the engine from the car).
2. Check the pilot bearing at the end of the crankshaft. Make sure it spins smoothly and quietly.
3. If the contact surface of the bearing with the transmission input shaft is damaged or worn, replace the bearing.
4. Using a puller, remove the pilot bearing.
5. Install the new bearing using a replacement socket and a hammer.
6. Examine an overlay of a disk of coupling.
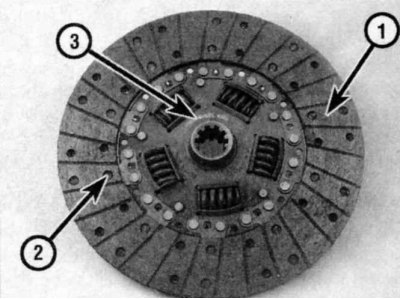
1 - overlay - it wears out during clutch operation
2 — Rivets - they hold the lining, and can damage the pressure plate or flywheel if they come into contact with their surfaces
3 — inscriptions - «Flywheel side» (flywheel side) or something similar
7. Check for signs of oil contamination and general signs of wear. If the pad is dirty or worn, replace the disc. Also check the runout and thickness of the clutch disc, then compare the results with the values given in the Table of Dimensions and Adjustment Data at the end of the Manual. If the disc is too thin or warped, replace it. Check for loose rivets, warps, cracks, broken springs, or other obvious damage. As stated above, the clutch disc is usually replaced every time it is removed, so if there is any doubt about its condition, it is best to replace it.
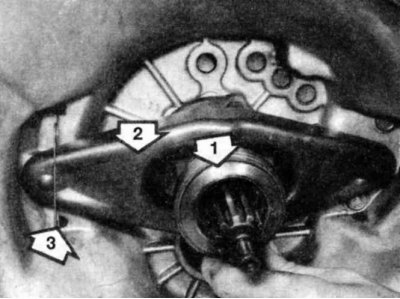
8. Usually release bearing (1), are replaced simultaneously with the replacement of the clutch disc. Remove the bearing from the input shaft.
9. It is also recommended to release the return spring (3), remove the release lever (2) and inspect the recess for the pusher tip of the slave cylinder. Install the clutch release lever and bearing in reverse order.
10. Check up a working surface of a pressure disk. If it has cracks, grooves, scratches, oily or discolored stains from overheating, or other damage, the disc should be replaced. Place the flatness tester on the surface and make sure it is flat.

11. Check for loose rivets or deformed spring petals.
12. If there are any signs of pressure plate wear, replace it. It is recommended to make it a rule to replace all components of the clutch assembly (driven disc, pressure plate and release bearing), or if the old components have been around for quite some time.
Installation
1. Thoroughly clean the working surfaces of the flywheel and pressure plate before installation. Only handle these components with clean hands. Keep oil or dirt away from the friction surfaces of the clutch components.
2. Place the driven and pressure plates on the flywheel, holding the driven plate in place with the clutch centering tool. Make sure the slave disk is installed correctly (new discs are usually labeled «Flywheel side» - the side facing the flywheel - or something similar). When installing the old pressure plate, make sure that the alignment marks previously applied match.
3. Tighten the pressure plate to flywheel bolts only with your fingers, working in a circle.
4. If not already done, install the clutch centering tool in the middle of the clutch basket (see illustration). Move the disc until the tool is exactly centered and the transmission input shaft can be easily inserted through the disc into the pilot bearing. If the disc is poorly centered, it will be impossible to install the transmission.
5. Tighten the bolts securing the pressure plate to the flywheel a little at a time, moving diagonally to avoid deformation of the pressure plate, with the required force.
6. Lubricate the entire inner surface of the release bearing with high temperature grease. Make sure the inside of the oil groove is filled. Apply grease to the ball seat and yoke pins as well.
7. Establish transmission, the executive cylinder and all earlier removed components.