



Table of contents: Removal ↓ Installation ↓
- Home
- BMW 5 Series
- E34
- Chassis
- Brake system
- Removal and installation parking brake pads
Removal and installation parking brake pads (BMW 5 Series E34)
Removal
Remove the rear wheel brake disc.
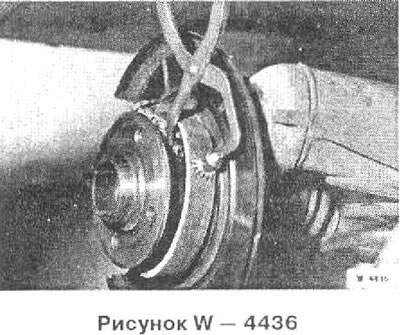
Disconnect the front return spring. Check the return spring. Replace the rusted and weakened spring.
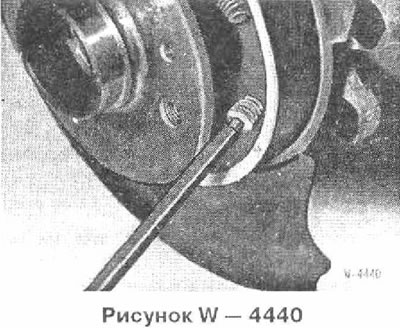
Lightly press the pressure spring with a 5 mm open-end wrench, turn 90° (¼ turn) and remove the spring from the brake shoe.
Also remove the pressure spring from the other brake shoe.
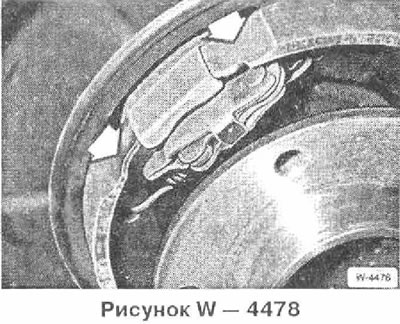
Spread the brake pads from the top and remove them downwards.
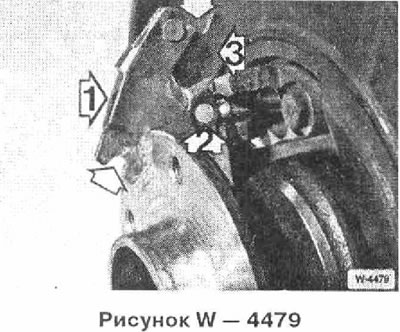
Check ease of movement and, if necessary, remove the expansion lock. To do this, pull part 1 back, push out pin 2 and remove part 3 from the cable.
Installation
It is imperative to replace the brake pads on both sides,
Apply a very thin layer of Molykote G paste to the working surfaces and the pin of the expansion lock.
(Figure W - 4479) Place the expansion lock with pin 2 at the bottom on the handbrake cable in the correct position.
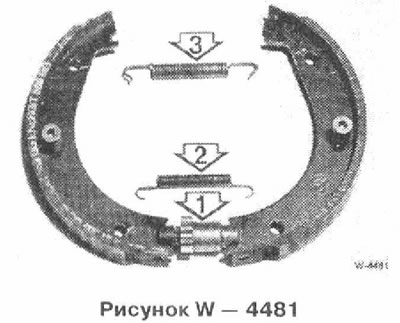
Ensure movement of the brake shoe installation mechanism 1. Lightly lubricate the thread with Molykote paste. Unscrew the threaded element completely.
Place the installation mechanism in the correct position between the brake shoes. Connect the return spring 2 (thinner spring) to the undersides of the brake pads.
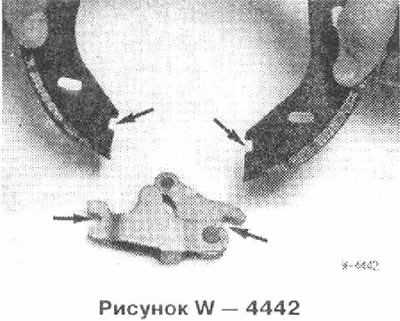
Insert the brake pads. The brake pads should fit into the "arrow" slots of the spacer lock from above.
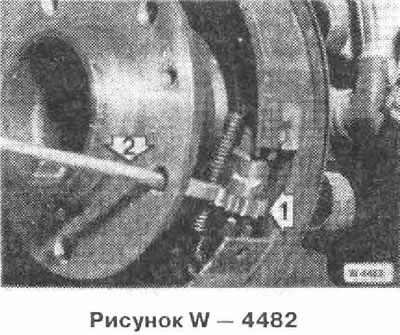
The gear of the adjustment mechanism must be facing downwards so that it can be adjusted later from the outside.
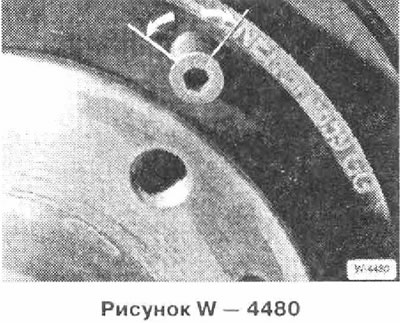
Using a 5 mm spanner, press the 2 pressure springs and simultaneously turn them 90°. In the closed position, the marking on the bolt head is located as shown in the figure.
Connect the upper return spring.
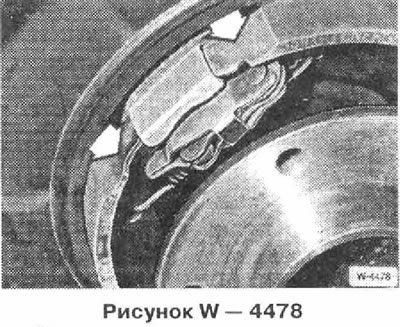
The "arrow" brake pads must rest against the support on the brake shield.
Install the brake disc and rear wheel.
Adjust the handbrake.
Note: If the brake pads of the handbrake have been replaced, they must be run in as follows. At a speed of about 40 km/h, carefully tighten the handbrake until light braking occurs. While maintaining the speed, tighten the handbrake lever another click and drive about 400 m. Release the handbrake and let it cool. It is recommended to do this once every three months, regardless of whether the pads have been replaced, as this removes any corrosion and friction products from the working surfaces.
This article is available at russian, bulgarian, belarusian, ukrainian, serbian, croatian, romanian, polish, slovak, hungarian
Article verified: Polikarpov Saveliy
Share information:
Previous articles
БМВ E34: Brake system
Next articles
Similar articles on other types of BMW cars:
Removal and installation parking brake pads BMW 3 Series E30 (1982-1994)
Removal and installation parking brake pads BMW 3 Series E36 (1990-2000)
Front brake pads — removal and installation BMW 7 Series E32 (1986-1994)
Removal and installation the parking brake cables and pedal BMW 7 Series E38 (1994-2001)
Removal and installation the brake booster BMW X3 E83 (2003-2010)
Removal and installation the parking brake lever BMW X5 E53 (1999-2006)
Removal and installation parking brake pads BMW 3 Series E30 (1982-1994)
Removal and installation parking brake pads BMW 3 Series E36 (1990-2000)
Front brake pads — removal and installation BMW 7 Series E32 (1986-1994)
Removal and installation the parking brake cables and pedal BMW 7 Series E38 (1994-2001)
Removal and installation the brake booster BMW X3 E83 (2003-2010)
Removal and installation the parking brake lever BMW X5 E53 (1999-2006)
Link in different formats to this page
Visitor comments
No comments yet
- General information
- Governing bodies
- Manual
- Maintenance
- Power unit
- Engine repair
- Lubrication system
- Cooling system
- Ignition system
- Supply system
- Injection system (gasoline)
- Injection system (diesel)
- Exhaust system
- Transmission
- Clutch
- Car gearbox
- Front axle
- Rear axle
- Chassis
- Steering
- Brake system
- Wheels and tires
- Body
- Interior
- Exterior
- Heating system
- Electrical equipment
- Equipment and devices
- Power devices
- Windscreen wipers
- Electrical circuits
- General information
- Manual
- Maintenance
- Power unit
- Engine repair
- Ignition system
- Engine lubrication system
- Cooling system
- Fuel system (gasoline)
- Fuel system (diesel)
- Exhaust system
- Transmission
- Clutch
- Car gearbox
- Chassis
- Front and rear suspension
- Steering
- Brake system
- Body
- Exterior
- Interior
- Electrical equipment
- Heating system
- Equipment and devices
- Power devices
- Electrical circuits
- General information
- Manual
- Maintenance
- Power unit
- Engine in a car
- Engine overhaul
- Cooling system
- Supply system
- Ignition system
- Control system
- Transmission
- Clutch
- Manual gearbox
- Automatic gearbox
- Transmission line
- Chassis
- Steering
- Front suspension
- Rear suspension
- Brake system
- Body
- Body elements
- Car care and painting
- Electrical equipment
- Heater and air conditioner
- Equipment and devices
- Starter and generator
- Electrical circuits
- General information
- Operation and maintenance
- Specifications
- Power unit
- Engine repair
- Cooling and lubrication system
- Supply system
- Ecotronic power supply system
- Fuel injection system
- Ignition system
- Transmission
- Clutch
- Gearbox BMW 242/4
- Gearbox Getrag 262/8
- Gearbox Getrag 265/6
- Automatic gearbox
- Cardan gear
- Rear axle
- Chassis
- Steering
- Front suspension
- Rear suspension
- Brake system
- Electrical equipment
- Equipment and devices
- Electrical circuits