
Upper chain covers and camshaft sprockets
Withdrawal
1. Remove cylinder head covers (see Section M62 engine).
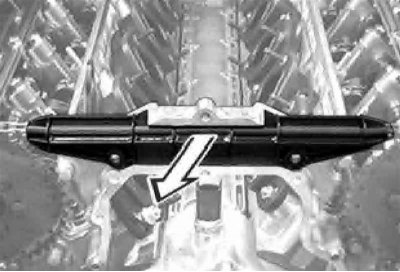
2. Remove the cooling fan drive clutch with impeller and fan shroud.
3. On the block of cylinders Nos. 1-6, remove the shut-off valve.
4. Remove the housings of both ignition distributors (see chapter Power supply and exhaust systems).
5. If necessary, remove the CMP sensor.

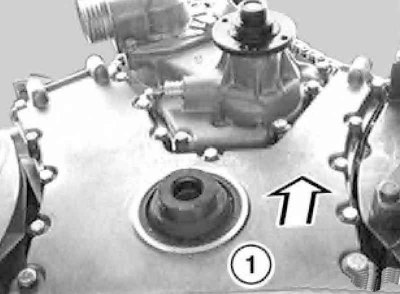
6. Turn out a bolt of fastening directing an oil collector.
7. Remove the oil filler cap and remove the bolt.
8. Turn out bolts of fastening and remove the top forward cover of a timing chain.
1 — The holder of a pipe of giving of additional air
9. Remove the camshaft drive chain guide.
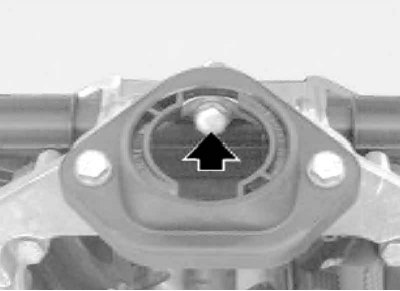
10. Turn the crankshaft by the central bolt clockwise so that the piston of the first cylinder is at TDC of the end of the compression stroke.
In this position, the sample (1) on the camshaft flange must be in line with the fuel rail mounting bolt (2).
TDC setting
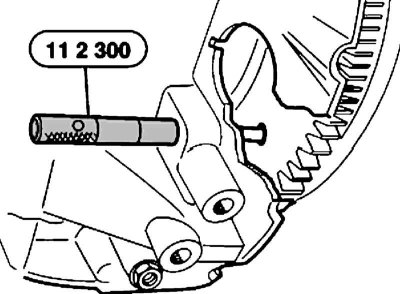
11. Remove the dust cover from the crankshaft fixing hole and fix the shaft with tool #11 2 300 or a suitable rod.
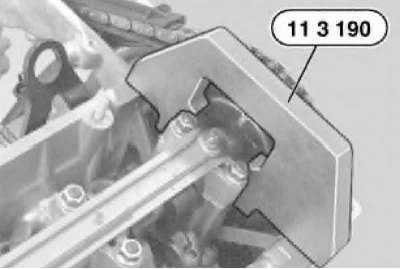
12. Fix both camshafts with tool No. 11 3 190.
The crankshaft and camshafts must remain in a fixed position until the end of the work.
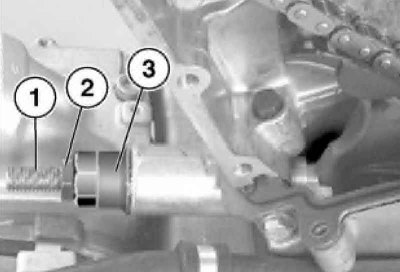
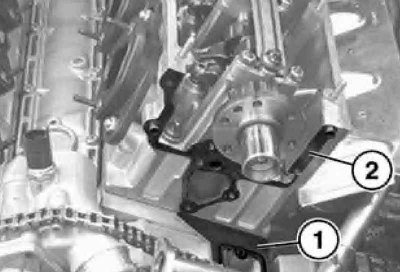
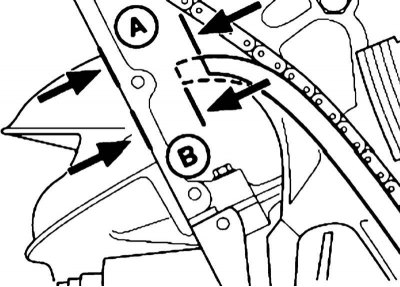
13. Press the protective cap of the tensioner with a screwdriver, loosen the locknut located by the cap (2), turn the adjusting bolt (1) for several turns. Carefully release the cap nut (3).
screw (3) spring loaded.
14. Turn out bolts of fastening of the left and right asterisks then fix a chain that it has not slipped off.
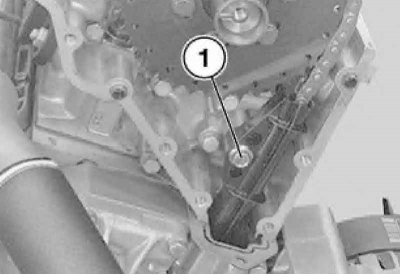
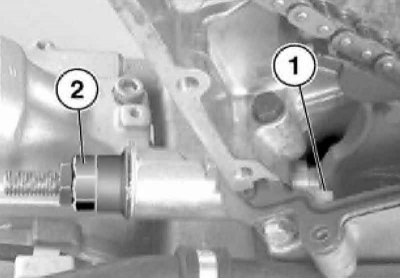
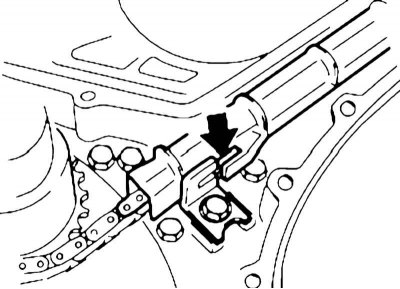
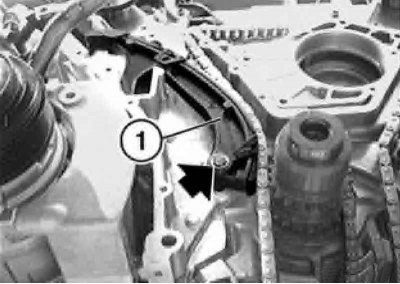
15. Remove the bolt (1) securing the chain guide bar. Pull the damper bar out of the lower attachment loop in an upward direction.
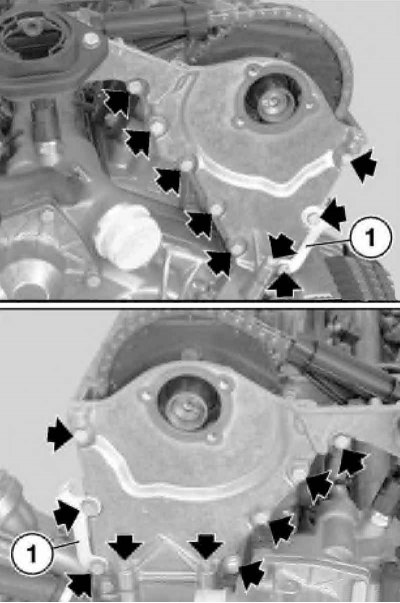
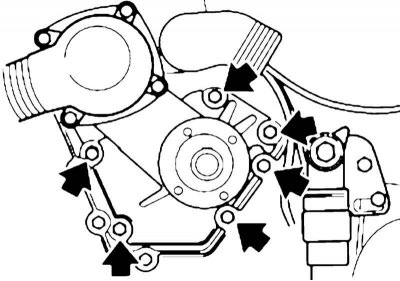
16. Turn out bolts (1) and remove the top rear timing chain cover.
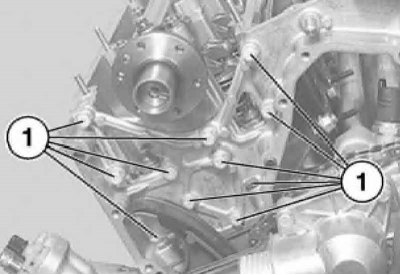
Right bolts of fastening of a back top cover of a timing chain
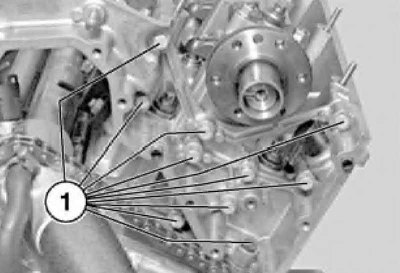
Left bolts of fastening of a back top cover of a timing chain
Installation
1. Clean mating surfaces of dirt and grease.
2. Make sure that the centering sleeves are intact and correctly installed.
3. Install new gaskets (1) on both rows of cylinders. For gaskets (1 Apply Hylomar SQ 32 M around the chain hole).
5. Install the back cover and hand-tighten all of the rear cover bolts. Tighten with the required effort, first the bolts securing the rear cover to the bottom cover, and then to the cylinder heads.
6. Before installing the camshaft sprocket for number 7-12 cylinders, be sure to install the CMP sensor rotor on the stub on the shaft.
7. Install the sprockets on the camshafts, aligning the longitudinal holes in the center; hand-tighten the sprocket bolts.
8. Install the chain tensioner plunger so that the guide (1) entered the tensioner. Insert the spring and tighten the screw plug (2).
9. Adjust chain tension. To do this, press and retract the tensioner bar in the direction of the drive chain and measure distance A. Press the tensioner bar to the stop, measure distance B and subtract distance A from it. Use the adjusting screw to set the specified value (6 + 0.5 mm.) and tighten the locknut.
10. Install a new tensioner protective cap.
11. Tighten the camshaft sprocket bolts with the required force: first on the side of cylinders No. 7-12, then on the side of cylinders No. 1-6.
12. Install the camshaft drive chain guide.
13. Insert the chain guide bar from above and fix it in the mounting plate. Tighten the damper mounting bolt.
When the timing cover is installed, the fastening loop is not visible.
14. Clean the mating surfaces of the chain cover from dirt and oil. Check the centering sleeves of the cover for damage and correct installation. Apply Hylomar SQ 32 M to the joint surfaces of the top and bottom covers.
15. Install new gaskets so that the sealing strip is facing outward.
16. Install the upper front timing cover.
17. Tighten by hand the bolt in the oil filler pipe and the bolt securing the oil sump guide.
18. Tighten the bolts securing the upper front cover of the timing chain.
19. Install other removed components in the reverse order of their dismantling.
Lower front cover
1. Empty the engine cooling system (see chapter Vehicle settings and routine maintenance).
2. Remove the upper timing chain covers and the upper section of the oil pan (see Section Removal and installation of the upper section of the oil pan and oil pump).
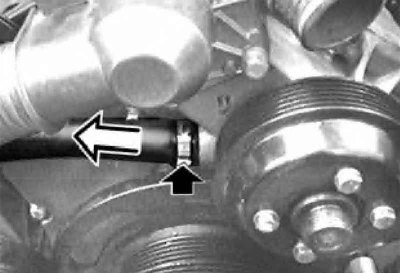
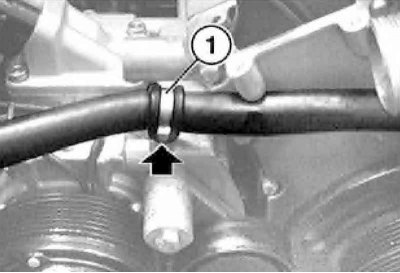
3. Loosen the clamp and disconnect the hose.
4. Turn out bolts and remove bracket, take a hose aside. Remove the vibration damper.
5. Turn out bolts of fastening of the bottom forward cover of a timing chain.
6. Fix the timing chain and its straps. Clean the sealing surfaces of the crankcase, check the correct position of the centering sleeves.
7. Install new seals. Apply a coat of Hylomar SQ 32 M sealant to the timing chain cover gasket surfaces.
8. Replace front crankshaft oil seal (see Section Replacing crankshaft seals and ignition distributor seals).
9. Connect removed hoses.
Lower back cover
1. Remove the lower front timing chain cover.
2. Turn out bolts of fastening of the water pump and remove it.
3. Remove the snap ring, remove the tensioner bar and timing chain.
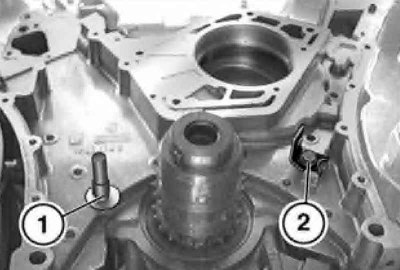
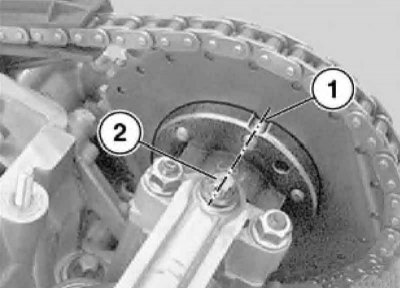
4. Remove the stop bolt (1) tensioner straps. Remove the mounting bracket if necessary (2) chain guide rails.
5. Turn out bolts of fastening. Remove the lower rear timing cover.
6. Installation is carried out in the reverse order. Use a new timing chain cover gasket; apply Hylomar SQ 32 M sealant to the joint surfaces. Replace the water pump gasket.