
Table of contents: Removal ↓ Installation ↓
- Home
- BMW 3 Series
- E36
- Transmission
- Car gearbox
- Removal and installation the propeller shaft
Removal and installation the propeller shaft (BMW 3 Series E36)
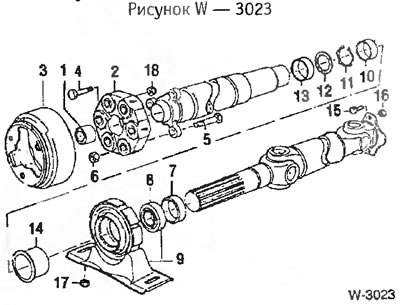
1. Guide bushing
2. Hinge disc
3. Vibration damper
4. Knurled bolt
5. Bolt
6. Self-locking nut
7. Dust cover
8. Radial ball bearing
9. Middle support
10. Dust cover
11. Retaining ring
12. Toothed washer
13. Tension ring
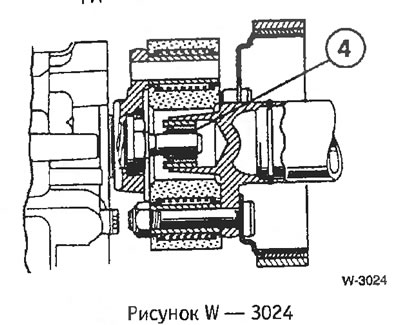
14. Threaded ring
15. Bolt
16.-18. Locking nut M10
Various cardan shafts are installed: most often, a cardan shaft with a front joint disk is installed, see the figure. Cardan shafts are also installed that have constant-speed joints instead of joint disks. Take into account the differences when removing.
Removal
Raise the car.
Remove the exhaust system as a complete unit.
Remove the catalytic converter heat shield.
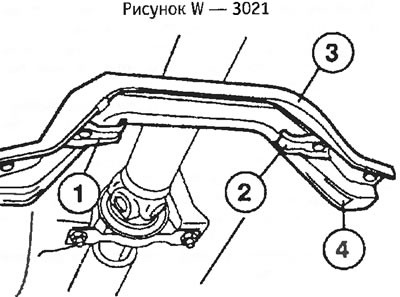
If present, unscrew fasteners "1" and -2-. Unscrew bracket "3" from the bottom of the car, paying attention to its installation position for subsequent installation. Wide lug "4" faces the front side of the car.
Separating the propeller shaft from the gearbox:
Design with a hinged disc: Unscrew the hinged disc from the gearbox. In doing so, unscrew only the nuts, not the bolts. Design with a front crosspiece: Unscrew the crosspiece from the flange of the gearbox.
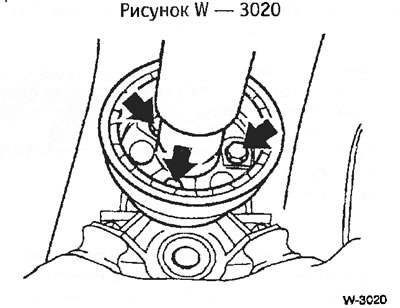
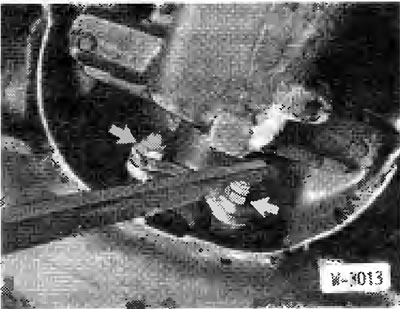
Using the BMW 261040 tool, loosen the threaded ring "arrow" a few turns. If you do not have this tool, loosen the threaded ring with a pipe wrench.
Remove the cardan shaft from the rear axle gearbox. Block the shaft with a crowbar.
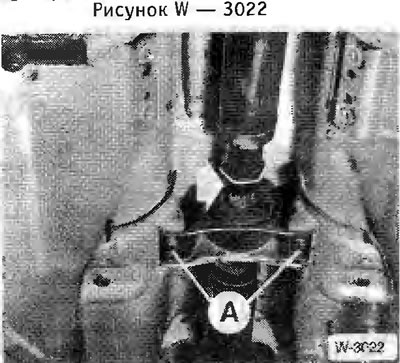
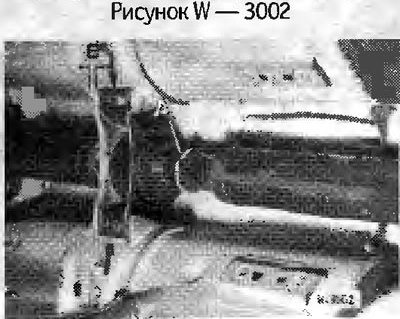
Remove the middle support "A" (Figure W 3022).
Bend the cardan shaft downwards and pull it out of the centering pin in the gearbox. If necessary, push the shaft completely into the movable joint.
Caution: Do not disconnect the cardan shaft at the sliding element.
Caution: Do not drop the cardan shaft. The rubber seal of the constant velocity joint may be damaged in particular.
Installation
If there are vibrations and noises, the cardan shaft should be balanced in a workshop. In addition, the bending angle of the cardan shaft can be checked.
Note: The cardan shaft is balanced as a set and can only be replaced as an assembly. Replace worn cardan shafts.
Before installation, check the centering disk of the cardan shaft, if necessary, lubricate the disk with Molykore Longtherm 2. Replace the damaged disk.
With the help of an assistant, push the cardan shaft into the centering pin of the gearbox.
Tighten the middle support with a bolt tightening torque of 22 Nm. At the same time, shift the middle support with an interference fit of E = 4-6 mm in the direction of movement.
Screw the cardan shaft to the rear axle gearbox. To avoid overtightening the cardan shaft, if possible, only the nuts or bolts on the flange side should be turned. Install new self-locking nuts with a tightening torque of 70 Nm.
Screw the cardan disc to the cardan shaft and to the gearbox. Tightening torques: M8 bolts - 45 Nm; M10 - 70 nm; M12 - 80 Nm. To avoid overtightening the hinge disk, tighten only the nuts or bolts from the flange side, if possible. Block the cardan shaft from turning with a crowbar.
Tighten the threaded ring to a torque of 17 Nm (Figure W 3022). If there is no special tool, tighten using a pipe wrench.
Screw on the catalytic converter heat shield.
Tighten the cross beam with a tightening torque of 20 Nm. The wide projection of the beam should face forward.
Install the exhaust system.
Lower the car.
This article is available at russian, bulgarian, belarusian, ukrainian, serbian, croatian, romanian, polish, slovak, hungarian
Article verified: Chebotarev Vladislav
Share information:
Previous articles
БМВ E36: Car gearbox
Next articles
Similar articles on other types of BMW cars:
Removal and installation the propeller shaft BMW 5 Series E34 (1988-1996)
Removal and installation the propeller shaft BMW 5 Series E39 (1995-2003)
Removal and installation the cardan shaft and elastic coupling BMW 7 Series E38 (1994-2001)
Cylinder Head Cover — Removal and Installation BMW 7 Series E32 (1986-1994)
Half shaft — removal and installation of the left or right half shaft BMW X3 E83 (2003-2010)
Removal and installation the front axle drive shaft BMW X5 E53 (1999-2006)
Link in different formats to this page
Visitor comments
No comments yet
- General information
- Manual
- Maintenance
- Power unit
- Engine repair
- Cooling system
- Power system (gasoline)
- Injection system (gasoline)
- Fuel system (diesel)
- Exhaust system
- Ignition system
- Charge and launch systems
- Transmission
- Car gearbox
- Clutch and drive shafts
- Chassis
- Brake system
- Suspension front and rear
- Steering
- Body
- Body care and repair
- Exterior
- Interior
- Electrical equipment
- Troubleshooting
- Lighting and signaling
- Equipment and devices
- Heater and air conditioner
- Electrical circuits
- General information
- Manual
- Repair on the road
- Weekly checks
- Maintenance
- Troubleshooting
- Power unit
- 4 cylinder engines
- 6 cylinder engines
- Engine overhaul
- Cooling and heating
- Fuel and exhaust system
- Starting and charging system
- Ignition system
- Transmission
- Clutch
- Mechanical gearbox
- Automatic gearbox
- Cardan and drive shafts
- Chassis
- Brake system
- Wheel suspension
- Steering
- Body
- Exterior
- Interior
- Electrical equipment
- Equipment and devices
- Electrical circuits
- General information
- Maintenance
- Power unit
- Engine repair
- Cooling system
- Ignition system
- Supply system
- Fuel injection system
- Exhaust system
- Transmission
- Clutch
- Car gearbox
- Front and rear axle
- Chassis
- Steering
- Brake system
- Body
- Exterior
- Interior
- Electrical equipment
- Heating system
- Equipment and devices
- Power devices
- Electrical circuits
- Power unit
- M10/M20 engine
- M40 engine
- Ignition system
- Lubrication system
- Cooling system
- Supply system
- Fuel injection
- Exhaust system
- Transmission
- Clutch
- Manual gearbox
- Front axle
- Rear axle
- Chassis
- Steering
- Brake system
- Body
- Exterior
- Interior
- Electrical equipment
- Heating system
- Equipment and devices
- Electrical circuits
- General information
- Specifications
- Operation and maintenance
- 4-cylinder engine
- Engine repair
- Cooling and lubrication system
- Supply system
- Ignition system
- 6-cylinder engine
- Engine repair
- Cooling and lubrication system
- Supply system
- Fuel injection system
- Ignition system
- Transmission
- Clutch
- 4-speed manual gearbox
- 5-speed manual gearbox
- Automatic gearbox
- Cardan and rear axle
- Chassis
- Steering
- Front suspension
- Rear suspension
- Brake system
- Electrical equipment
- Equipment and devices
- Electrical circuits