
M43TU engine
Withdrawal
1. Disconnect the negative cable from the battery (see paragraph 4).
2. Apply the parking brake, raise the front of the vehicle and place it on secure stands. Remove the crankcase protection from under the engine.
3. To improve access, release the fuel hoses under the starter from the fasteners and disconnect them. Get ready for fuel to spill out of the hoses.
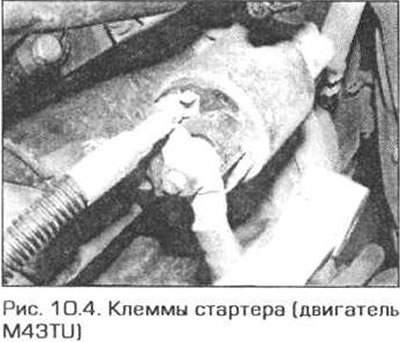
4. Disconnect the wires from the starter (pic. 10.4).
5. Turn out bolts of fastening of a starter.
6. Pull the starter forward and lower it down. Be careful not to damage the fuel hoses.
Installation
7. Installation is carried out in reverse order. Tighten the starter mounting bolts to the required torque.
N42 engine
Withdrawal
8. Disconnect the negative cable from the battery (see paragraph 4).
9. Remove the intake manifold as directed in chapter 4A.
10. Turn away nuts and disconnect wires from a starter (pic. 10.10).

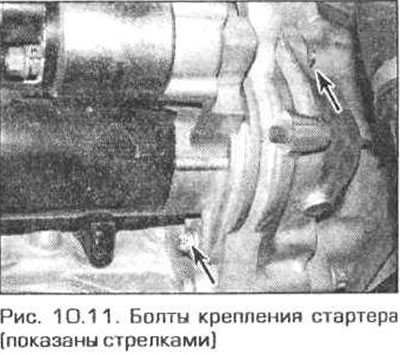
11. Turn out two bolts and remove a starter from the engine (pic. 10.11)
Installation
12. Installation is carried out in reverse order. Tighten the starter mounting bolts to the specified torque.
M52TU engine
Withdrawal
13. Disconnect the negative cable from the battery (see paragraph 4).
14. Disconnect the air flow sensor wiring, disconnect the vacuum hose from the air cleaner and remove the air cleaner (see chapter 4A).
15. On the throttle body, pull the accelerator cable sheath out of the bracket. Disconnect the tip of the cable from the throttle sector.
16. Release the clamps and disconnect the hoses from the throttle body and from the idle air valve.
17. Apply the parking brake, raise the front of the vehicle and place it on secure supports. Remove the crankcase protection from under the engine.
18. To improve access, release the fuel hose from the fasteners and under the starter and separate them. Get ready for fuel to spill out of the hoses.
19. Turn away nuts and disconnect wires from the back party of a starter.
20. Turn out bolts of fastening of a starter.
21. Pull the starter forward and lower it down. Follow that. not to damage the fuel lines.
Installation
22. Installation is carried out in reverse order. Tighten the starter mounting bolts to the specified torque.
M54 engine
Withdrawal
23. Disconnect the negative cable from the battery (see paragraph 4). There are two ways to remove the starter. First: Remove the intake manifold as directed in chapter 4A, then proceed from step 33. Second: remove the starter from under the engine as described below.
24. Apply the parking brake, raise the front of the vehicle and place it on secure supports. Remove the crankcase protection from under the engine.
25. On the model"coupe" release from November 1999 and on all models from December 2000, remove eight bolts and remove the transverse amplifier from under the transmission.
Note. Driving with the amplifier removed may result in an accident.
26. To remove the starter, you need to lower the gearbox by about 5 cm. First, remove the air duct of the ventilation and interior heating system in the rear of the engine compartment as follows.
- A) Remove the cabin air filter cover by turning its retainers 90°counterclockwise. Pull the filter out of the housing.
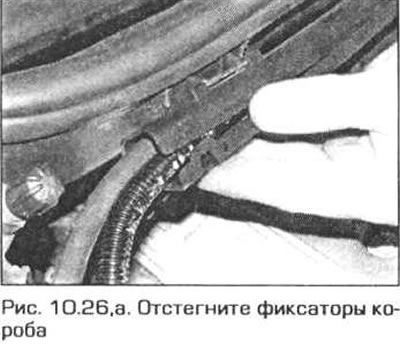
- b) Unfasten the four latches of the wiring box and remove the sleeves with wires from the box (see fig. 10.26 a)
- V) Remove the four screws and pull the cabin filter housing forward.
- G) In the left rear corner of the engine compartment, pull off the seal, turn the two latches counterclockwise and slide the trim panel slightly forward.
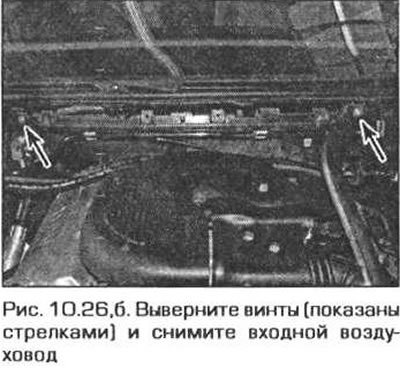
- d) Remove the two screws and remove the air duct (see fig. 10.26b).
27. Remove the exhaust system (see chapter 4A).
28. Remove shift lever cable (or selector - depending on the model).
29. Disconnect the front propeller shaft from the gearbox (see chapter 8) and tie the shaft somewhere on the side.
30. Support the gearbox from below with a trolley jack and remove the transverse amplifier from under the transmission. Lower the gearbox about 5 cm.
31. Disconnect the hoses from the vacuum reservoir under the starter. Mark the hoses in advance so as not to experience difficulties during assembly. Turn out a fixing bolt and remove a receiver.
32. For better access, disconnect the electrical connector from the crankshaft position sensor.
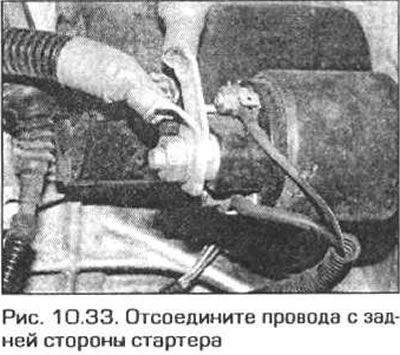
33. Mark the starter wires, unscrew the terminal nuts and disconnect from the starter wire (pic. 10.33).
34. Turn out bolts of fastening of a starter.
35. Pull the starter forward, then down.
Installation
36. Installation is carried out in the reverse order, taking into account the following remarks.
- A) Tighten nuts and bolts to the required torque, if specified.
- b) When installing the lower transverse reinforcement, replace the bolts with new ones.