
- Home
- BMW 3 Series
- E46
- Transmission
- Mechanical gearbox
- Oil seals — replacement
Oil seals — replacement (BMW 3 Series E46)
Primary shaft seal
1. Remove the gearbox (see paragraph 7) and follow these steps.
2. Remove the clutch release bearing and fork (see chapter 6).
3. Unscrew the mounting bolts and remove the front gearbox cover with the release bearing guide sleeve (Fig. 5.3).
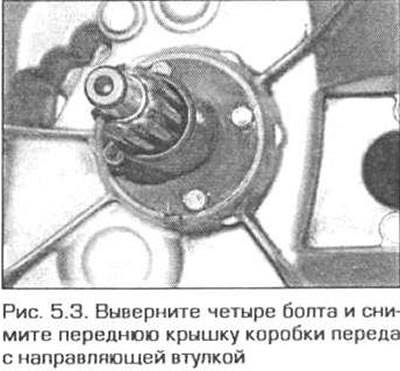
4. Remember the depth of the primary shaft seal in the gearbox housing.
5. Drill a small hole in the cuff (the cuff has two holes located on opposite sides). Lubricate the drill to prevent chips from getting into the gearbox (Fig. 5.5).
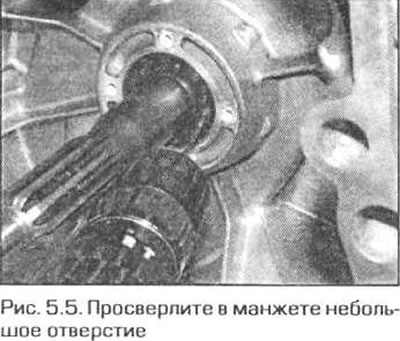
6. Using a thin punch, countersink the edge of the cuff opposite the drilled hole as much as possible.
7. Screw a thin screw into the hole and remove the cuff using pliers (Fig. 5.7).
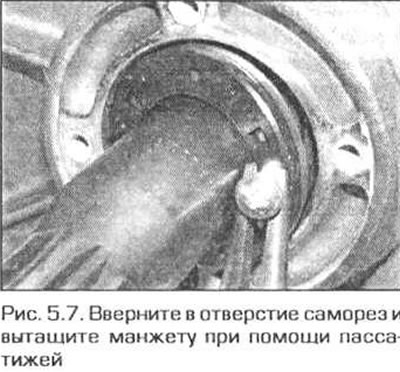
8. Clean the gearbox mounting surface.
9. Lubricate the lip of the new seal with gearbox oil, then carefully place the seal onto the input shaft and press it into the gearbox housing.
10. Press the cuff to the same depth at which the old cuff was located
11. Install the gearbox cover with the guide sleeve and securely tighten the bolts. Lubricate the bolt threads with a compound that prevents spontaneous loosening.
12. Install the clutch fork and release bearing (see chapter 6).
13. Install the gearbox (see paragraph 7), then check the oil level in it (see paragraph 2).
Output shaft seal
Note: When installing, you will need a composition to prevent spontaneous loosening of the nuts.
14. Raise the vehicle and support it on supports (see "Lifting and installing the car on supports").
15. Disconnect the propeller shaft from the gearbox flange and secure it to the side with wire (see chapter 8).
16. Using a screwdriver, remove the boot from the gearbox output flange nut (if it exists). Throw away the cover as it will no longer be needed. If necessary (for ease of access) place a support under the gearbox and remove the rear gearbox support.
17. Holding the flange from turning, unscrew the flange fastening nut using a socket wrench and extension (Fig. 5.17).
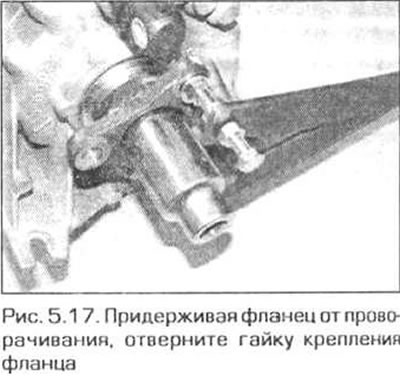
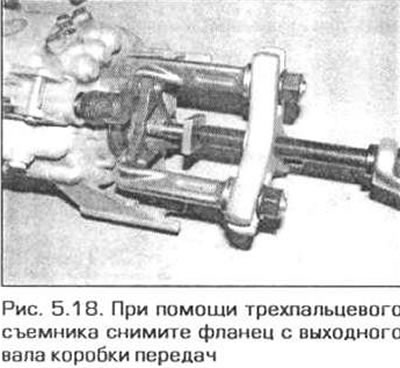
18. Using a puller, remove the flange from the output shaft (Fig. 5.18). Prepare for oil leakage.
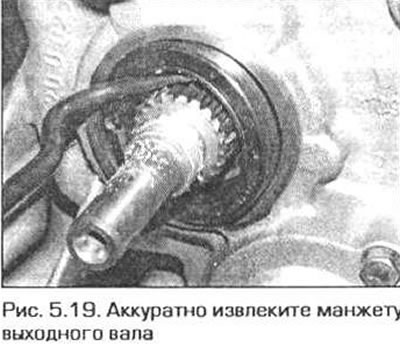
19. Note the depth of the seal in the gearbox housing and remove the seal (Fig. 5.19). Be careful not to damage the output shaft.
20. Clean the seating surface under the cuff.
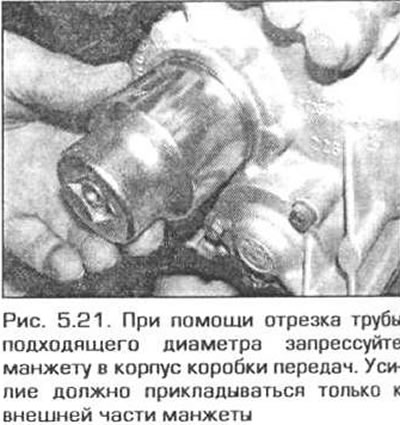
21. Lubricate the edge of the new seal, then carefully press it into the gearbox housing to the same depth (Fig. 5.21).
22. Place the flange on the output shaft.
Note: To make installation of the flange easier, hold it in hot water for a few minutes, then slide it onto the shaft.
23. Tighten the flange mounting nut to the torque corresponding to the 1st stage (see "Technical data"), then unscrew the nut (2nd stage). Lubricate the nut thread with a compound that prevents spontaneous loosening. Tighten the nut to the torque corresponding to the 3rd stage. Hold the flange from turning.
24. If there was a cover on the flange nut, throw it away. There is no need to install the cover back.
25. Connect the propeller shaft (see chapter 8), then check the gearbox oil level (see paragraph 2) and lower the car to the ground.
Gear Selector Shaft Seal
Note: You will need a new selector shaft clevis pin when installing.
26. Raise the vehicle and support it on supports (see "Lifting and installing the car on supports").
27. Disconnect the propeller shaft from the gearbox flange and secure it to the side with wire (see chapter 8). For easier access, support the gearbox and remove the gearbox support.
28. Slide the retaining ring back, then remove the pin securing the earring to the gear selector shaft.
29. Remove the earring (along with the thrust) from the shaft, then disconnect the rod from the shaft.
30. Using a thin flat-head screwdriver, remove the cuff from the gearbox housing.
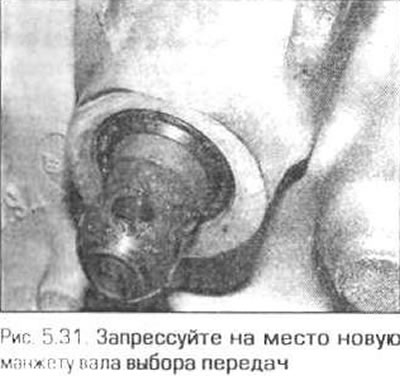
31. Clean the seating surface, then install a new seal and press it into the gearbox using a piece of pipe of a suitable diameter (Fig. 5.31).
32. Check the condition of the rubber cover of the earring and replace it if necessary.
33. Place the earring on the end of the shaft, then align the holes in the shaft and earring and secure the earring with a pin.
34. Install the retaining ring in place.
35. Connect the propeller shaft (see chapter 8).
36. Check the gearbox oil level (see paragraph 2). then lower the car to the ground.
The original article is located on: www.bmwman.ru
This article is available at russian, bulgarian, belarusian, ukrainian, serbian, croatian, romanian, polish, slovak, hungarian
Article verified: Ilyinsky Matvey
Share information:
Previous articles
БМВ E46: Mechanical gearbox
Next articles
Similar articles on other types of BMW cars:
Engine suspension cushion replacement BMW 5 Series E12 (1972-1981)
Wheel replacement BMW 5 Series E34 (1988-1996)
Seals — replacement BMW 7 Series E32 (1986-1994)
Timing mechanism — replacement of the drive chain BMW X3 E83 (2003-2010)
Wheel replacement BMW X5 E53 (1999-2006)
Engine suspension cushion replacement BMW 5 Series E12 (1972-1981)
Wheel replacement BMW 5 Series E34 (1988-1996)
Seals — replacement BMW 7 Series E32 (1986-1994)
Timing mechanism — replacement of the drive chain BMW X3 E83 (2003-2010)
Wheel replacement BMW X5 E53 (1999-2006)
Link in different formats to this page
Visitor comments
No comments yet
- General information
- Manual
- Maintenance
- Power unit
- Engine repair
- Cooling system
- Power system (gasoline)
- Injection system (gasoline)
- Fuel system (diesel)
- Exhaust system
- Ignition system
- Charge and launch systems
- Transmission
- Car gearbox
- Clutch and drive shafts
- Chassis
- Brake system
- Suspension front and rear
- Steering
- Body
- Body care and repair
- Exterior
- Interior
- Electrical equipment
- Troubleshooting
- Lighting and signaling
- Equipment and devices
- Heater and air conditioner
- Electrical circuits
- General information
- Manual
- Repair on the road
- Weekly checks
- Maintenance
- Troubleshooting
- Power unit
- 4 cylinder engines
- 6 cylinder engines
- Engine overhaul
- Cooling and heating
- Fuel and exhaust system
- Starting and charging system
- Ignition system
- Transmission
- Clutch
- Mechanical gearbox
- Automatic gearbox
- Cardan and drive shafts
- Chassis
- Brake system
- Wheel suspension
- Steering
- Body
- Exterior
- Interior
- Electrical equipment
- Equipment and devices
- Electrical circuits
- General information
- Maintenance
- Power unit
- Engine repair
- Cooling system
- Ignition system
- Supply system
- Fuel injection system
- Exhaust system
- Transmission
- Clutch
- Car gearbox
- Front and rear axle
- Chassis
- Steering
- Brake system
- Body
- Exterior
- Interior
- Electrical equipment
- Heating system
- Equipment and devices
- Power devices
- Electrical circuits
- Power unit
- M10/M20 engine
- M40 engine
- Ignition system
- Lubrication system
- Cooling system
- Supply system
- Fuel injection
- Exhaust system
- Transmission
- Clutch
- Manual gearbox
- Front axle
- Rear axle
- Chassis
- Steering
- Brake system
- Body
- Exterior
- Interior
- Electrical equipment
- Heating system
- Equipment and devices
- Electrical circuits
- General information
- Specifications
- Operation and maintenance
- 4-cylinder engine
- Engine repair
- Cooling and lubrication system
- Supply system
- Ignition system
- 6-cylinder engine
- Engine repair
- Cooling and lubrication system
- Supply system
- Fuel injection system
- Ignition system
- Transmission
- Clutch
- 4-speed manual gearbox
- 5-speed manual gearbox
- Automatic gearbox
- Cardan and rear axle
- Chassis
- Steering
- Front suspension
- Rear suspension
- Brake system
- Electrical equipment
- Equipment and devices
- Electrical circuits