
Transmission with manual gearshift
Gear shift lever
Note: You will need a new shift lever bearing for installation.
1. Raise the vehicle and support it on supports (see "Lifting and installing the car on supports").
2. Pull up and remove the decorative knob from the gear shift lever. Note: Do not rotate the knob as this will break it.
3. Disconnect the lever cover from the center console and remove it from the lever, Remove the sound insulation (if it exists).
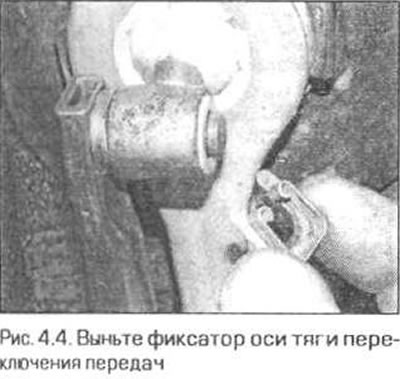
4. Under the vehicle, remove the retainer from the gearshift rod axle. Remove the axle from the gearshift lever earring and remove the washers from the axle (Fig. 4.4).
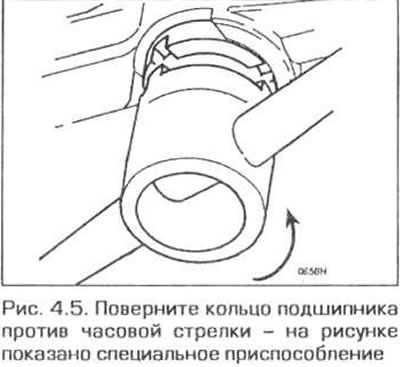
5. Now you need to release the lower locking ring of the gearshift lever bearing. There is a special device for this purpose, however. You can do this operation using two screwdrivers. To release the ring, you need to turn it a quarter of a turn counterclockwise (Fig. 4.5).
6. Now the bearing can be pushed upwards and the gearshift lever can be removed from the vehicle interior.
7. If necessary, you can remove the bearing from the ball joint of the lever by pulling it down. When pulling the bearing through the clevis of the lever, turn the bearing so that the clevis passes through the slots of the bearing.
8. Install the new bearing in the reverse order of removal. Make sure that the bearing is in place on the ball joint.
9. Install the lever in the reverse order of removal. When installing, follow these rules:;
- a) Lubricate the bearing before installation.
- b) Install the gearshift lever in place, with the arrow on the lever seal facing the front of the vehicle.
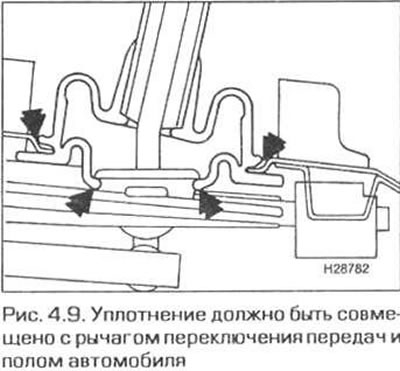
- c) Align the seal with the lever and the hole in the rear of the vehicle (Fig. 4.9).
- d) When aligning the bearing with the lever, make sure that the arrow or protrusion (depending on the model) on the top side of the bearing and facing the rear of the car.
- d) To secure the bearing, press it down until it clicks into place.
- e) Before installation, lubricate the gear shift rod axle.
Gear selector shaft earring
Note: You will need a new earring pin when installing.
10. Raise the vehicle and support it on supports (see "Lifting and installing the car on supports").
11. Disconnect the propeller shaft from the gearbox flange and secure it to the side with wire (see chapter 8).
12. Remove the shift rod axle retainer. Remove the axle from the clevis and remove the washers.
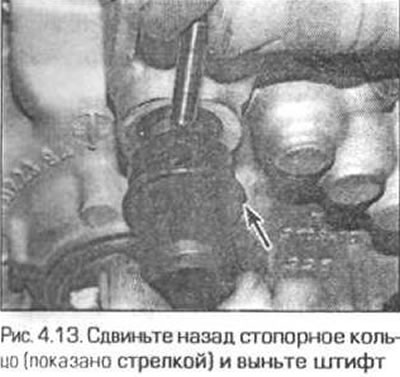
13. Slide the retaining ring back, then remove the pin securing the earring to the gear selector shaft (Fig. 4.13).
14. Remove the earring from the gear selector shaft.
15. Installation is performed in the reverse order of removal. When installing, adhere to the following rules:
- a) Before installation, check the condition of the rubber ring of the earring and replace it if necessary.
- b) Secure the earring to the shaft using a new pin.
- c) Lubricate the shift rod pin.
- d) Connect the propeller shaft (see chapter 8).
Rear Shift Lever Mount
16. Raise the vehicle and support it on supports (see "Lifting and installing the car on supports").
17. Disconnect the propeller shaft from the gearbox flange and secure it to the side with wire (see chapter 8).
18. Remove the gear shift lever (see above).
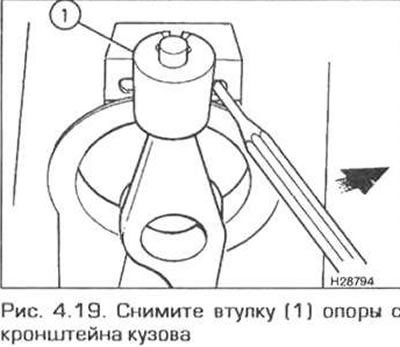
19. Using a screwdriver or a thin punch, remove the mounting sleeve from the body bracket (Fig. 4.19).
20. Remove the mount from the lever.
21. Lubricate the mount, then place it on the lever so that the notch in the mount faces the rear of the vehicle and the arrow points upward.
22. Secure the support to the bracket.
23. Connect the propeller shaft (see chapter 8) and lower the car to the ground.
Transmission with automatic gearshift
24. At the time of writing this Guide, no data on this system were available.