
- Home
- BMW 7 Series
- E32
- Power unit
- Engine overhaul
- Checking the compression in the cylinders
Checking the compression in the cylinders (BMW 7 Series E32)
Checking the compression in the cylinders will show what condition the upper part of the engine is in (i.e. pistons, rings, valves, head gasket). Specifically, this test will tell you if low compression is caused by a leak due to worn piston rings, faulty valves and seats, or a bad head gasket.
Start by cleaning the area around the spark plugs/glow plugs before removing them. If you have a source of compressed air, you should use that for this purpose, but a soft brush or even a regular bicycle pump will also do. The idea is to prevent dirt from getting into the cylinders when you perform the compression test.
Warm up the engine to operating temperature, then turn it off and switch off the ignition.
Remove the cabin air filter housing located on the right side of the engine compartment.
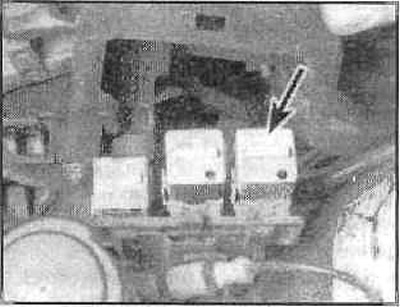
Unscrew the screws and remove the cover from the electronic unit. Remove the DME main relay (digital engine management system), so that no gasoline is injected during testing.
Typical relay arrangement
Remove all spark plugs.
Screw or press the compression tester into the spark plug hole in accordance with the operating instructions.
The assistant must fully depress the gas pedal and keep it depressed during the test.
Remove the cabin air filter, which is located on the right side of the engine compartment.
Remove the screws and remove the fuse box cover.
Remove the glow plug relay.
Disconnect the electrical wires from the glow plugs and remove the spark plugs using a suitable socket head.
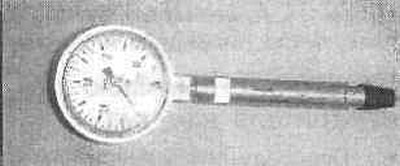
Screw in a compression tester instead of the glow plug.
Compression meter
Crank the engine through at least seven compression strokes with the starter, monitoring the gauge readings. The pressure should build up quickly in a healthy engine. Low pressure on the first stroke, followed by a gradual increase in pressure on subsequent strokes, indicates worn piston rings. Low pressure on the first strokes that does not increase on subsequent strokes may be due to leaking valves or a damaged cylinder head gasket (the cause could also be a crack in the head). Low pressure may also be caused by deposits on the valve heads. Record the pressure readings obtained.
Repeat this operation for the remaining cylinders and compare the measurement results with the technical data.
Add a little motor oil into each cylinder through the spark plug hole and repeat the measurements.
If the pressure increases after adding oil, the piston rings are certainly worn. If the pressure does not increase significantly, the leak is at the valves or cylinder head gasket. Valve leaks can be caused by burnt valve seats and/or valve faces, or cracked, warped, or bent valves.
If the pressure in two adjacent cylinders is low, there is a good chance that the cylinder head gasket between them is damaged. The appearance of coolant in the combustion chambers or crankcase supports this assumption.
If the pressure in one cylinder is approximately 20% lower than in the others, and uneven engine operation is felt at idle, then the cause of this may be a damaged exhaust cam on the camshaft.
If the pressure is unusually high, the combustion chambers may be coated with carbon deposits. If so, the cylinder head will need to be removed and cleaned.
Attach a vacuum gauge directly to the exhaust manifold. Warm up the engine before taking measurements. Apply the parking brake and block the wheels. Start the engine and let it run at normal idle speed.
Read the instrument readings. A normal engine should give a vacuum of 430 to 560 mm Hg. The following signs can help assess the condition of the engine:
If the fluctuations are significant, check the compression or check for leaks in the cylinders or gaskets.
If the arrow moves slowly over a wide range, check whether the crankcase forced ventilation system is clogged, whether the fuel-air ratio is correct, or whether there are leaks in the throttle body or in the gasket.
Check the return of the vacuum gauge needle after quickly opening the throttle valve from zero (when increasing the speed to 2500 rpm) to the desired value. If the vacuum drops slowly, the piston rings may be worn out or there may be a problem with the exhaust system.
Note: To check the compression, the petrol engine must be warm, and the diesel engine must be cold. For petrol engines, the spark plugs must be unscrewed, and for diesel engines, the glow plugs must be removed. The compression pressure value depends on many parameters, including the device used. The compression of petrol engines must be at least 10 bar, and for diesel engines - at least 20 bar. The battery must be fully charged when performing this test.
Start by cleaning the area around the spark plugs/glow plugs before removing them. If you have a source of compressed air, you should use that for this purpose, but a soft brush or even a regular bicycle pump will also do. The idea is to prevent dirt from getting into the cylinders when you perform the compression test.
Petrol engines
Warm up the engine to operating temperature, then turn it off and switch off the ignition.
Remove the cabin air filter housing located on the right side of the engine compartment.
Unscrew the screws and remove the cover from the electronic unit. Remove the DME main relay (digital engine management system), so that no gasoline is injected during testing.
Typical relay arrangement
Remove all spark plugs.
Caution: Set the gearbox to neutral and apply the parking brake. Crank the engine slightly with the starter to add combustion products.
Screw or press the compression tester into the spark plug hole in accordance with the operating instructions.
The assistant must fully depress the gas pedal and keep it depressed during the test.
Diesel engine
Remove the cabin air filter, which is located on the right side of the engine compartment.
Remove the screws and remove the fuse box cover.
Remove the glow plug relay.
Disconnect the electrical wires from the glow plugs and remove the spark plugs using a suitable socket head.
Screw in a compression tester instead of the glow plug.
Compression meter
Crank the engine through at least seven compression strokes with the starter, monitoring the gauge readings. The pressure should build up quickly in a healthy engine. Low pressure on the first stroke, followed by a gradual increase in pressure on subsequent strokes, indicates worn piston rings. Low pressure on the first strokes that does not increase on subsequent strokes may be due to leaking valves or a damaged cylinder head gasket (the cause could also be a crack in the head). Low pressure may also be caused by deposits on the valve heads. Record the pressure readings obtained.
Repeat this operation for the remaining cylinders and compare the measurement results with the technical data.
Add a little motor oil into each cylinder through the spark plug hole and repeat the measurements.
If the pressure increases after adding oil, the piston rings are certainly worn. If the pressure does not increase significantly, the leak is at the valves or cylinder head gasket. Valve leaks can be caused by burnt valve seats and/or valve faces, or cracked, warped, or bent valves.
If the pressure in two adjacent cylinders is low, there is a good chance that the cylinder head gasket between them is damaged. The appearance of coolant in the combustion chambers or crankcase supports this assumption.
If the pressure in one cylinder is approximately 20% lower than in the others, and uneven engine operation is felt at idle, then the cause of this may be a damaged exhaust cam on the camshaft.
If the pressure is unusually high, the combustion chambers may be coated with carbon deposits. If so, the cylinder head will need to be removed and cleaned.
Checks with a vacuum meter
Attach a vacuum gauge directly to the exhaust manifold. Warm up the engine before taking measurements. Apply the parking brake and block the wheels. Start the engine and let it run at normal idle speed.
Read the instrument readings. A normal engine should give a vacuum of 430 to 560 mm Hg. The following signs can help assess the condition of the engine:
- A low reading indicates a leaking intake manifold/throttle body gasket, or a leaking vacuum hose. Check the ignition timing and other possible causes.
- If the value is 75-200 mm Hg below normal and changes towards lower values, this indicates a leak in the intake manifold gasket.
- If the arrow periodically drops at a constant rate of 50-100 mm Hg, then there may be a leak in the valves. Check the compressor.
- An irregular drop or jitter in the needle may be caused by a stuck cap or misfiring. Check the compression and spark plugs.
- A rapid vibration of 100 mmHg combined with smoke from the exhaust pipe indicates worn valve guides. Check for leaking gaskets, condition of valve springs and ignition timing.
- Small changes within 25 mmHg indicate problems in the ignition system.
If the fluctuations are significant, check the compression or check for leaks in the cylinders or gaskets.
If the arrow moves slowly over a wide range, check whether the crankcase forced ventilation system is clogged, whether the fuel-air ratio is correct, or whether there are leaks in the throttle body or in the gasket.
Check the return of the vacuum gauge needle after quickly opening the throttle valve from zero (when increasing the speed to 2500 rpm) to the desired value. If the vacuum drops slowly, the piston rings may be worn out or there may be a problem with the exhaust system.
This article is available at russian, bulgarian, belarusian, ukrainian, serbian, croatian, romanian, polish, slovak, hungarian
Article verified: Sevastyanov Nikolay
Share information:
Previous articles
БМВ E32: Engine overhaul
Next articles
Similar articles on other types of BMW cars:
Checking the level and replacing the oil in the automatic transmission BMW 3 Series E21 (1975-1983)
Checking the compression ratio BMW 5 Series E28 (1981-1988)
Checking the technical condition of the cylinder head BMW 5 Series E12 (1972-1981)
Bleeding the cooling system and checking it for leaks (M54, N46, N47,… BMW X3 E83 (2003-2010)
Checking the compression in the cylinders BMW X5 E53 (1999-2006)
Link in different formats to this page
Visitor comments
No comments yet
- General information
- Introduction to guide
- Manual
- Maintenance
- Power unit
- Engine M60/1, M60/2 (petrol)
- M62 engine (petrol)
- M57 engine (diesel)
- M67 engine (diesel)
- Cooling system
- Fuel system (petrol)
- Fuel system (diesel)
- Exhaust system
- Ignition and control systems
- Charge and launch systems
- Transmission
- Clutch
- Mechanical gearbox
- Automatic gearbox
- Cardan and drive shafts
- Chassis
- Brake system
- Front suspension
- Rear suspension
- Steering
- Body
- Exterior
- Interior
- Electrical equipment
- Equipment and devices
- Lighting
- Heating and air conditioning
- Electrical circuits
- General information
- Care and maintenance
- Power unit
- Minor engine repair
- Engine overhaul
- Lubrication system
- Cooling system
- Ignition system
- Supply system
- Injection system (petrol)
- Injection system (diesel)
- Exhaust system
- Transmission
- Clutch
- Manual gearbox
- Automatic gearbox
- Cardan gear
- Rear axle and shafts
- Chassis
- Front suspension
- Rear suspension
- Steering
- Wheels and tires
- Brake system
- Body
- Body elements
- Electrical equipment
- Equipment and devices
- Electrical circuits