
- Home
- BMW 7 Series
- E32
- Power unit
- Engine overhaul
- Engine — removal and installation
Engine — removal and installation (BMW 7 Series E32)
Warning: Gasoline is extremely flammable, so extreme caution must be exercised when working on any part of the fuel system. Do not smoke or allow open flames in the work area. If gasoline comes into contact with your skin, wash it off immediately with plenty of soap and water. Wear safety glasses and have a fire extinguisher handy when working on any component of the fuel system.
Removal and installation of the M52 series engine
Depending on the model's production date and configuration, electrical wires and/or vacuum and coolant hoses may be located and connected in the engine compartment in different ways. Since it is impossible to provide for all options in one section, it is recommended to mark all wires and hoses with adhesive tape before disconnecting. This describes the removal of the M52 series 6-cylinder gasoline engine.
Before removing the engine, you need to remove the gearbox. The engine without the gearbox is pulled out upwards. The exhaust manifold and generator remain on the engine, the intake manifold is removed. A crane is needed to remove the engine (lift or winch).
Since some connections will need to be loosened or disconnected under the car, it is necessary to support the car with four stands or use a special lift. Before working in the engine compartment, the fenders should be covered with fabric.
Removal
Disconnect the ground cable from the battery.
Note: This will erase data from electronic memory blocks, such as the diagnostic device memory.
Remove the hood.
Remove the gearbox.
Lower the car.
Remove the air filter with air flow meter.
Remove the intake pipe (manifold).
Remove the fairing.
Disconnect the brake booster vacuum hose from the intake manifold, not the brake booster. It will require some force to remove.
Remove the oil filler cap. Use a screwdriver to pry up the small caps and unscrew the screws underneath. Remove the two plastic caps.
Disconnect the lambda probe wire connections. Remove the plug from the VANOS solenoid valve.
Remove the injector connector bracket and set it aside.
Remove the cover from the intake manifold. Unscrew the support point for the positive battery cable and press the two clamps together. Unhook the base downwards.
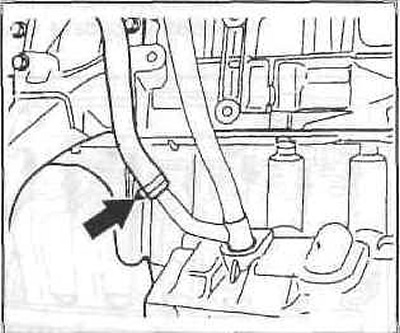
Disconnect the engine crankcase ventilation system nipple.
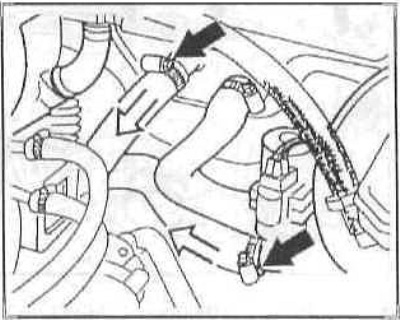
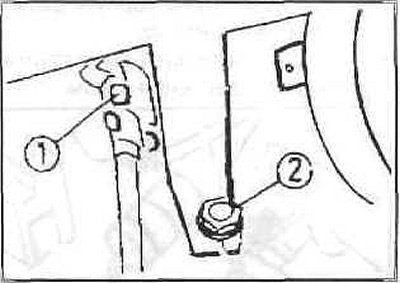
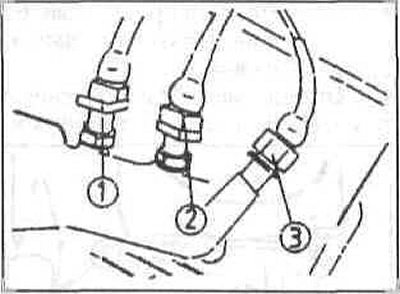
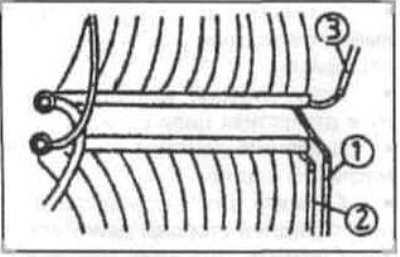
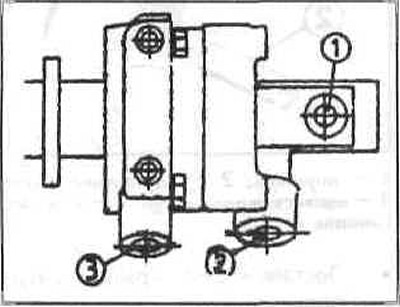
Collect the leaking fuel with a rag. Disconnect the fuel supply line (1) from the distribution line first (from the filter), then the return fuel line (2), loosening the clamps. The clamps must be replaced after removal.
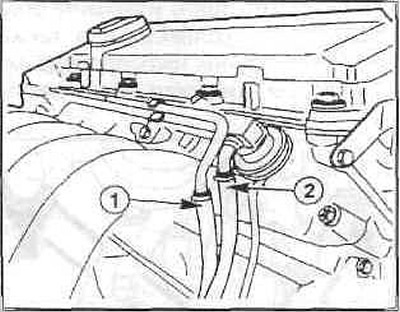
Note: Some models may have the fuel supply line screwed directly into the distribution pipe, so when installing, always replace the sealing ring and lubricate it with technical petroleum jelly. In another version, the fuel hoses are secured with clamps, in which case a special device is needed to loosen the clamps. Before installation, check the sealing ring and replace it if damaged.
Remove the throttle body.
Caution: The throttle cable (pull rod) and the coolant hoses for heating the throttle body remain connected.
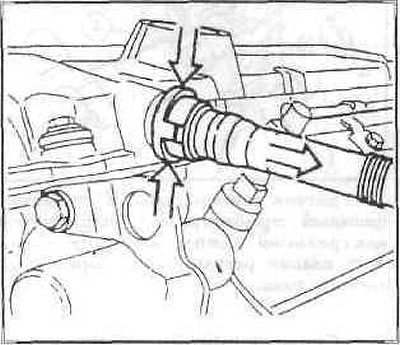
Remove the oil return hose from the dipstick guide tube by loosening the clamp first.
Unscrew the dipstick guide tube from the intake manifold.
Remove the bolts and the intake manifold support as well as the coolant line support elbow from the manifold.
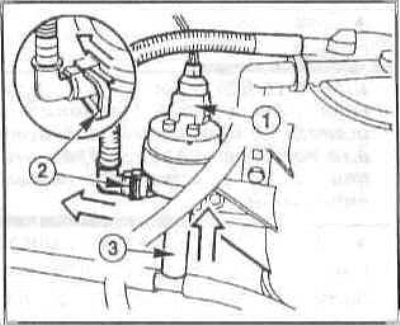
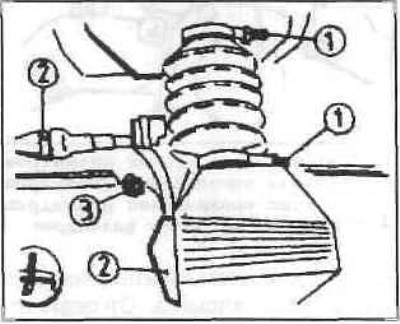
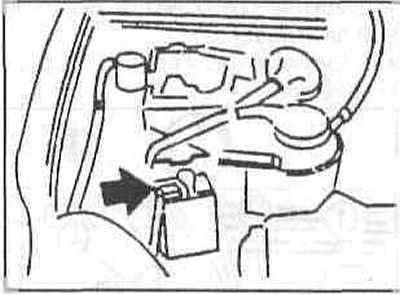
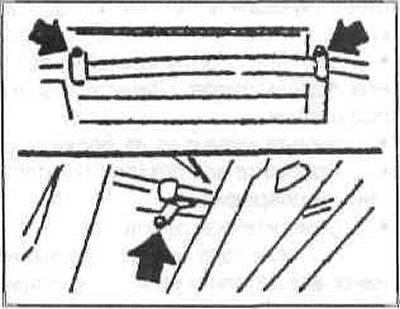
Disconnect the plug (1) from the fuel tank ventilation valve. Pull the valve up from its mount. Press the clamp (2) and pull off the hose. Remove the plugs of the inlet air temperature sensor and the idle speed control valve from the intake manifold.
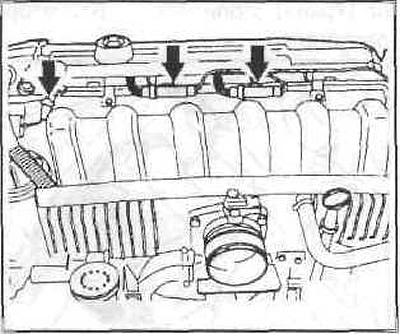
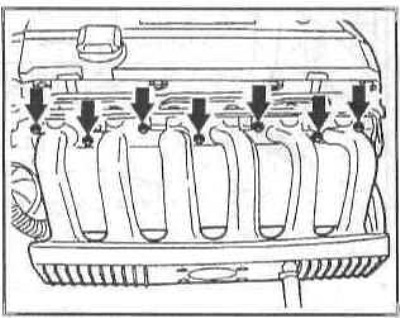
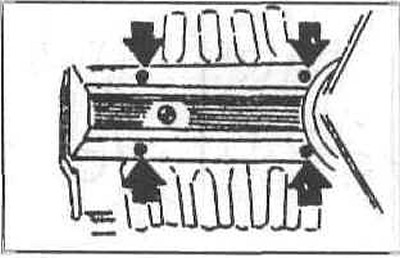
Remove the bolts securing the intake manifold to the cylinder head.
Caution: Make sure that no objects fall into the air intake ducts. If this does happen, remove these objects by any means necessary, otherwise the engine will be seriously damaged.
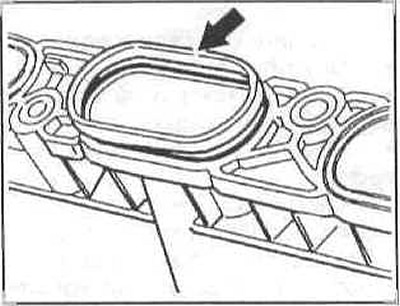
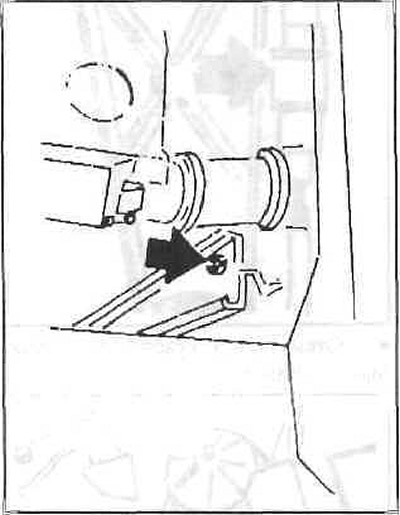
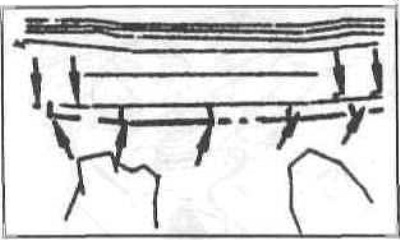
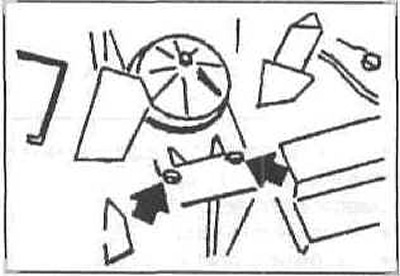
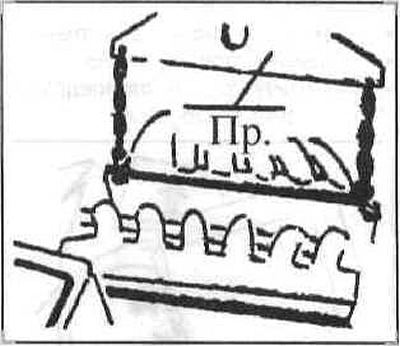
Before installing the intake manifold, all sealing rings (arrow) must be checked and, if any damage is found, the rings must be replaced.
Remove the fan. Remove the poly V-belt. Drain the coolant. Remove the radiator.
Caution: If the coolant hoses are secured with clamps, these clamps must be cut off when removing them and then replaced with screw clamps.
Remove the spark plugs.
After loosening the clamps, remove the coolant hoses from the heater valve (tap) and from the heater radiator.
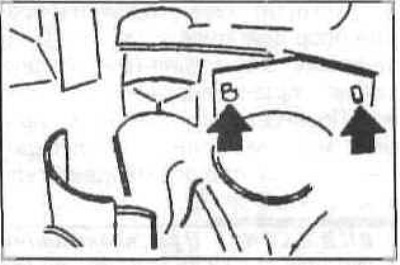
Disconnect the plugs by pressing the wire clips.
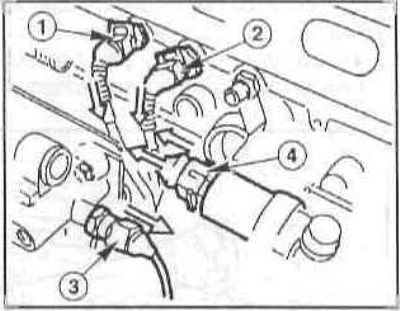
1 - temperature sensor;
2 - remote thermometer;
3 — Oil pressure indicator lamp switch;
4 — idle speed control valve.
Remove the plugs from under the intake pipe: knock sensor plug, crankshaft pulse sensor (generator), cylinder recognition sensor.
Disconnect the wires from the generator and starter.
Remove the bolts and disconnect the wire cover from the cylinder block, set the harness aside.
Remove the bolts, remove the power steering pump and set it aside with the attached hoses.
Caution: If hydraulic lines are disconnected, air must be bled from the system after installation.
Remove the power steering fluid reservoir by unscrewing the two bolts.
Car with air conditioning: unscrew the bolts, remove the compressor and put it aside together with the connected pipes.
Caution: Never open the refrigerant line, as the refrigerant is poisonous and may cause frostbite if it comes into contact with the skin.
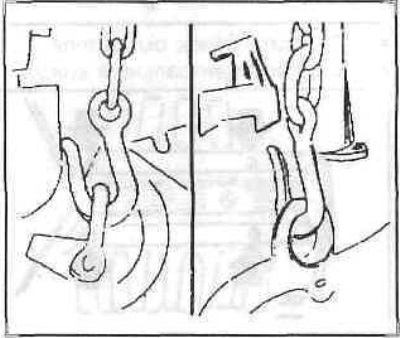
Suspend the engine on cables. To do this, attach cables or winch chains to the engine lifting bearings. Raise the engine slightly.
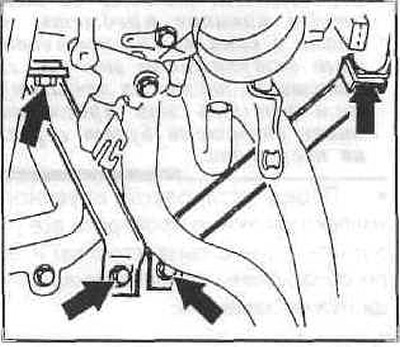
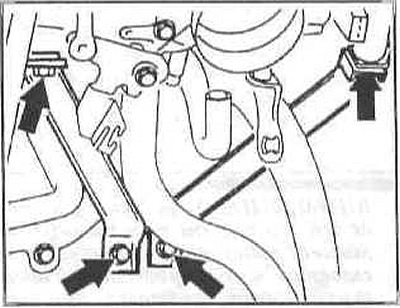
Unscrew the nuts from the left and right motor supports, and remove the motor ground wire (ground) from the right support.
Check that all hoses and wires coming from the engine are disconnected. Then lift the engine with a crane (winch).
Caution: When lifting the engine, carefully guide it so as not to damage the body. The removed engine cannot be kept upside down for more than 10 minutes, since oil will leak from the hydraulic valve lifters and they will not work. If you need to turn the engine over, the hydraulic valve lifters (hydraulic compensators) needs to be removed.
Installation
The engine is installed in the reverse order of removal.
Removal and installation of the M30 series engine
Removal
Disconnect the ground cable from the battery.
Raise the car with a lift.
Remove the gearbox.
Remove the engine splash shield.
Drain the coolant into a container.
Coolant can be reused if it is not older than two years.
Remove the radiator.
Remove the hydraulic pump poly V-belt.
Remove the hydraulic pump and tie it to the side wall with wire. The wires remain connected.

Remove the air filter included.
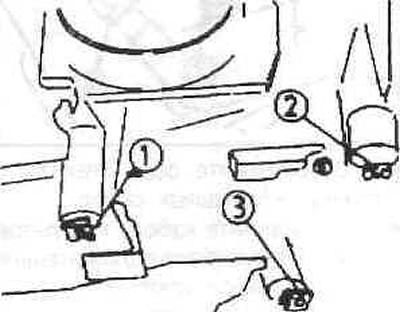
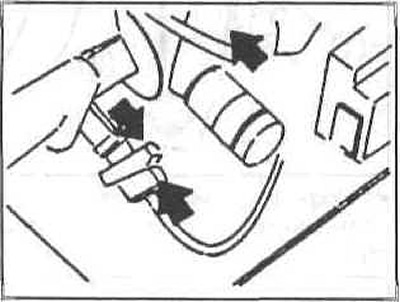
Loosen the clamp (1), nut (3), disconnect the connector (2) of the idle speed control valve and remove the idle speed control valve.
Remove all coolant hoses engine-expansion tank-washer.
Remove the expansion tank. Disconnect the level control sensor connector.
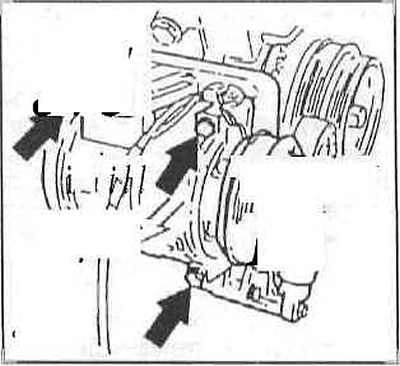
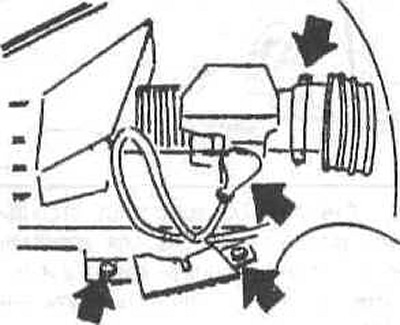
After disconnecting the brackets (1-3), remove the air flow meter.
Disconnect the throttle cable and speed control cable from the throttle body.
Remove the intake manifold bracket.
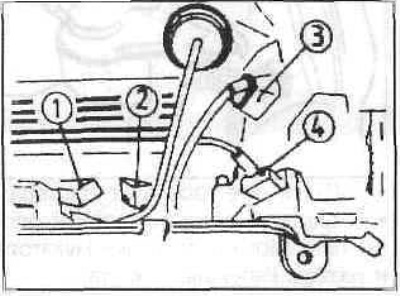
Disconnect the connectors (1-4) and loosen the power cable on the starter.
Remove the generator air cooling hose.
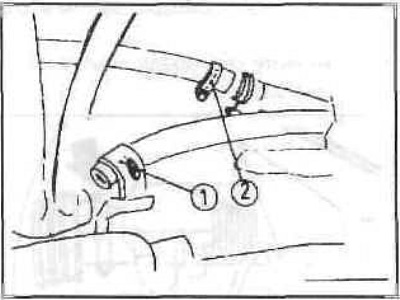
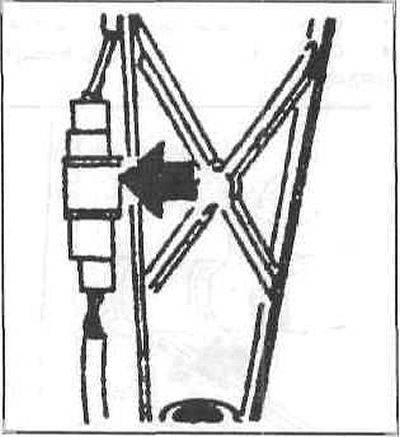
Disconnect the connector (1), disconnect the connection (2) and disconnect the lambda probe (3).
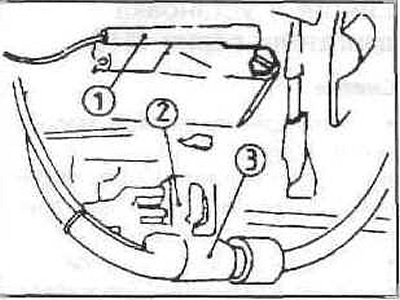
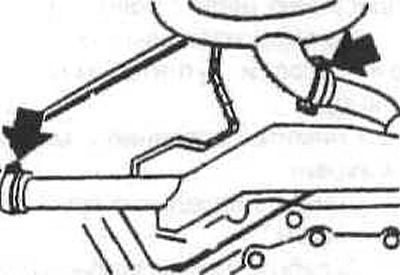
Disconnect the fuel lines (1) and (2).
Remove the fuel line, disconnect the throttle switch connector, remove the cover and remove the injection valve cable harness bar.
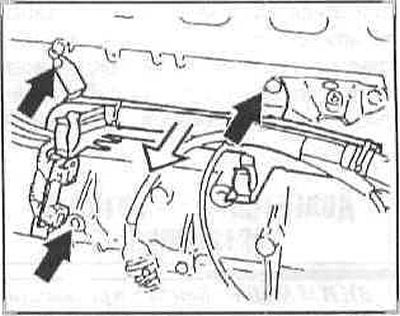
Remove the ground bar (1) and loosen the left and right front engine bearing nuts (2).
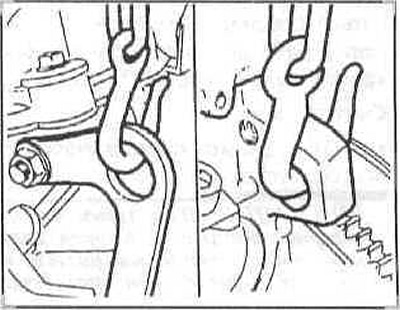
Attach the engine puller to the lift and hook the hooks onto the cleats.
Remove the engine from the engine compartment. Installation
The engine is installed in the reverse order of removal.
Removal and installation of the M70 series engine
Removal
Disconnect the ground cable from the battery.
Raise the vehicle with a lift and remove the engine splash shield.
Remove the gearbox.
Drain the coolant.
Remove the radiator and expansion tank. Remove the corresponding cooling system pipes.
Remove both air filters in the kit.
Loosen the oil filter bolt.
Remove the oil lines to the oil cooler on the filter housing and plug them immediately.
Disconnect the sensor connector.
Remove the washer reservoir. Remove the center casing of the oil pressure switch.
Remove the wiring harness bracket.
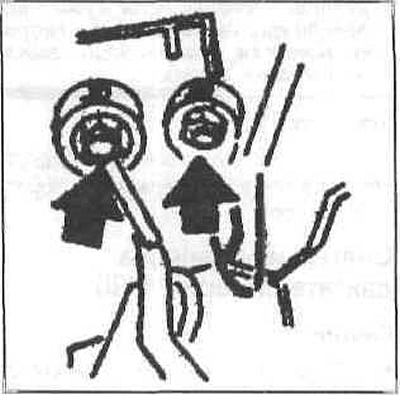
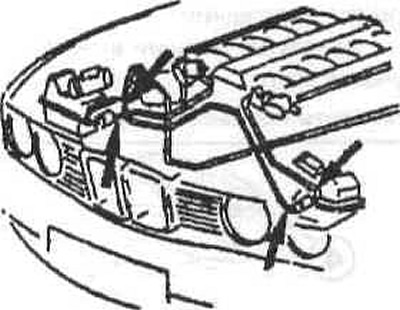
Disconnect the connectors on the front of the engine as shown in the figure.
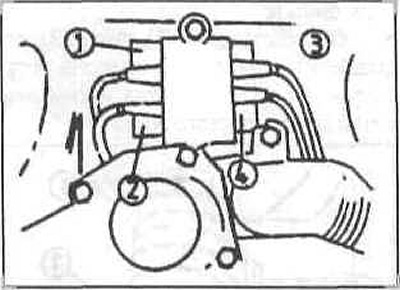
1 - Cylinder pulse sensor;
2 - cylinder identification sensor;
3 - cylinder identification sensor;
4 — cylinder pulse sensor.
Disconnect the plugs of the twelve injection valves. Disconnect the cable harness and put it aside. Disconnect the temperature sensor plug.
Disconnect both connectors from the air intake chambers. Disconnect the alternator cable at the positive battery cable connection. Disconnect the alternator connection.
Disconnect the cable from the starter. Remove the positive battery cable support point holder and the cable harness connector.
Remove the air conditioning compressor drive belt.
Remove the air conditioning compressor. The hoses remain connected.
Disconnect the oil level switch sensor connection.
Unscrew the oil filter housing from the body.
Remove the fuel lines and return line. Mark the fuel lines so that you can reinstall them in their original locations.
Remove the heater hoses from the manifold and the cooling system pipe.
Remove the activated carbon filter hoses.
Unscrew the pipes from the twin pump (steering/brakes).
Unscrew the ride height adjustment oil line from the oil pan.
Disconnect the ground wire from the engine mount bracket.
Remove both exhaust pipes on the right and left.
Attach the fixture to the lift and hang the engine by the lugs. Raise the engine slightly.
Release both engine mounts on the right and left.
Remove the engine and place it so that it cannot tip over.
Installation
The engine is installed in the reverse order of removal.
This article is available at russian, bulgarian, belarusian, ukrainian, serbian, croatian, romanian, polish, slovak, hungarian
Article verified: Sevastyanov Nikolay
Share information:
Previous articles
БМВ E32: Engine overhaul
Next articles
Similar articles on other types of BMW cars:
Removal and installation the engine BMW 3 Series E21 (1975-1983)
Removal and installation the engine BMW 3 Series E30 (1982-1994)
Removal and installation the engine BMW 5 Series E12 (1972-1981)
Removal and installation the engine BMW 5 Series E34 (1988-1996)
Removal and installation the engine assembly BMW X3 E83 (2003-2010)
Removal and installation the engine BMW X5 E53 (1999-2006)
Link in different formats to this page
Visitor comments
No comments yet
- General information
- Introduction to guide
- Manual
- Maintenance
- Power unit
- Engine M60/1, M60/2 (petrol)
- M62 engine (petrol)
- M57 engine (diesel)
- M67 engine (diesel)
- Cooling system
- Fuel system (petrol)
- Fuel system (diesel)
- Exhaust system
- Ignition and control systems
- Charge and launch systems
- Transmission
- Clutch
- Mechanical gearbox
- Automatic gearbox
- Cardan and drive shafts
- Chassis
- Brake system
- Front suspension
- Rear suspension
- Steering
- Body
- Exterior
- Interior
- Electrical equipment
- Equipment and devices
- Lighting
- Heating and air conditioning
- Electrical circuits
- General information
- Care and maintenance
- Power unit
- Minor engine repair
- Engine overhaul
- Lubrication system
- Cooling system
- Ignition system
- Supply system
- Injection system (petrol)
- Injection system (diesel)
- Exhaust system
- Transmission
- Clutch
- Manual gearbox
- Automatic gearbox
- Cardan gear
- Rear axle and shafts
- Chassis
- Front suspension
- Rear suspension
- Steering
- Wheels and tires
- Brake system
- Body
- Body elements
- Electrical equipment
- Equipment and devices
- Electrical circuits