
- Home
- BMW 5 Series
- E34
- Power unit
- Engine repair
- Removal and installation the engine
Removal and installation the engine (BMW 5 Series E34)
The engine is removed upwards without the gearbox. The intake and exhaust manifolds, as well as the carburetor and generator, remain on the engine. In no case should the engine be removed downwards with a mobile garage jack, as the jack can damage the engine.
Since some connections need to be removed from underneath the car, the car needs to be lifted and placed on reliable stands. The front fenders need to be covered before installation work in the engine compartment.
Electrical wires, as well as vacuum and water hoses, may be routed differently in the engine compartment depending on the year of manufacture and the composition of the equipment. Since it is impossible to provide a detailed description of each of the routing options, it is recommended to mark the wires and hoses when disconnecting them.
Remove the engine compartment hood.
Disconnect the wires from the battery.
Raise the car.
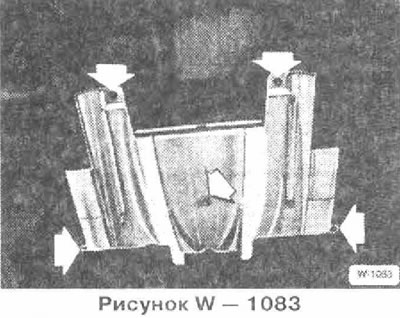
Remove the pan under the power unit.
Remove the gearbox.
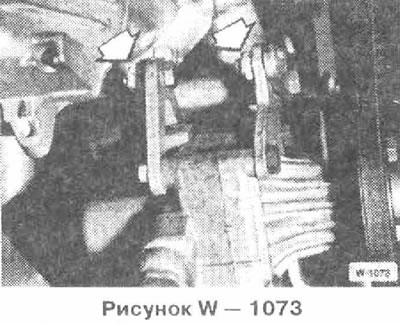
Vehicles with power steering: Remove the V-belt, unscrew the power steering pump and set it aside with the hoses connected.
Vehicles equipped with air conditioning: Unscrew the air conditioning compressor and set it aside with the hoses connected.
Drain the coolant.
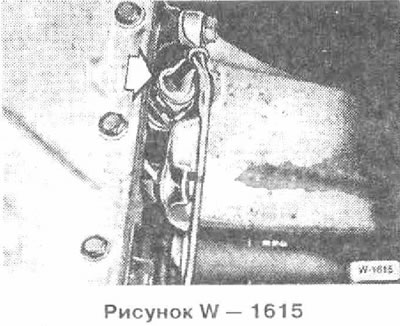
Disconnect the oil pressure switch connector. The figure shows the oil pressure switch on the M20 engine (under the right engine beam, on other models it is located on the cylinder head or on the oil filter housing).
Lower the car.
Remove the air filter.
Disconnect the gas cable 1 from the throttle lever. To do this, open the throttle valve, disconnect the nipple 3 with a narrow screwdriver. Compress the protrusions 3 of the clamp and pull it out of the throttle lever. Pull the gas cable down from the slot in the throttle lever.
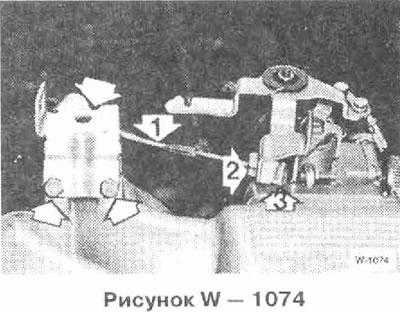
If equipped, disconnect the automatic transmission cable.
Unscrew the "arrow" bracket.
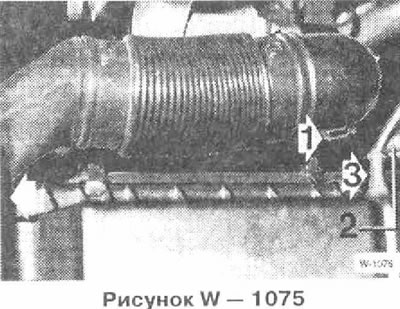
Loosen clamp 1, disconnect the air hose from the "arrow" mount on the air filter housing and pull it out.
Cut the loops securing the water hose 2 to the air filter housing.
Disconnect connector 3.
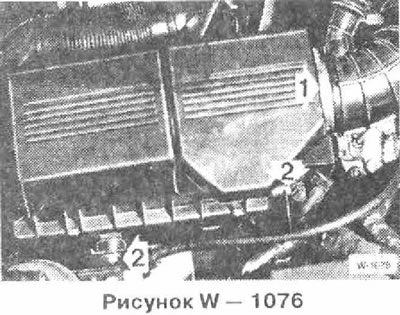
Loosen clamp 1 and remove the hose.
Remove the air filter by loosening nuts 2.
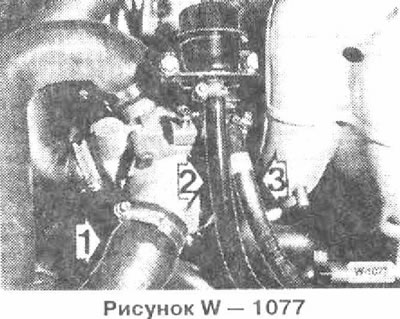
Disconnect water hose 1, having first released and pulled back the clamp.
Disconnect fuel hoses 2/3, having previously marked them with adhesive tape to avoid mixing up the hoses when installing them: release the hose clamps.
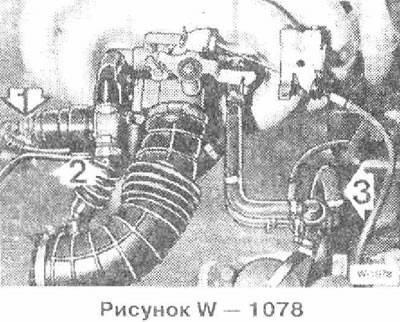
Disconnect connector 1 of the idle speed control valve.
Release the electrical wire from the fastening 2.
Disconnect vacuum hose 3 of the brake booster.
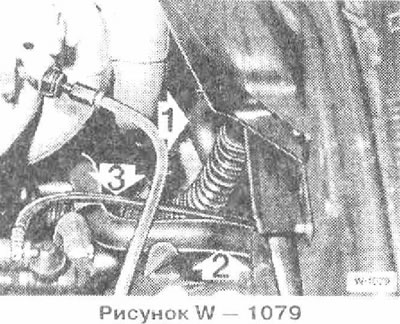
Mark with adhesive tape and remove the heater hoses 1/2.
Disconnect vacuum hose 3.
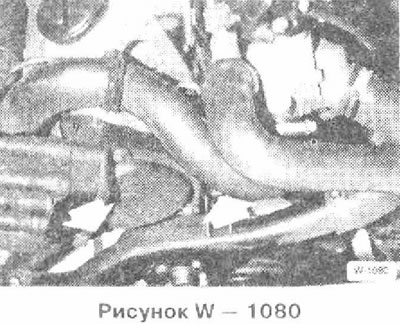
Unscrew and remove the water pipe.
Disconnect the ignition wires from the ignition coil.
If available, unscrew the hoses from the oil radiator and plug them.
Use a screwdriver to pry up the cable channel under the distributor and route the wires to the left side of the engine.
Unscrew the wires from the starter.
Unscrew the cover from the back of the generator and disconnect the wires.
Disconnect the connector behind the generator.
Disconnect the TDC sensor connector in the wiring harness under the intake manifold.
If equipped, disconnect the cylinder identifier connector.
Disconnect all connectors in the cable harness under the intake manifold. If present, disconnect the vacuum hose.
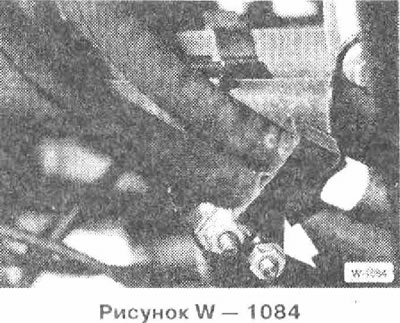
Unscrew the wiring harness fastening under the intake pipe on the left "arrow" and on the right, remove the harness from the intake manifold and move it to the side.
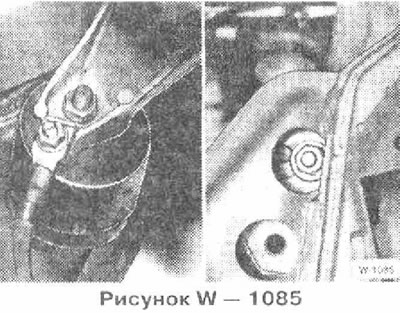
Unscrew the ground jumper.
Unscrew the engine mounts on the left at the top and on the right at the bottom.
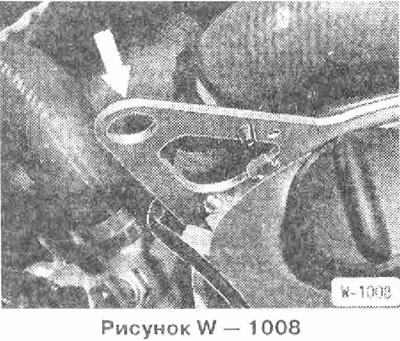
Hook the engine with a cable. To do this, connect the cable or chain to the engine's "arrow" lifting eyes. Raise the engine slightly with a crane.
Check that all hoses and wires connecting the engine to the body are disconnected, and then remove the engine.
Check the engine mounts, water, oil and fuel hoses for breaks or cracks and replace them if necessary.
Check the ease of rotation of the crankshaft bearing and clutch release bearing and the ease of movement of the clutch release fork.
Check the thickness and condition of the friction lining of the driven clutch disc.
Carefully insert the engine into the engine compartment. To avoid damage to the drive shaft, clutch and body, lower the engine very carefully.
Insert the guide pin into the hole in the bridge beam and screw on the engine mount nuts without tightening them.
Raise the car.
Install the gearbox.
Lower the car.
Pull the engine to align it. Then tighten the engine mounts to 45 Nm.
Put the engine wiring harness back in place and screw it on.
Connect all removed connectors and hoses. Secure the hoses with clamps.
Attach electrical wires to the generator.
Screw on the generator cover.
Secure the cable channel under the distributor.
Screw on the water pipe.
Check the air filter element, knock it out or replace it if necessary. Install the air filter.
Connect the gas cable and, if available, the automatic transmission cable, and screw on the bracket.
Install the radiator.
Install the fan.
If removed, install the air conditioning compressor.
Tighten the power steering pump.
Place a tray under the power unit.
Connect all electrical wires, vacuum, water and fuel hoses in accordance with the markings made during removal. Secure the hoses with clamps. Secure the wires with cable ties.
Check the oil level in the engine and gearbox and top up if necessary.
Check the frost protection properties of the coolant and add concentrate if necessary.
Connect the wires to the battery.
Start the engine and warm it up to operating temperature, check the coolant level and the tightness of all hose connections.
Check valve clearances.
Install the engine compartment hood.
Remove the pan under the power unit.
Remove the expansion tank of the cooling system.
Disconnect the gearbox oil pipes from the oil pan by unscrewing the coupling nuts.
Remove the idle speed control valve from the intake duct. First disconnect the connector and unscrew the coupling nut.
Disconnect the air flow meter connector.
Loosen the air intake hose clamps. Remove the 3 mounting brackets from the rear of the air flow meter. Pull out the air hose with the air flow meter, disconnecting the crankcase ventilation hose.
Disconnect the oil level switch connector, near the rear of the generator.
Disconnect the connector from the fuel tank vent valve.
Disconnect the hose from the activated carbon filter.
Disconnect the water hose from the rear of the generator, first releasing the clamp.
Disconnect the temperature sensor connectors from the cable harness side of the throttle switch and the oil pressure switch.
Unscrew the cable block, having first removed the cover by prying it with a screwdriver.
Installation is carried out in reverse order.
Remove the expansion tank of the cooling system.
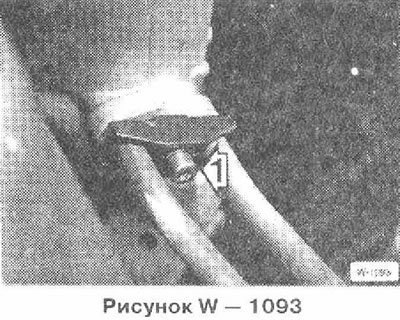
Remove the oil pipes by unscrewing bolt 1. Close the holes in the body and in the hoses with plugs.
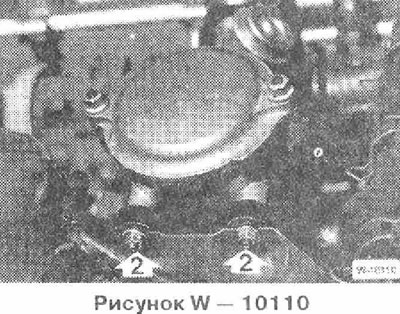
Unscrew the 2 bolts securing the 2 oil filter housing to the body.
Secure the filter housing to the engine with wire.
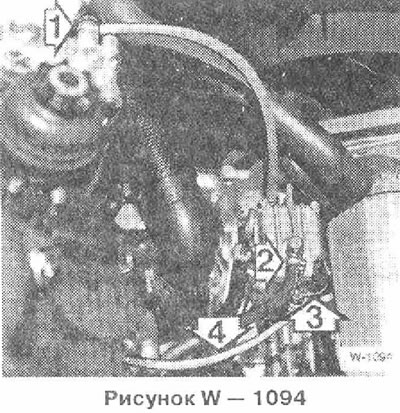
Unscrew fuel hoses 1 and 2.
Unscrew nut 3 and remove the wire.
Read the original source on the website BMWMAN.ru
Since some connections need to be removed from underneath the car, the car needs to be lifted and placed on reliable stands. The front fenders need to be covered before installation work in the engine compartment.
Electrical wires, as well as vacuum and water hoses, may be routed differently in the engine compartment depending on the year of manufacture and the composition of the equipment. Since it is impossible to provide a detailed description of each of the routing options, it is recommended to mark the wires and hoses when disconnecting them.
Note: This describes the removal of the M20 engine. Special instructions for M30 engines (with a working volume of 3.0 and 3.5 l) and diesel engines M21 are given at the end of the section.
Removal
Remove the engine compartment hood.
Disconnect the wires from the battery.
Raise the car.
Remove the pan under the power unit.
Remove the gearbox.
Vehicles with power steering: Remove the V-belt, unscrew the power steering pump and set it aside with the hoses connected.
Caution: If the hydraulic system is opened, it will need to be bled after installation.
Vehicles equipped with air conditioning: Unscrew the air conditioning compressor and set it aside with the hoses connected.
Caution: Never open the air conditioning circuit, as the release of freon may cause frostbite.
Drain the coolant.
Disconnect the oil pressure switch connector. The figure shows the oil pressure switch on the M20 engine (under the right engine beam, on other models it is located on the cylinder head or on the oil filter housing).
Lower the car.
Remove the air filter.
Note: If the water hoses are secured with clamps, cut the clamps with side cutters and install screw clamps during installation.
Disconnect the gas cable 1 from the throttle lever. To do this, open the throttle valve, disconnect the nipple 3 with a narrow screwdriver. Compress the protrusions 3 of the clamp and pull it out of the throttle lever. Pull the gas cable down from the slot in the throttle lever.
If equipped, disconnect the automatic transmission cable.
Unscrew the "arrow" bracket.
Loosen clamp 1, disconnect the air hose from the "arrow" mount on the air filter housing and pull it out.
Cut the loops securing the water hose 2 to the air filter housing.
Disconnect connector 3.
Loosen clamp 1 and remove the hose.
Remove the air filter by loosening nuts 2.
Disconnect water hose 1, having first released and pulled back the clamp.
Disconnect fuel hoses 2/3, having previously marked them with adhesive tape to avoid mixing up the hoses when installing them: release the hose clamps.
Disconnect connector 1 of the idle speed control valve.
Release the electrical wire from the fastening 2.
Disconnect vacuum hose 3 of the brake booster.
Mark with adhesive tape and remove the heater hoses 1/2.
Disconnect vacuum hose 3.
Unscrew and remove the water pipe.
Disconnect the ignition wires from the ignition coil.
If available, unscrew the hoses from the oil radiator and plug them.
Use a screwdriver to pry up the cable channel under the distributor and route the wires to the left side of the engine.
Unscrew the wires from the starter.
Unscrew the cover from the back of the generator and disconnect the wires.
Disconnect the connector behind the generator.
Disconnect the TDC sensor connector in the wiring harness under the intake manifold.
If equipped, disconnect the cylinder identifier connector.
Disconnect all connectors in the cable harness under the intake manifold. If present, disconnect the vacuum hose.
Unscrew the wiring harness fastening under the intake pipe on the left "arrow" and on the right, remove the harness from the intake manifold and move it to the side.
Unscrew the ground jumper.
Unscrew the engine mounts on the left at the top and on the right at the bottom.
Hook the engine with a cable. To do this, connect the cable or chain to the engine's "arrow" lifting eyes. Raise the engine slightly with a crane.
Check that all hoses and wires connecting the engine to the body are disconnected, and then remove the engine.
Caution: To avoid damage to the body, handle the engine carefully.
Installation
Check the engine mounts, water, oil and fuel hoses for breaks or cracks and replace them if necessary.
Check the ease of rotation of the crankshaft bearing and clutch release bearing and the ease of movement of the clutch release fork.
Check the thickness and condition of the friction lining of the driven clutch disc.
Carefully insert the engine into the engine compartment. To avoid damage to the drive shaft, clutch and body, lower the engine very carefully.
Insert the guide pin into the hole in the bridge beam and screw on the engine mount nuts without tightening them.
Raise the car.
Install the gearbox.
Lower the car.
Pull the engine to align it. Then tighten the engine mounts to 45 Nm.
Put the engine wiring harness back in place and screw it on.
Connect all removed connectors and hoses. Secure the hoses with clamps.
Attach electrical wires to the generator.
Screw on the generator cover.
Secure the cable channel under the distributor.
Screw on the water pipe.
Check the air filter element, knock it out or replace it if necessary. Install the air filter.
Connect the gas cable and, if available, the automatic transmission cable, and screw on the bracket.
Install the radiator.
Install the fan.
If removed, install the air conditioning compressor.
Tighten the power steering pump.
Place a tray under the power unit.
Connect all electrical wires, vacuum, water and fuel hoses in accordance with the markings made during removal. Secure the hoses with clamps. Secure the wires with cable ties.
Check the oil level in the engine and gearbox and top up if necessary.
Check the frost protection properties of the coolant and add concentrate if necessary.
Connect the wires to the battery.
Start the engine and warm it up to operating temperature, check the coolant level and the tightness of all hose connections.
Check valve clearances.
Install the engine compartment hood.
Engine M30
Removal
Remove the pan under the power unit.
Remove the expansion tank of the cooling system.
Disconnect the gearbox oil pipes from the oil pan by unscrewing the coupling nuts.
Remove the idle speed control valve from the intake duct. First disconnect the connector and unscrew the coupling nut.
Disconnect the air flow meter connector.
Loosen the air intake hose clamps. Remove the 3 mounting brackets from the rear of the air flow meter. Pull out the air hose with the air flow meter, disconnecting the crankcase ventilation hose.
Disconnect the oil level switch connector, near the rear of the generator.
Disconnect the connector from the fuel tank vent valve.
Disconnect the hose from the activated carbon filter.
Disconnect the water hose from the rear of the generator, first releasing the clamp.
Disconnect the temperature sensor connectors from the cable harness side of the throttle switch and the oil pressure switch.
Unscrew the cable block, having first removed the cover by prying it with a screwdriver.
Installation
Installation is carried out in reverse order.
Engine M21
Removal
Remove the expansion tank of the cooling system.
Remove the oil pipes by unscrewing bolt 1. Close the holes in the body and in the hoses with plugs.
Unscrew the 2 bolts securing the 2 oil filter housing to the body.
Secure the filter housing to the engine with wire.
Unscrew fuel hoses 1 and 2.
Unscrew nut 3 and remove the wire.
Read the original source on the website BMWMAN.ru
This article is available at russian, bulgarian, belarusian, ukrainian, serbian, croatian, romanian, polish, slovak, hungarian
Article verified: Polikarpov Saveliy
Share information:
Previous articles
БМВ E34: Engine repair
Next articles
Similar articles on other types of BMW cars:
Removal and installation the engine BMW 3 Series E21 (1975-1983)
Removal and installation the engine BMW 3 Series E30 (1982-1994)
Engine — removal and installation BMW 7 Series E32 (1986-1994)
Removal and installation the engine BMW 7 Series E38 (1994-2001)
Removal and installation the engine assembly BMW X3 E83 (2003-2010)
Removal and installation the engine BMW X5 E53 (1999-2006)
Removal and installation the engine BMW 3 Series E21 (1975-1983)
Removal and installation the engine BMW 3 Series E30 (1982-1994)
Engine — removal and installation BMW 7 Series E32 (1986-1994)
Removal and installation the engine BMW 7 Series E38 (1994-2001)
Removal and installation the engine assembly BMW X3 E83 (2003-2010)
Removal and installation the engine BMW X5 E53 (1999-2006)
Link in different formats to this page
Visitor comments
No comments yet
- General information
- Governing bodies
- Manual
- Maintenance
- Power unit
- Engine repair
- Lubrication system
- Cooling system
- Ignition system
- Supply system
- Injection system (gasoline)
- Injection system (diesel)
- Exhaust system
- Transmission
- Clutch
- Car gearbox
- Front axle
- Rear axle
- Chassis
- Steering
- Brake system
- Wheels and tires
- Body
- Interior
- Exterior
- Heating system
- Electrical equipment
- Equipment and devices
- Power devices
- Windscreen wipers
- Electrical circuits
- General information
- Manual
- Maintenance
- Power unit
- Engine repair
- Ignition system
- Engine lubrication system
- Cooling system
- Fuel system (gasoline)
- Fuel system (diesel)
- Exhaust system
- Transmission
- Clutch
- Car gearbox
- Chassis
- Front and rear suspension
- Steering
- Brake system
- Body
- Exterior
- Interior
- Electrical equipment
- Heating system
- Equipment and devices
- Power devices
- Electrical circuits
- General information
- Manual
- Maintenance
- Power unit
- Engine in a car
- Engine overhaul
- Cooling system
- Supply system
- Ignition system
- Control system
- Transmission
- Clutch
- Manual gearbox
- Automatic gearbox
- Transmission line
- Chassis
- Steering
- Front suspension
- Rear suspension
- Brake system
- Body
- Body elements
- Car care and painting
- Electrical equipment
- Heater and air conditioner
- Equipment and devices
- Starter and generator
- Electrical circuits
- General information
- Operation and maintenance
- Specifications
- Power unit
- Engine repair
- Cooling and lubrication system
- Supply system
- Ecotronic power supply system
- Fuel injection system
- Ignition system
- Transmission
- Clutch
- Gearbox BMW 242/4
- Gearbox Getrag 262/8
- Gearbox Getrag 265/6
- Automatic gearbox
- Cardan gear
- Rear axle
- Chassis
- Steering
- Front suspension
- Rear suspension
- Brake system
- Electrical equipment
- Equipment and devices
- Electrical circuits