
2. Turn the spring so that its lower end (1) coincides with the end (2) of the device.
Attention:
- The spring must not be compressed until the coils are completely adjacent to each other.
- The spring coils must be completely located in the recesses of devices 313382 and 313383.
3. Compress the spring.
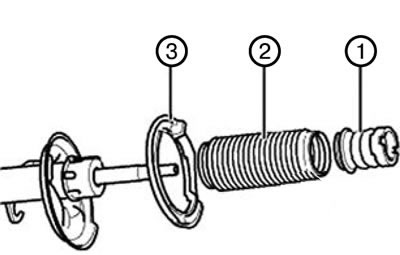
4. Check and, if damaged, replace the bump stop (1), protective cover (2) and spring insulating gasket (3).
5. Insert the shock absorber into the compressed spring.
Note: Align the insulating gasket (3) with the recess relative to the spring plate.
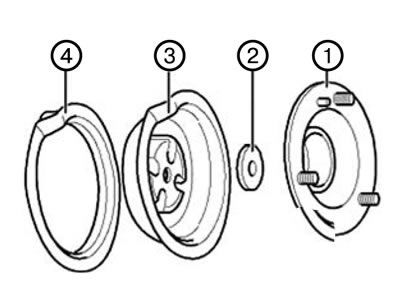
6. Check and, if necessary, replace the upper support (1) and insulating gasket (4).
7. Place the plate (3) with the insulating gasket (4) on the rod.
8. Place the washer (2) and the upper support (1) with the dust seal on the rod.
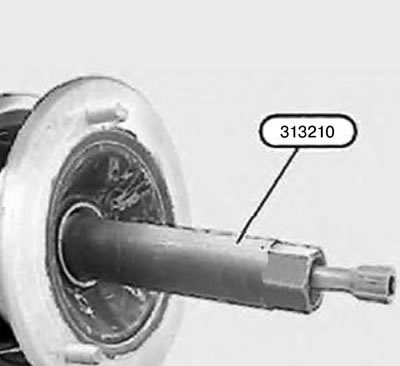
9. Screw on a new nut and tighten it using tool 313210, holding the rod from turning.
Tightening torque: 64 Nm.
10. Install the cap.
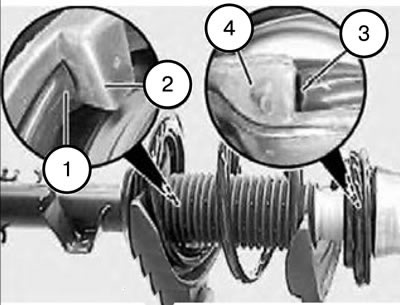
Attention:
- The lower end of the spring (1) must be pressed against the stop (2) of the insulating gasket.
- The upper end of the spring (3) must be pressed against the stop (4) of the insulating gasket.
11. Remove the compression force from the spring.
12. Check the shape of the corrugation and correct any defects.
13. Check and adjust the wheel alignment angles if a shock absorber strut with an upper support without a centering pin was installed.