
Removal and installation the left or right tie rod
Attention:
- In the 12/2006 design, the connection between the tie rod and the guide joint is reinforced by 10 mm. This means that for vehicles manufactured before 12/2006, the guide joint must also be replaced.
- Installation of rods of different designs is permitted.
1. Remove the front panel of the unit protection.
2. Remove the steering gear cover.
3. Disconnect the front wheel arch protective cover.
4. Remove the guide joint.
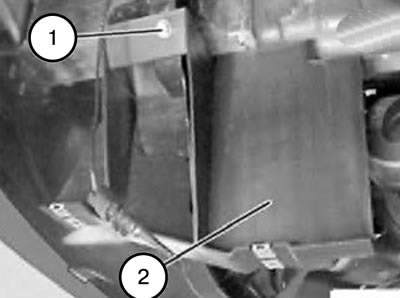
5. Unscrew the screw (1).
6. Unscrew the nut from the back side.
7. Turn the bracket (2) of the front engine shield towards the center axis of the vehicle and remove it downwards.
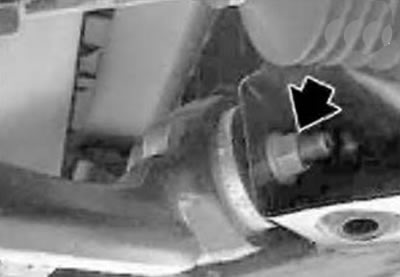
8. Unscrew the nut.
9. Remove the bolt (forward).
10. Remove the rod.
Note:
- When installing, it is necessary to replace the self-locking nut.
- Tighten the threaded connection when the vehicle is normally loaded.
Tightening torque: 165 Nm + 90°.
11. Installation should be carried out in the reverse order of removal, taking into account the above notes.