
Removal and installation the left or right front shock absorber assembly
Attention:
- If the centering pin at the upper shock absorber support is missing, then in order to keep the camber angle approximately the same, it is necessary to mark the position of the studs relative to the wheel arch.
- When marking, only one nut can be unscrewed at a time.
1. Remove the brake caliper and tie it to the body.
2. Disconnect the stabilizer bar mounting strut from the shock absorber strut.
3. Disconnect the tie rod end from the steering column.
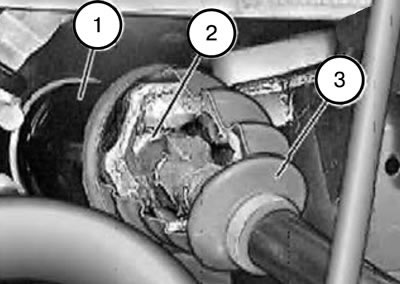
Caution: When disconnecting the pivot bearing from the shock absorber strut, the tripod (2) may pop out of the housing (1) and fall into the boot (3). In this case, you will need to install a new axle shaft, otherwise the tripod (2) may jam or the roller on the tripod (2) may come off. If the roller slips off and remains in the cover (3) or hinge, it will quickly cause them to fail.
4. Disconnect the pulse sensor wire from the shock absorber strut.
5. Disconnect the brake pad wear sensor wire from the shock absorber strut.
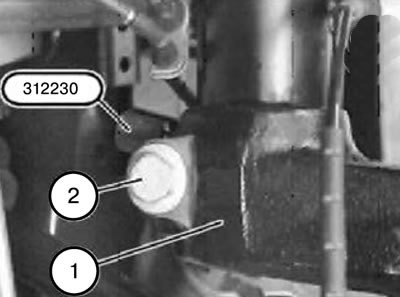
6. Support the pivot support (1) using a jack and a suitable support.
7. Loosen the nut and remove the bolt (2) forward.
8. Release the pivot support (1) using tool 312230.
9. Lower the jack.
10. Remove and tie up the swivel support (1).
Note: The self-locking nut must be replaced during installation.
Tightening torque: 100 Nm.
Note:
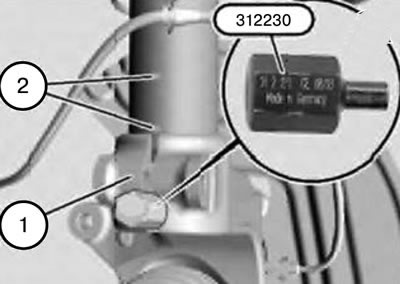
- When installing, it is necessary that the bottom of the shock absorber strut and the clamp in the pivot support are cleaned of dirt and grease.
- Release the pivot support (1) using tool 312230, position it so that the gap aligns with the pins (2) on the rear side of the shock absorber strut, and lift it up to the stop.
11. Mark the position of the studs relative to the wheel arch.
12. Secure the stand so it doesn't fall.
13. Unscrew the nuts.
14. Remove the shock absorber strut from the wheel arch in a downward motion.
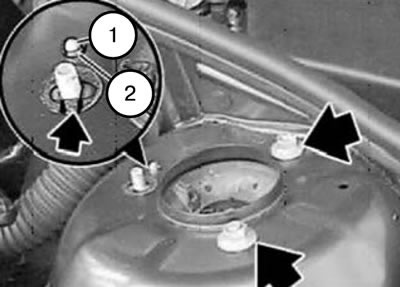
Note:
- When installing, it is necessary to align the shock absorber strut with the centering pin (1) and the hole (2) in the wheel arch or with the stud and marks on the wheel arch and push it upward.
- Replace the self-locking nut.
Tightening torque: 34 Nm.
15. Installation should be carried out in the reverse order of removal, taking into account the above notes.
16. Measure the chassis parameters if a shock absorber strut with an upper support without a centering pin was installed.