
Caution: To avoid large amounts of oil leaking when removing the pressure indicator switch, empty the full-flow oil filter.
Attention:
- When working with oil, fuel and coolant circuits, the generator must be protected from contamination.
- Cover the generator.
- Failure to comply with this condition may result in generator failure.
Attention:
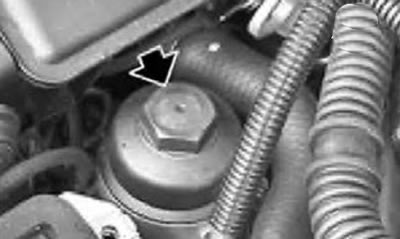
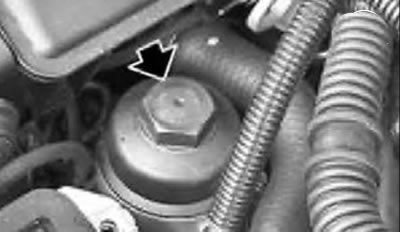
- Do not damage the full-flow oil filter cover; loosen and tighten only with a socket wrench with a replaceable head.
- When you unscrew the full-flow filter cap, oil flows from the filter housing into the oil sump.
1. Unscrew the full-flow oil filter cover and remove it with an upward movement.
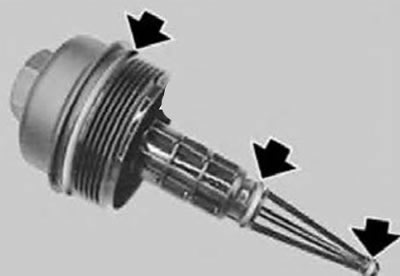
2. Replace and lubricate the sealing rings.
3. Install the full flow oil filter cover and tighten.
Tightening torque:
- M8: 22 Nm.
- M10: 33 Nm.
- M12: 33 Nm.
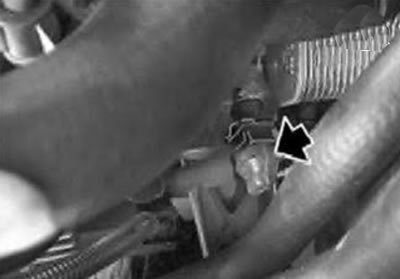
Caution: A small amount of engine oil may leak when removing the pressure indicator switch. Have a rag handy.
4. Disconnect the connector and remove the oil pressure indicator switch.
Note: The sealing ring must be replaced during installation.
Tightening torque: 27 Nm.
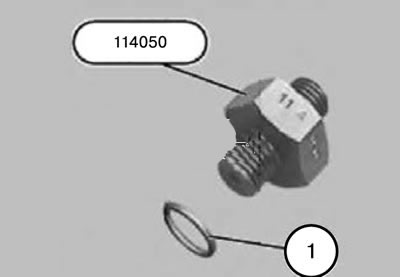
5. Install the 114050 tool with the sealing ring (1) in place of the oil pressure indicator switch.
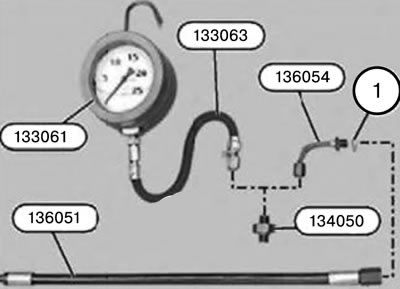
6. Install tool 136054 with sealing ring (1) and tool 136051 and connect to the DIS tester.
Note: When testing using a DIS tester.
7. Install tool 133063 and tool 133061 (pressure gauge).
Note: When checking using a pressure gauge.
8. Start the engine and let it idle until the oil pressure warning light goes out.
9. Check the engine oil pressure.
10. Install the removed parts and place the vehicle in a horizontal position.
11. Turn off the engine and wait for approx. 5 minutes, then check the engine oil level.
12. Add oil if necessary.