
Removal and installation the rear axle gearbox
Caution: Use only recommended rear axle gearbox oils.
Attention:
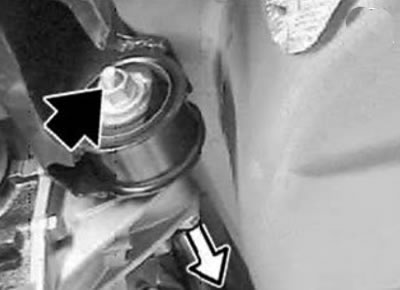
- Install the spacer washer (1) in place.
- In the case of a rubber-metal hinge with an internal bushing that protrudes noticeably on one side, a spacer washer is not installed.
1. Lower the rear section of the exhaust system.
2. Disconnect both axle shafts from the gearbox and tie them up.
3. Disconnect the cardan shaft from the rear axle gearbox and hang it up.
Attention:
If the jack is not handled correctly, the car may slip off the lift.
When the vehicle is supported, ensure that:
- the car no longer rose or fell;
- the car did not lift off the lift's support plates.

4. Remove the reaction rod and screw in the front bolts of the rear axle beam again until their heads are flush.
5. Support the rear axle gearbox with a jack and tool 334420.
Attention:
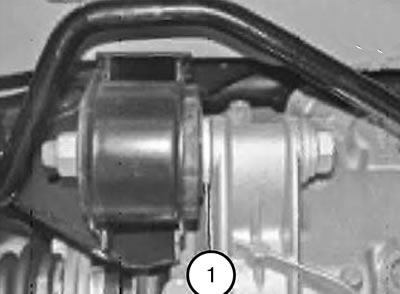
- Maintain the distance between tool 334420 and the anthers (1).
- To prevent friction and associated extraneous noise, the boot (1) must not be damaged (for example, deformed).
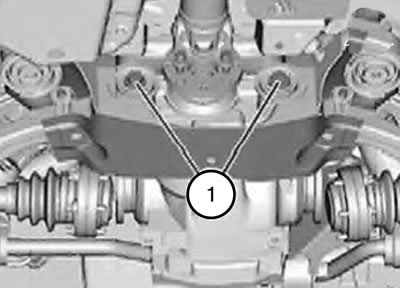
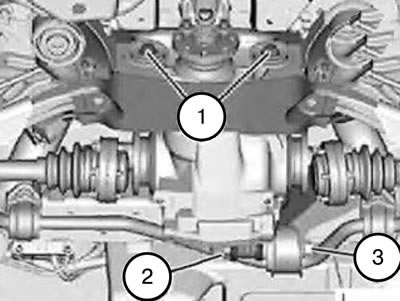
6. Unscrew the screws (1).
7. Unscrew the nut.
8. Remove the middle screw. Remove the spacer washer, if present.
9. Slowly lower the jack and remove the rear axle gearbox in a backward motion.
Caution: To avoid distortion of the rear axle gearbox during installation and, consequently, noise complaints, please follow the following assembly sequence.
10. Install the rear axle gearbox using a jack and tool 334420.
11. Screw in the screws (1) (without delaying).
12. Insert the screw (2) together with the spacer washer (if there was one).
13. Screw on a new nut (3) (without delaying).
14. Lower the jack.
15. Install the jet thrust.
16. Tighten the screws (1).
Tightening torque: 100 Nm.
17. Tighten the nut (3).
Tightening torque: 100 Nm.
18. Installation should be carried out in the reverse order of removal, taking into account the above notes.
19. Check and, if necessary, top up the oil level in the rear axle gearbox.